







How to Use the Video Wall Functions on the BG-4K-VP1616
Beyond matrix switching, the BG-4K-VP1616 can splice multiple displays into a single large video wall — all managed from the web GUI. This guide walks you through selecting your wall layout, routing a source to it, matching your outputs to the physical screens, fine-tuning the image, and saving your wall as a preset.
If you haven't connected to the unit yet, start with our BG-4K-VP1616 Initial Setup Guide to get into the web GUI, then come back here.
Let's break it down.
Part 1: Select Your Video Wall Layout
In the web GUI, open the Video Wall mode.
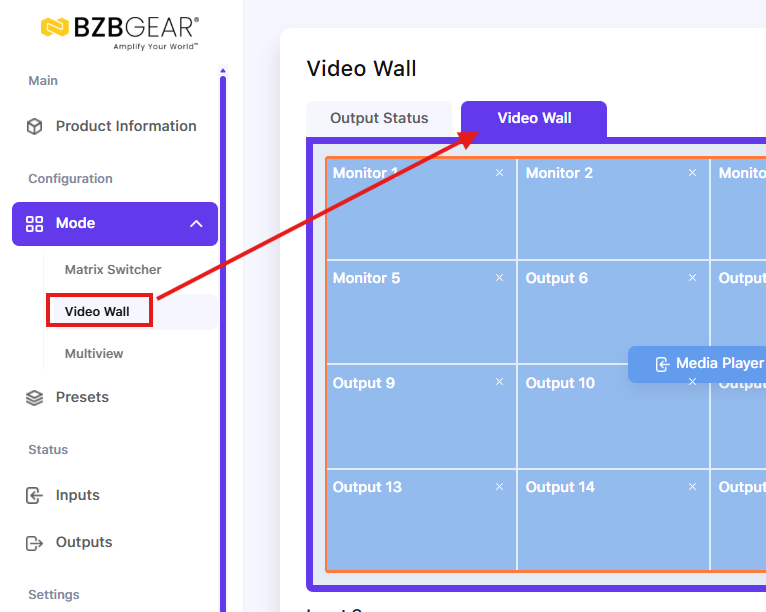
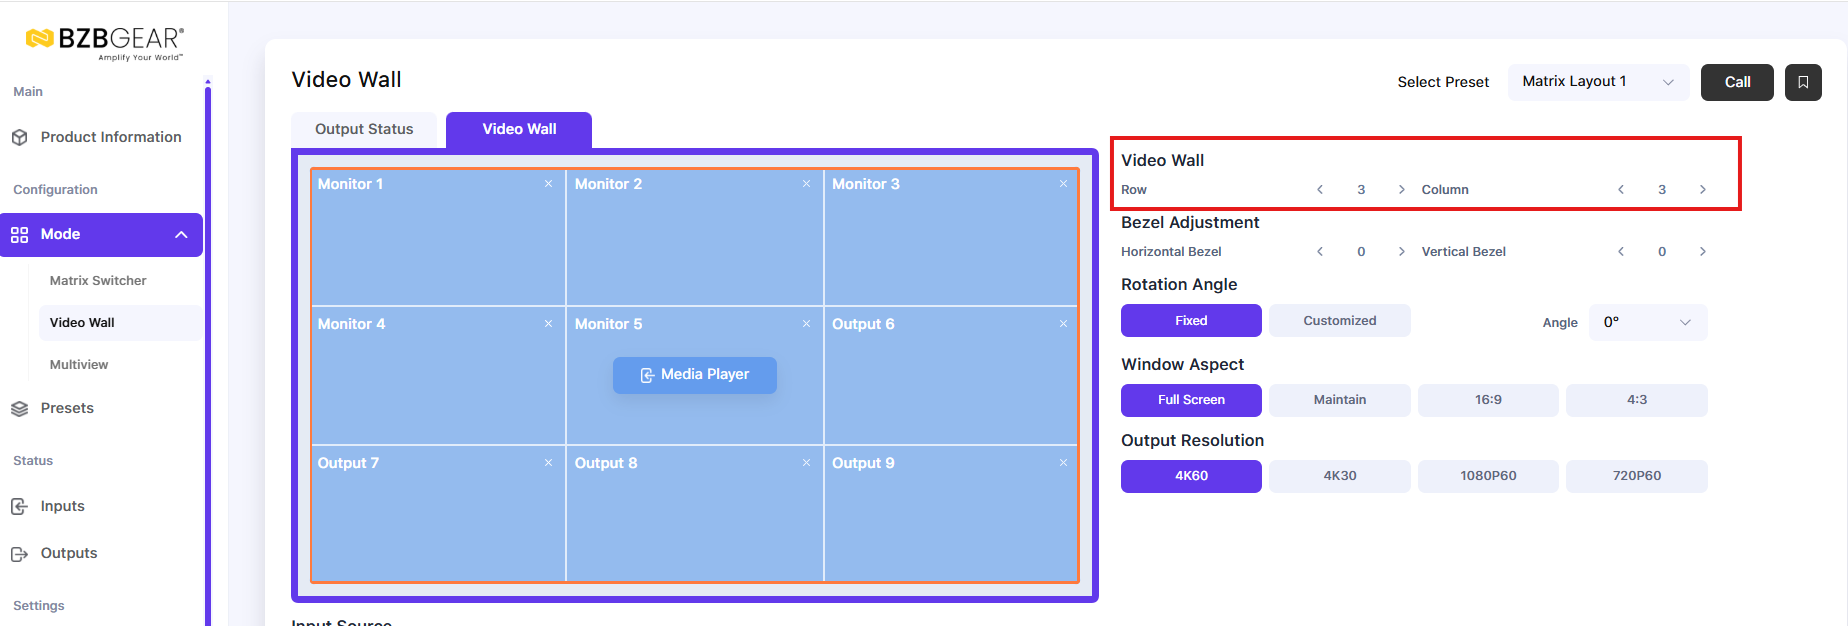
To build your wall, simply choose the number of rows and columns you need — for example, 2x2, 2x3, or 3x3. The system automatically adjusts the layout to match your selection.
Part 2: Match Your Outputs to the Physical Screens
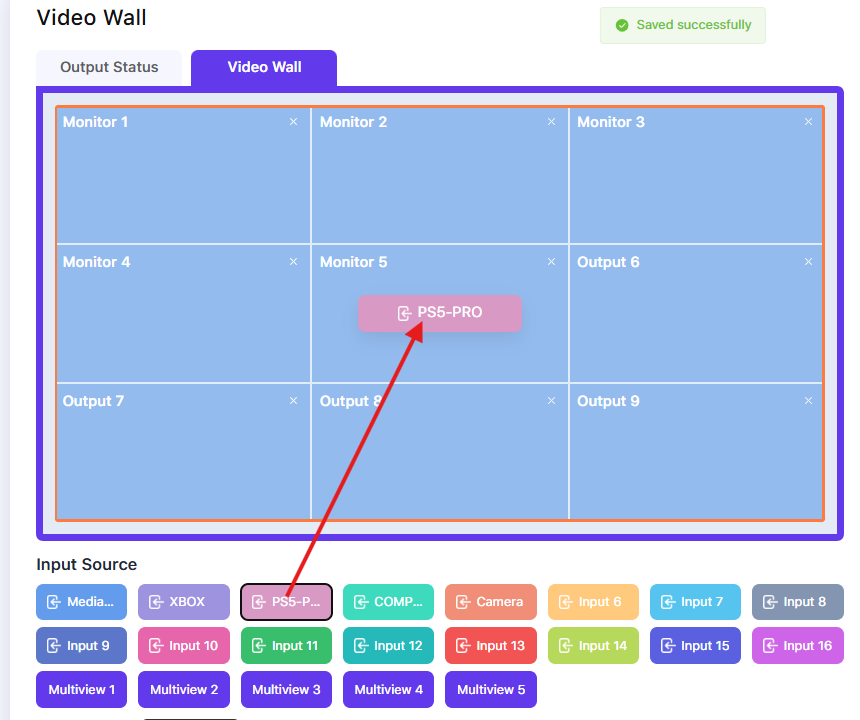
To make sure the wall displays correctly across your monitors, drag and drop the specific output IDs (e.g., Monitor 1, Monitor 2) into the grid so they match the physical arrangement of your displays.
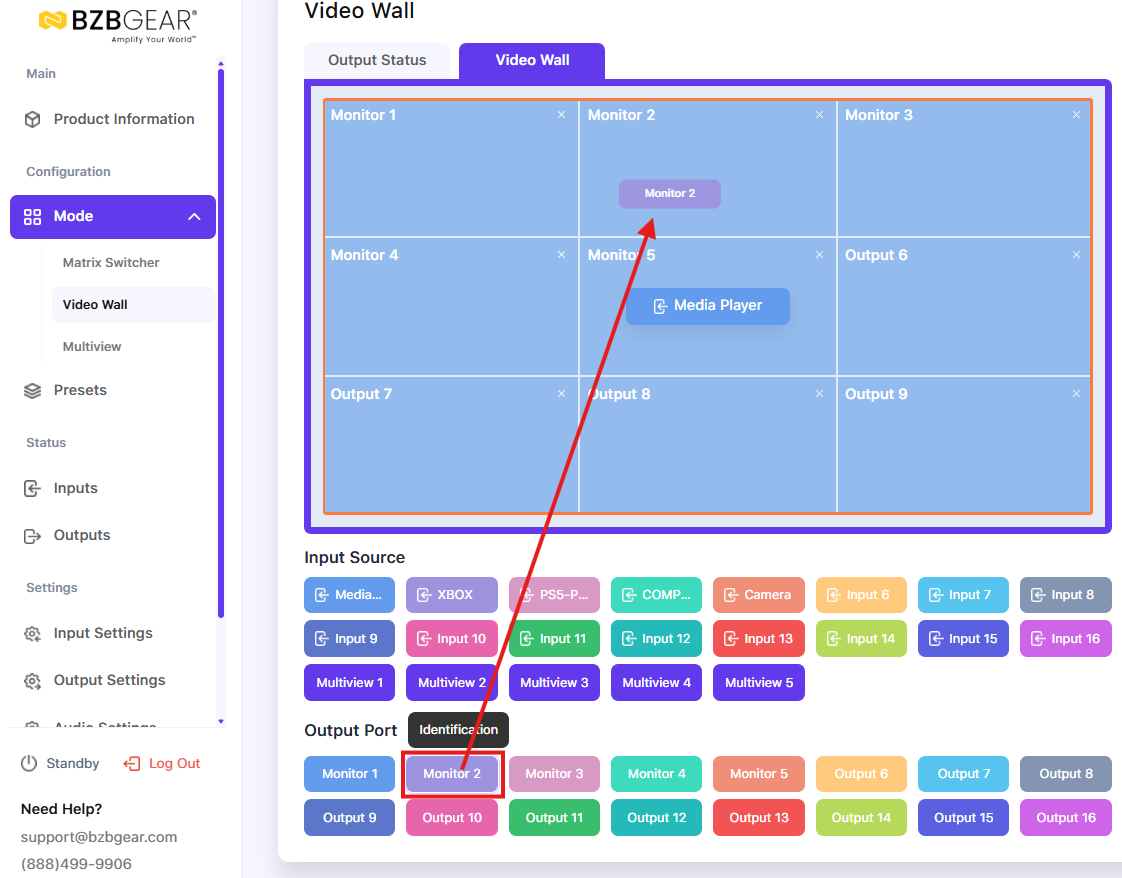
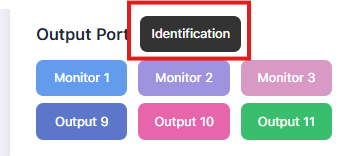
Tip: Use the Identification feature to display each output's number on its physical screen. It's the quickest way to verify which output goes where before you finalize the layout.
Part 3: Route a Source to the Wall
With your layout set and your outputs arranged, assigning a video source is easy — just drag and drop the desired input onto the wall layout in the GUI. That source now spans the entire wall.
Part 4: Fine-Tune Your Wall
The BG-4K-VP1616 gives you several adjustments to get a clean, seamless image across all your displays.
Bezel Compensation
To account for the frames around each monitor, use bezel compensation. Specify the pixel counts to compensate for your displays' bezels, so the image lines up seamlessly across the seams instead of being cut off.

Aspect Ratio and Scaling
Adjust the window ratio to suit your content — for example 4x3 or 16x9 — or set it to full screen to fill the entire wall.

Rotation
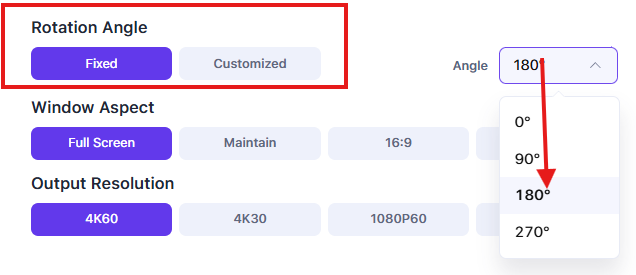
If any of your displays are mounted in a non-standard orientation, you can rotate them by 90 or 180 degrees so the image appears correctly.
Part 5: Save Your Video Wall as a Preset
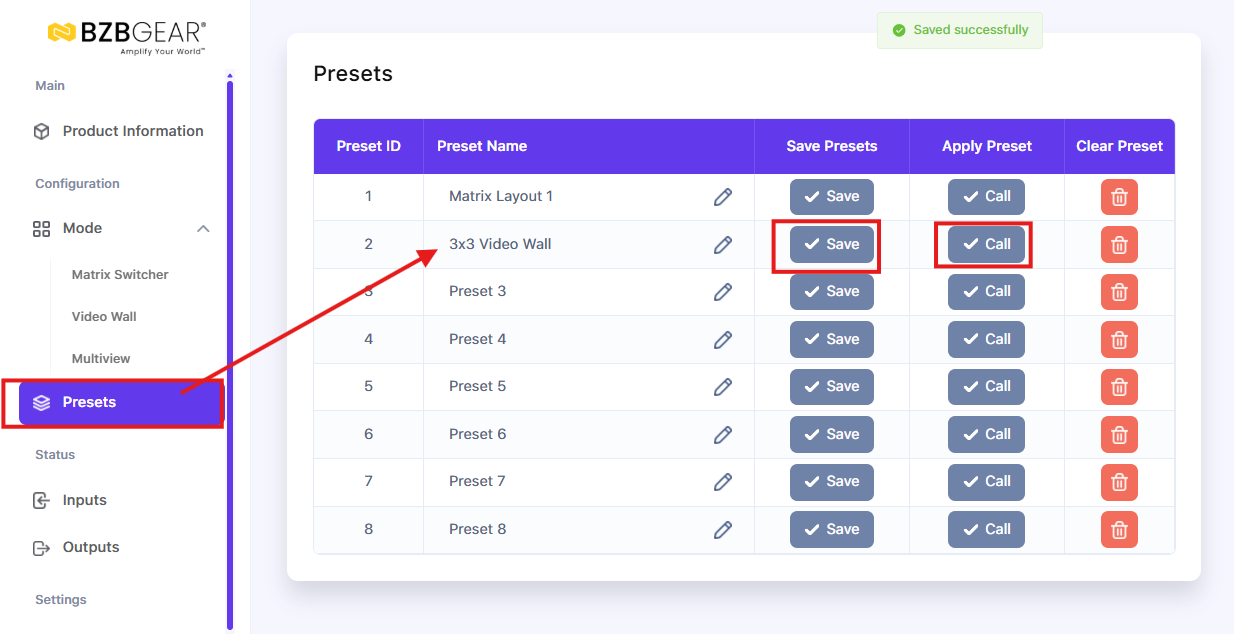
Once your wall is configured just the way you want it, save the layout as a preset. That way you can recall your exact video wall setup in a single click anytime — no need to rebuild it.
That's How Simple It Is
That's the video wall feature on the BG-4K-VP1616 — pick your rows and columns, match your outputs to your screens, drag a source onto the wall, fine-tune the bezels, scaling, and rotation, and save it as a preset. It's a powerful, flexible way to turn a bank of displays into one big canvas.


8.00 a.m. - 5.00 p.m. (PST)
10.00 a.m. - 3.00 p.m. (PST)
(by appointment only)
