







BG-4K-VP1616PRO Initial Setup Guide
The BG-4K-VP1616PRO is a powerful 4K UHD 16x16 HDMI unit that can do matrix switching, multiview, and video wall processing all in one — with 16 inputs to 16 outputs plus LAN extensions. This guide covers the initial setup: connecting your sources and displays, powering the unit, and getting into the web GUI so you're ready to configure it.
Let's break it down.
What You'll Need
Before you start, make sure you have the following ready:
- Your BG-4K-VP1616PRO unit
- Your HDMI sources (media players, game consoles, computers, etc.) and HDMI cables
- Your displays and HDMI cables
- A computer for accessing the web GUI, plus an Ethernet cable
- A network switch (optional — you can also connect your computer directly to the unit)
Part 1: Connect Your Sources and Displays
Step 1: Connect your sources
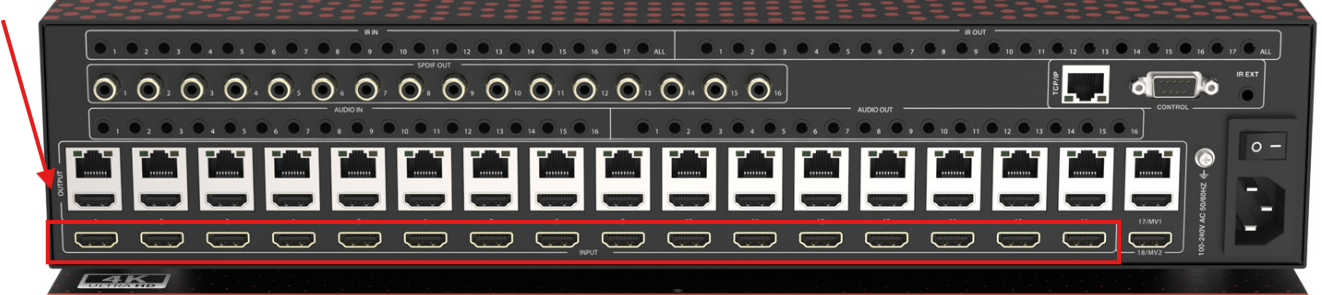
Connect each HDMI source to an input on the back of the BG-4K-VP1616PRO. With 16 inputs available, you can connect anything from a handful of sources up to a full sixteen.
Step 2: Connect your displays
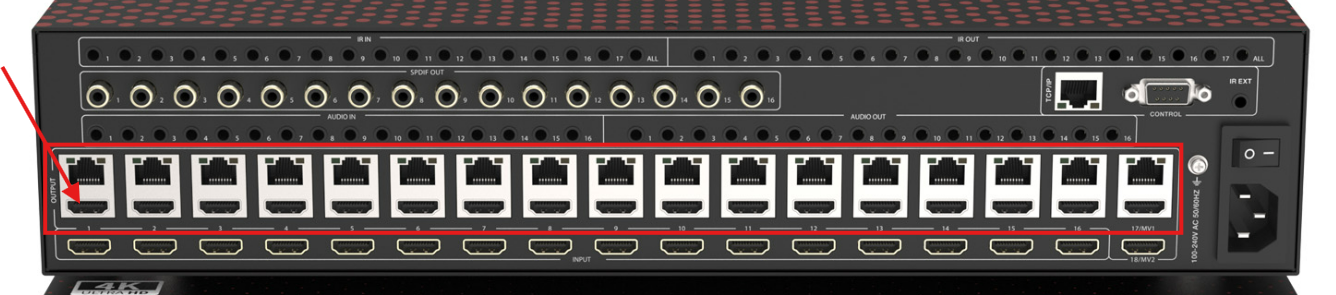
Connect each display to an output on the unit. As with inputs, you have 16 outputs to work with.
Step 3: Power on the unit
Connect power and turn the unit on. Your sources and displays are now physically connected and ready to be configured.
Part 2: Choose How You'll Control the Unit
You can control the BG-4K-VP1616 three ways:
- Front panel touch screen — quick, hands-on control right at the unit
- IR remote — convenient control from a distance
- Web GUI — full control and configuration from your computer (there's also an app)
The front panel and remote are great for quick changes, but the web GUI gives you full access to every setting — so that's what we'll use to finish setup.
Part 3: Connect to the Web GUI
Step 1: Connect the unit to your network
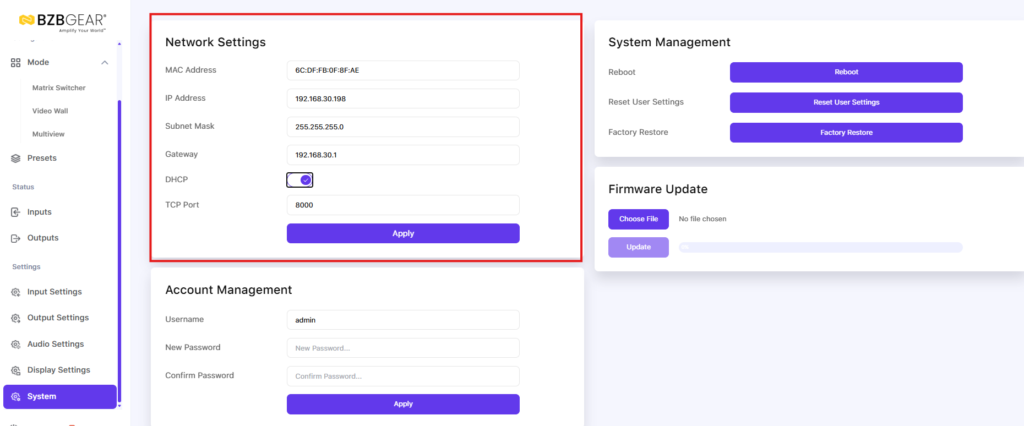
Connect the unit to your network switch with an Ethernet cable. By default, DHCP is enabled on the unit. So if DHCP is enabled on your network switch, the unit will pull a local open IP address and assign it to the unit. Then the IP address will display in the bottom right corner of the touch panel.
For a simple, direct setup, you can also connect your computer straight to the unit with an Ethernet cable. The unit's default IP address is 192.168.0.100. To reach it, set a static IP on your computer in the same range — for example, an address on 192.168.0.x — so your computer and the unit can communicate.
Step 2: Log in to the web GUI
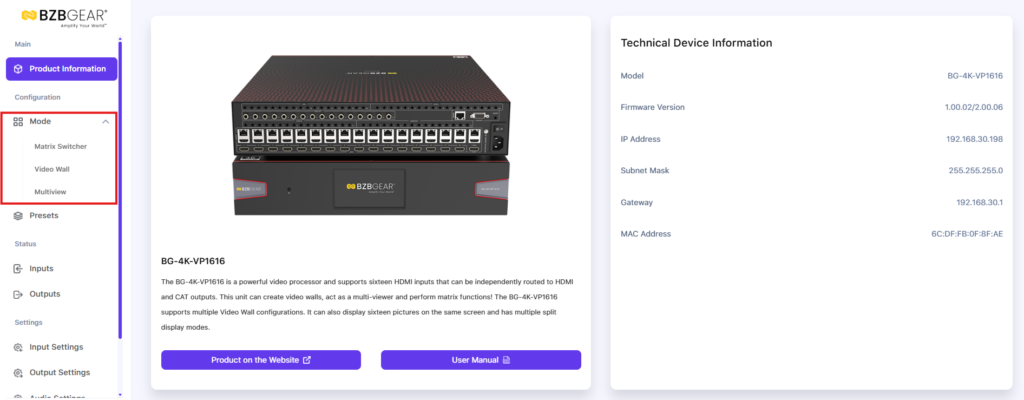
Open your web browser, enter the unit's IP address (ours is 192.168.30.198; it will be different on your network), and log in. The login and password are both “admin”.

Step 3: Get familiar with the modes
Once you're logged in, you'll see the VP series' different modes: Matrix, Video Wall, and Multiview. For most setups, you'll start in Matrix mode, but it's good to know all three live here for when you're ready to explore them.
Part 4: Basic Unit Setup
With the web GUI open, take a few minutes to get the unit organized before you start routing.
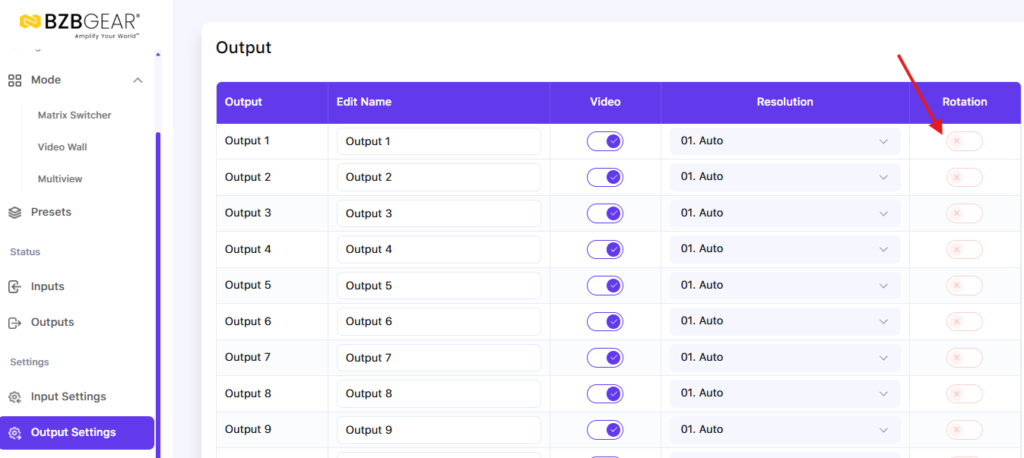
Rename your inputs and outputs. Give each input and output a clear, descriptive name so you always know what's what — much easier than remembering port numbers down the line.
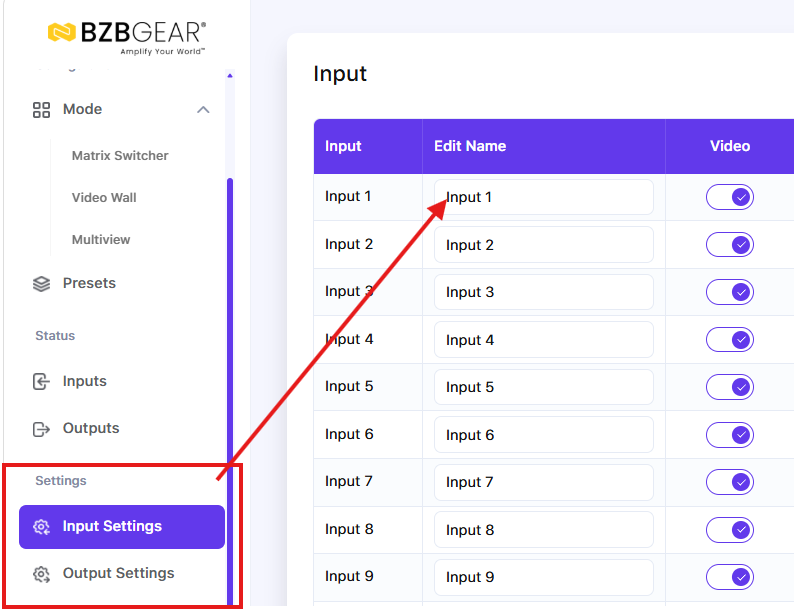
Adjust input and output settings. You can fine-tune settings for your sources and displays here, including flipping a TV's image if a screen is mounted in an unusual orientation.
Configure your network settings. If you'd like the unit on your main network with its own address, you can adjust all of its network settings right here in the web GUI.
You're Set Up and Ready to Go
That's the initial setup — your sources and displays are connected, the unit is powered, and you're logged into the web GUI with everything named and configured. From here, you're ready to start routing your sources to your displays.


8.00 a.m. - 5.00 p.m. (PST)
10.00 a.m. - 3.00 p.m. (PST)
(by appointment only)
