







How to Matrix and Manage Presets with the BZBGEAR Switch Control App for the BG-IPGEAR-ULTRA
Once your AV-over-IP system is up and running, the real day-to-day power comes from routing — sending any source to any display, on demand, in just a couple of clicks. This guide explains how to use the Matrix tab in the Switch Control app to assign sources to displays, swap sources, and create and recall matrix presets for the BG-IPGEAR-ULTRA.
It's a simple, visual way to manage your whole system, and once you've saved a few presets, switching your entire room layout becomes a one-click affair.
Let's break it down.
Before You Begin
This guide assumes your BG-IPGEAR-ULTRA system is already set up and online. If you haven't done that yet, start with the BG-IPGEAR-ULTRA-C Quick Start Guide and come back here once everything is connected.
You'll also want the Switch Control app installed on a computer that's on the same network as your control box.
Part 1: Connect to Your Control Box
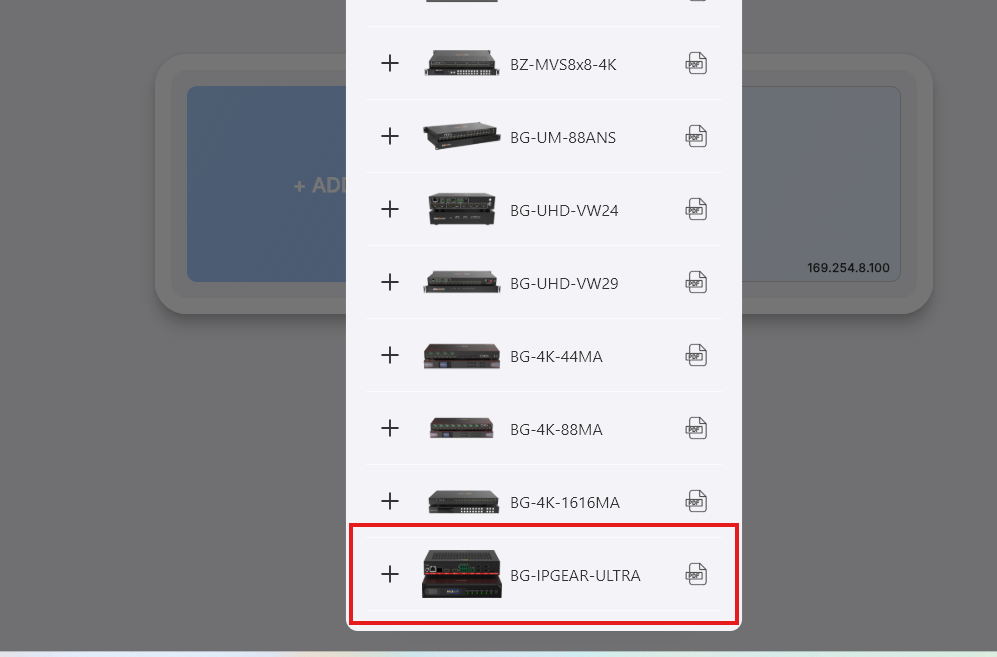
Step 1: Find the BG-IPGEAR-ULTRA in the device list
Open the Switch Control app. In the device list, locate your BG-IPGEAR-ULTRA.
Step 2: Add the control box's IP address
Connect to the control box by entering its IP address — this can be the default address or a static one you've assigned to it.
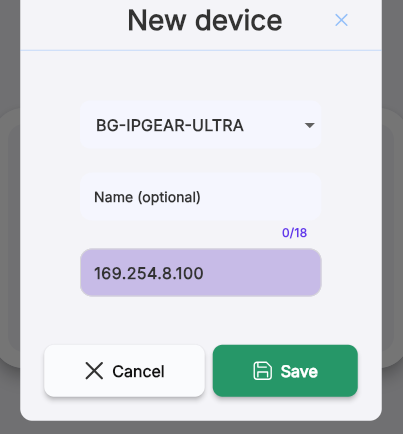
Step 3: Save and open the device
Click Save, then click on the device window. This opens the main page, where you'll see all of your connected source encoders (inputs) and display decoders (outputs).
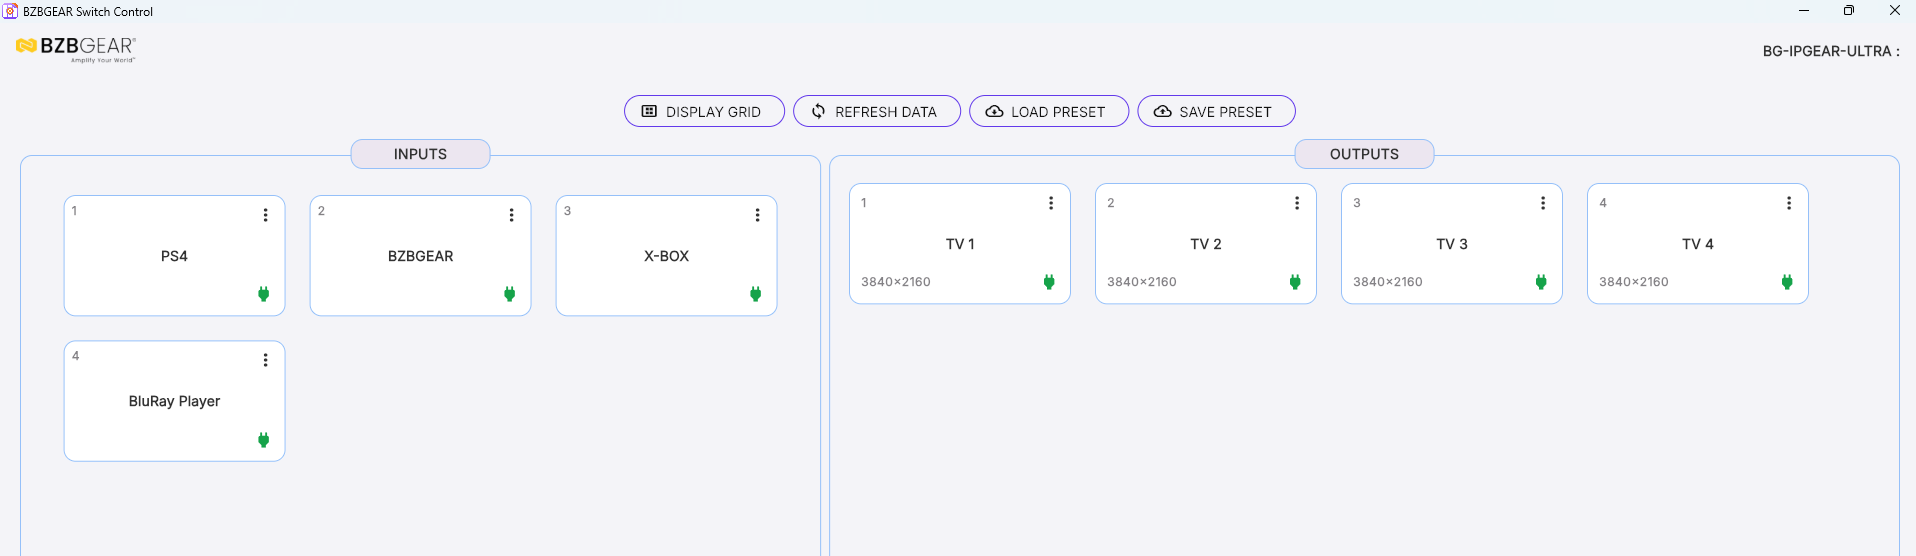
Tip: If you already labeled each encoder and decoder in the web GUI, those names will automatically populate in the app — making it easy to tell your sources and displays apart at a glance.
Part 2: Matrix Your Sources to Displays
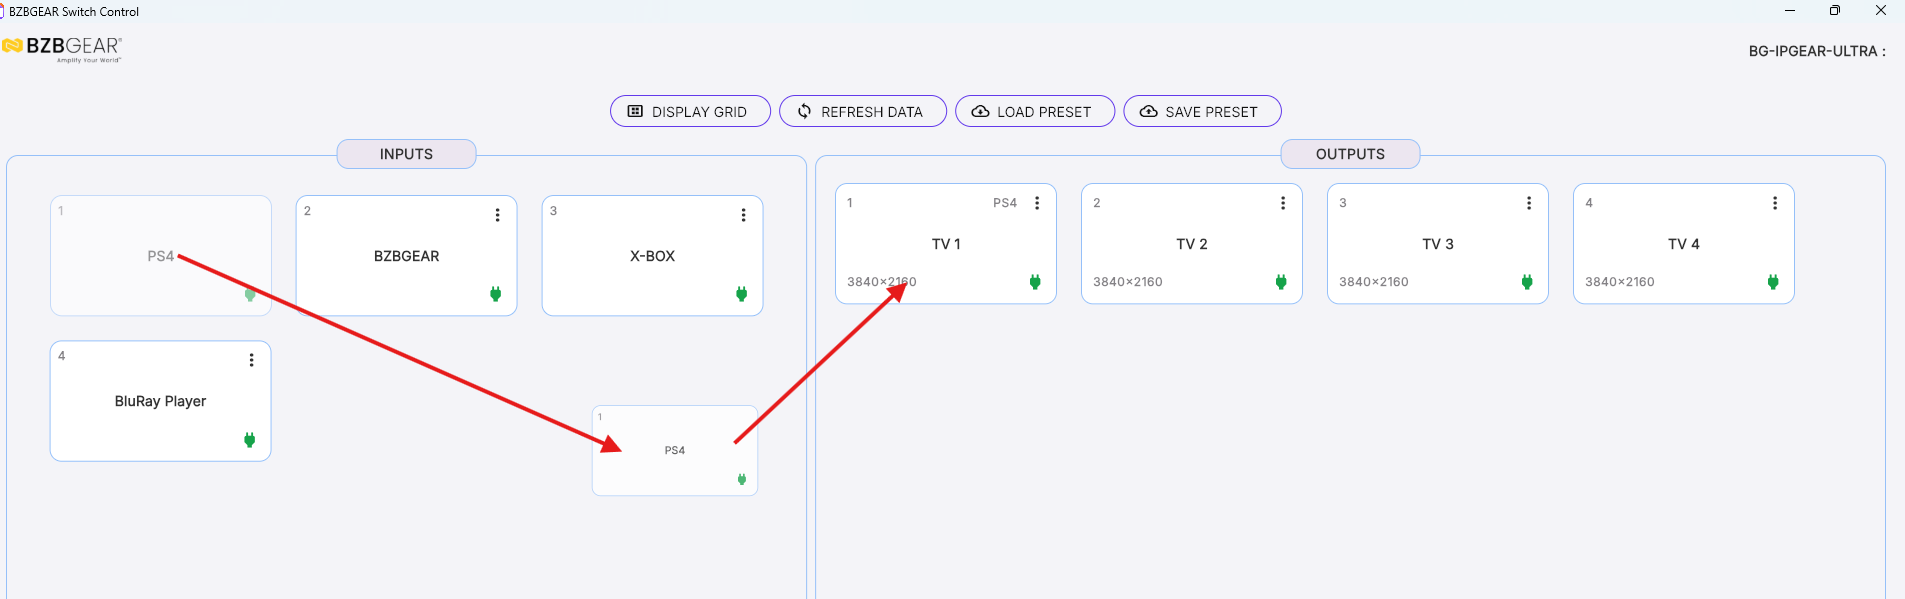
Routing a source to a display is as simple as a click and a drag.
Click and hold on the source you want to route, then drag it on top of the display you want it to appear on and release. That source is now assigned to that display. Repeat for as many source-to-display connections as you'd like — that's the whole matrix.
Part 3: Save a Matrix Preset
Once you've built a matrix layout you'll want to use again, you can save it as a preset.
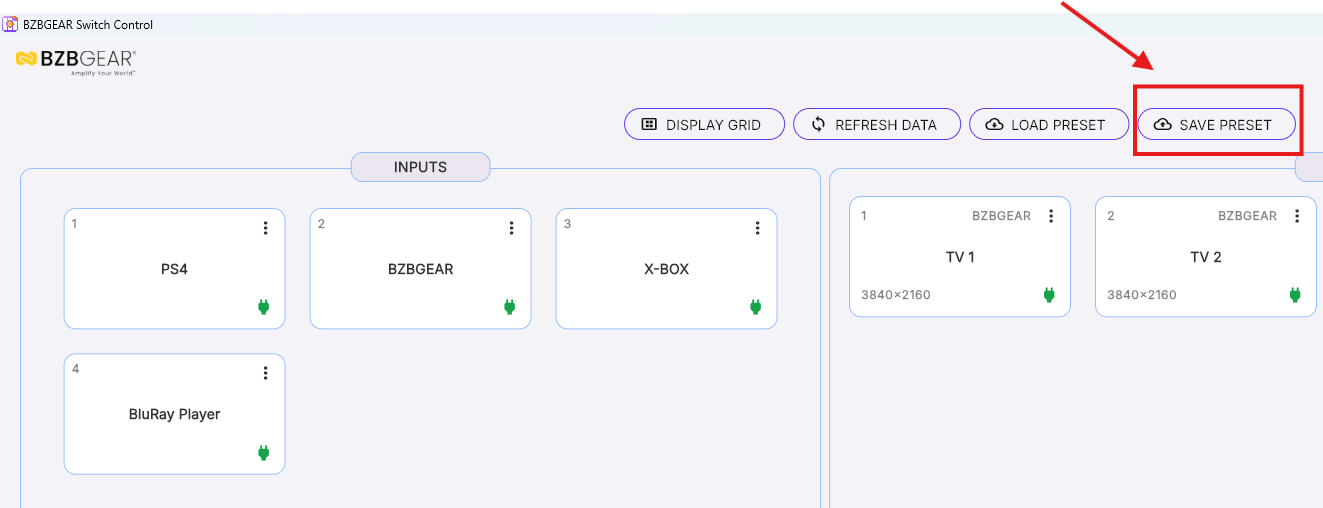
Step 1: Click Save Preset
With your desired matrix layout in place, click the Save Preset button at the top of the window.
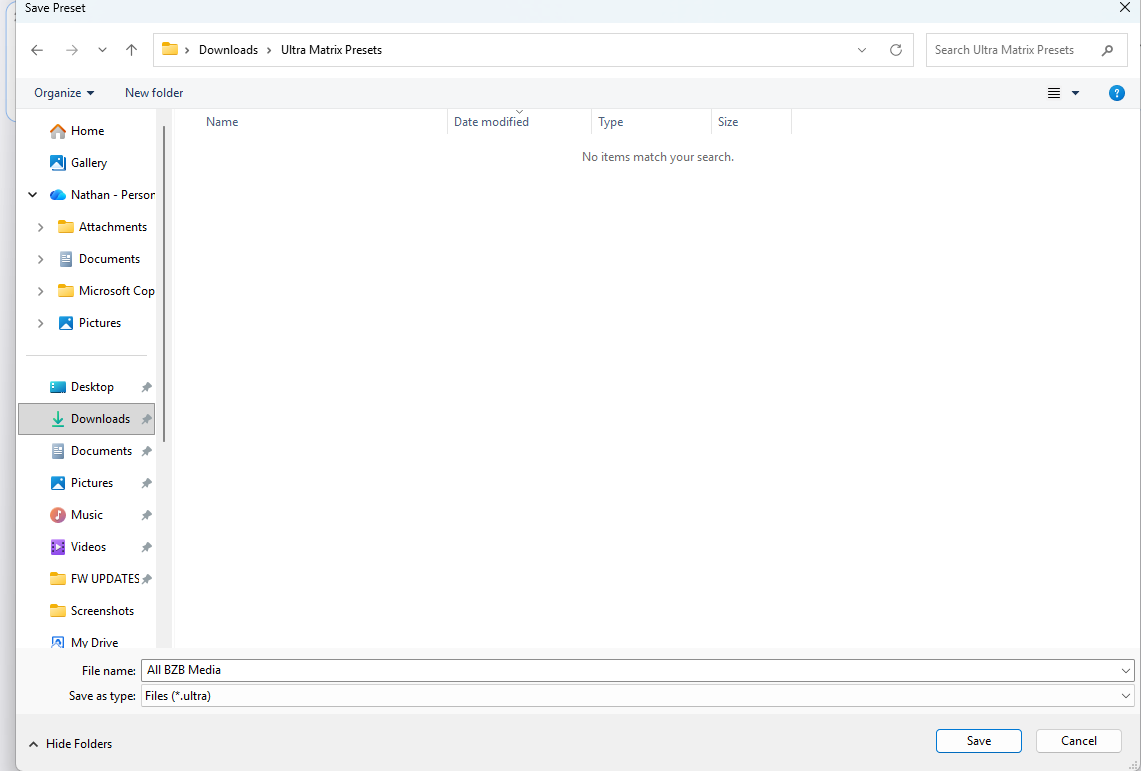
Step 2: Choose a location and save
Save the preset file to a folder on your computer, then click Save. Give it a name you'll recognize later — for example, the room, event, or layout it represents.
Part 4: Recall a Matrix Preset
Getting a saved layout back is just as quick.
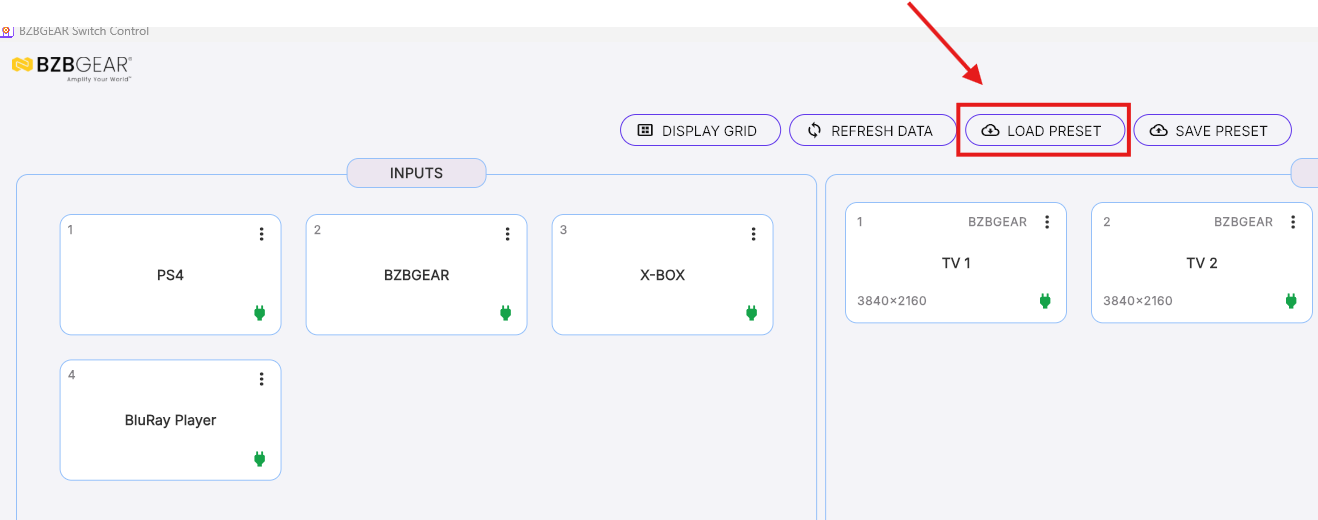
Step 1: Click Load Presets
Select Load Preset at the top of the window.
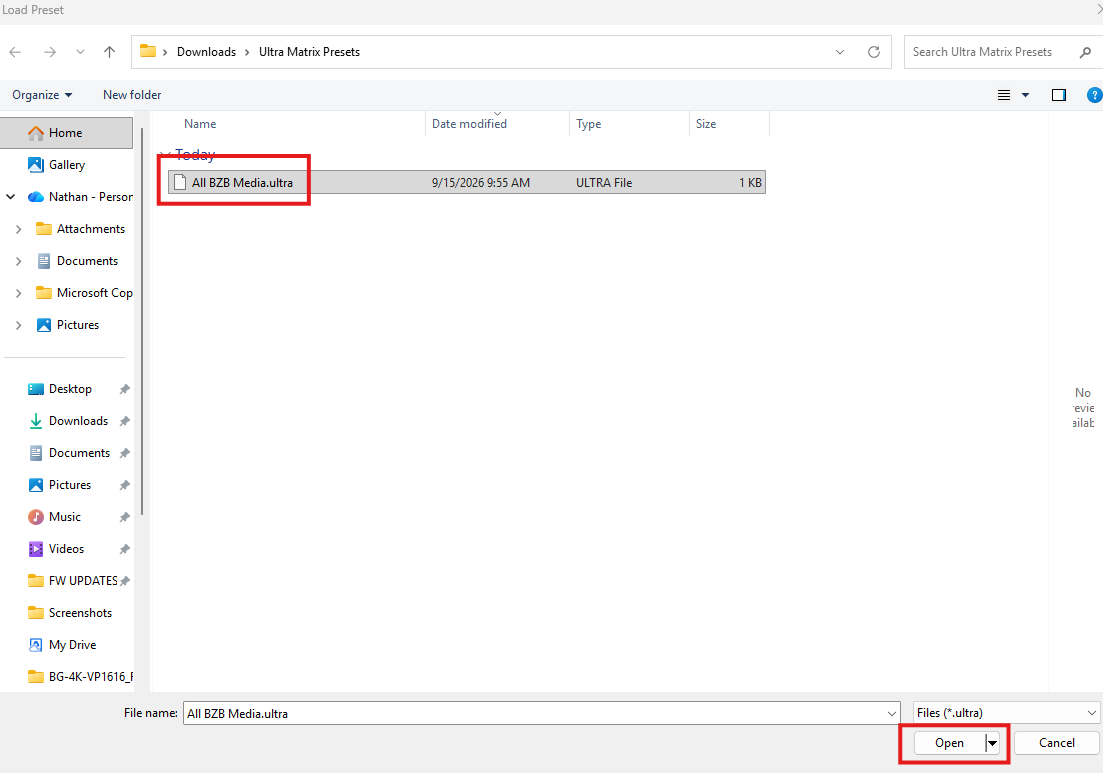
Step 2: Open your saved preset
Locate the folder where you saved your preset, select the file, and click Open. Your saved matrix layout is instantly recalled and applied to your system.
That's How Simple It Is
That's all there is to it — with the Switch Control app, matrixing your connected sources to your connected displays and saving and recalling presets takes just a few clicks. Whether you're routing a single source or reconfiguring an entire video wall, presets let you switch your whole setup in an instant.


8.00 a.m. - 5.00 p.m. (PST)
10.00 a.m. - 3.00 p.m. (PST)
(by appointment only)