


BG-IPGEAR-ULTRA-C Quick Start Guide
BG-IPGEAR-ULTRA-C: Quick Start Guide
Follow this guide to connect the BG-IPGEAR-ULTRA-C, discover your encoders and decoders, and prepare the system for routing and layout configuration.

Step 1: Connect to the Network
- Connect the BG-IPGEAR-ULTRA-C (Control Box) to your network switch using the VIDEO LAN (PoE) Ethernet port and a Cat6 cable.
- Connect your computer to the same network switch using a Cat6 cable.
- Open your computer’s Network Settings. On a Windows PC, search for View Network Connections.
- Locate the connected Ethernet adapter, right-click it, and select Properties.
- Double-click Internet Protocol Version 4 (TCP/IPv4).
- Temporarily assign your computer a static IP address in the 169.254.x.x range.
- Apply the settings.
Example settings
- IP Address: 169.254.100.1
- Subnet Mask: 255.255.0.0
Important: Your computer must share the same first two octets (169.254) as the system in order to communicate properly.
Step 2: Access the Control Box Web Interface
- Open a web browser.
- In the address bar, enter: controller.local
- The login page should appear automatically. No IP address is required.
Step 3: Log In and Change the Default Password
- Log in using the default credentials:
- Username: admin
- Password: admin
- When prompted, create a new password.
- Click Update Password to continue.
Step 4: Run the Initial Setup Wizard
- Follow the on-screen prompts.
- Click Next through the setup wizard.
- The system will begin scanning the network for connected devices.
Step 5: Discover and Add Devices
- Once your devices appear, select Stop Searching & Add to System once all devices have been discoverd.
- The encoders and decoders will appear in the device list and begin connecting automatically.
- Green status indicators confirm successful connections.
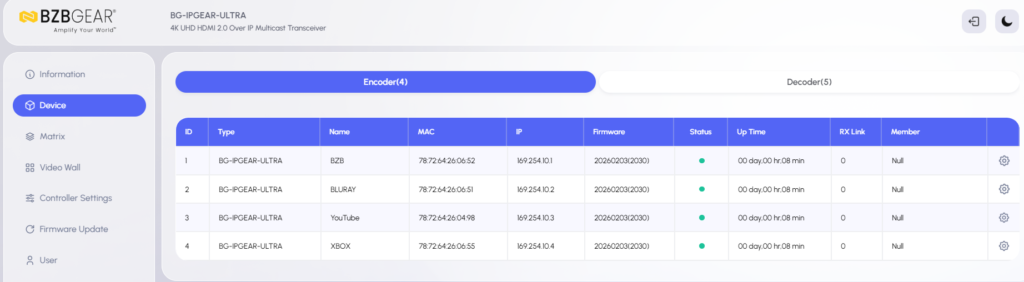
Step 6: Identify and Label Encoders (Sources)
- Locate each encoder in the device list.
- Click the Settings icon on the right side of the encoder:

3. Use the live preview image to identify the connected source:
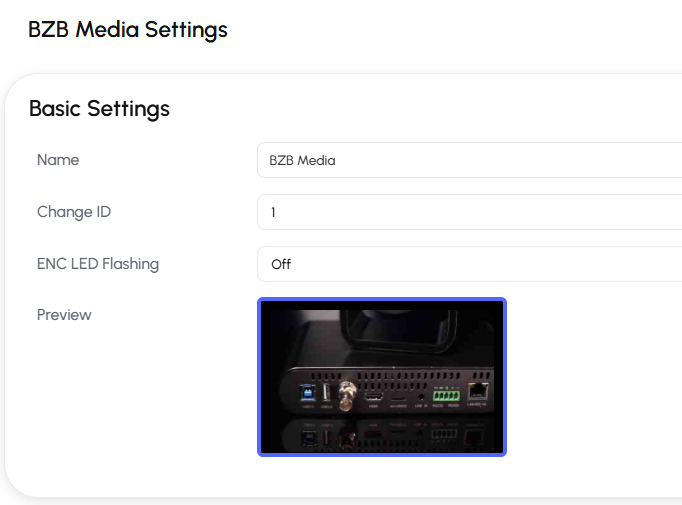
4. Rename the encoder to match its source name.
From this menu, you can also:
- Reboot the device
- Perform a factory reset
- Change a device from encoder to decoder, or vice versa
Step 7: Identify and Label Decoders (Displays)
- Select a decoder from the device list.
- Click the Settings icon on the right side.
- Temporarily switch the decoder to a known source to determine which display changes.
- Identify the physical display location.
- Rename the decoder accordingly, such as TV1, TV2, or TV3.
- Repeat for all displays.
Setup Complete
Your system is now:
- Connected
- Discovered
- Added to the system
- Labeled and organized for easy switching
You are now ready to begin routing sources and creating custom layouts.
For more advanced setup, refer to the additional guides for:
- Matrix switching
- Video wall setup
- Multiview layout customization
Get insider
updates & offers
Learn more
Get insider updates and offers
Join our vibrant community of BZBGEAR insiders today and unlock a world of exclusive updates, irresistible offers, and invaluable education.
Sales Inquiries
Leave your phone number, and one of our specialists will reach out to you shortly.
Call Us
Technical support
Monday - Friday
8.00 a.m. - 5.00 p.m. (PST)
8.00 a.m. - 5.00 p.m. (PST)
Saturday - Sunday
10.00 a.m. - 3.00 p.m. (PST)
(by appointment only)
10.00 a.m. - 3.00 p.m. (PST)
(by appointment only)
Phone & Email Support


