How to Live Stream to Facebook from Your IP Camera in 10 Easy Steps
In this article we will go over the steps on how to live stream to Facebook directly from your BZBGEAR Camera. If you have a camera from our VPTZ series please see the alternate guide here. It is assumed that your camera is connected to your LAN and has an IP address that is compatible with your router's settings. If this has not been done refer to our knowledge base articles on addressing your camera here or here. Lets get streaming!
Step 1:
Login into your Facebook account and click on the "Live Video" button:
 (This is located in the middle of your home page)
Step 2:
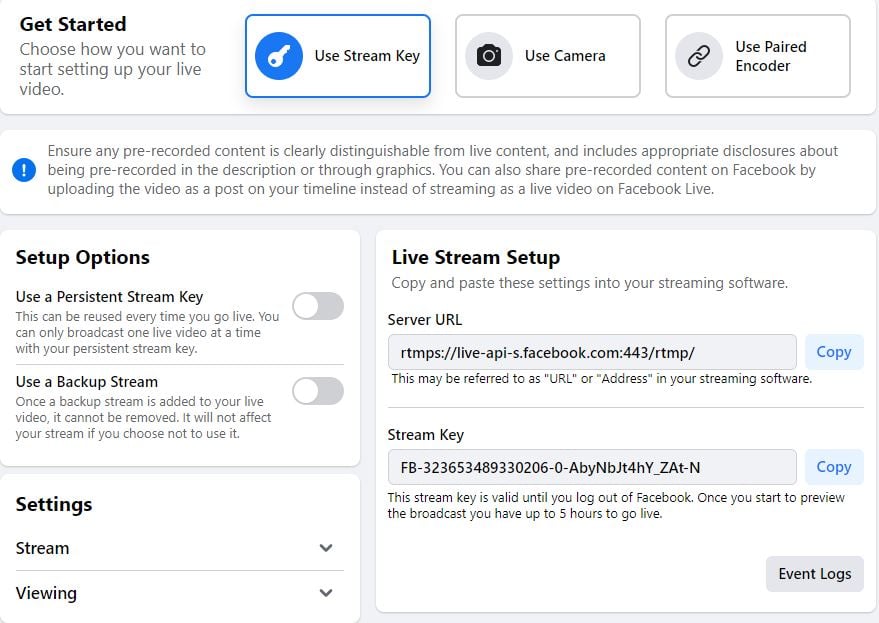
Select “Use Stream Key” to display your streaming options:
 Step 3:
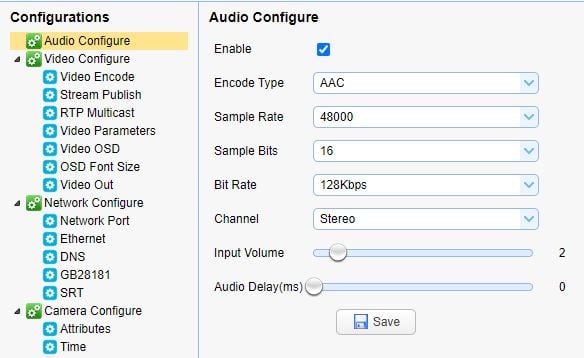
Open a second tab in your web browser and login to your camera’s web interface. From the Configuration page, go to “Audio Configure” and enable the audio. For the best audio, select AAC for “Encode Type” and change “Bit Rate” to 128Kbps. Hit save and reboot camera for audio settings to take effect. (Will have to re-login to camera after reboot):
 .
Step 4:
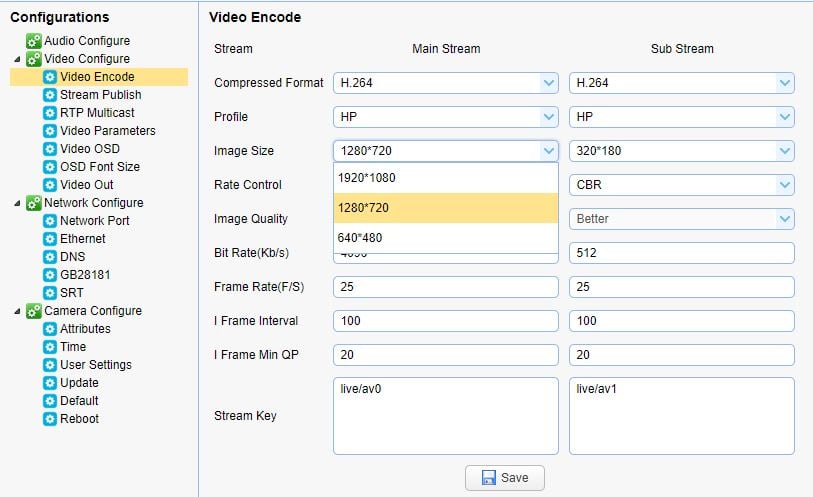
Since Facebook limits live streams to 720p, we need to change the resolution. This can be done by selecting “Video Encode” under Configurations, then selecting “1280 x 720” from the “Image Size” dropdown. Hit save once selected:
 Step 5:
Navigate to “Stream Publish”. Enable the Main Stream box. Make sure Protocol Type is RTMP.
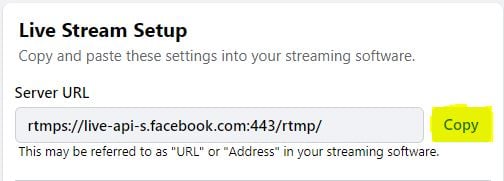
In the “Host Address” box, enter the “Server URL” information provided from Facebook. Return to your open Facebook streaming options page and select “Copy” next to the “Server URL” address provided:
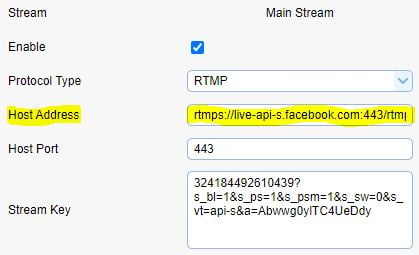
 Return to "Stream Publish" on the camera interface and paste the Server URL copied from Facebook into the "Host Address" field.
 Step 6:
Change “Host Port” to 443 (1935 is for YouTube)
Step 7:
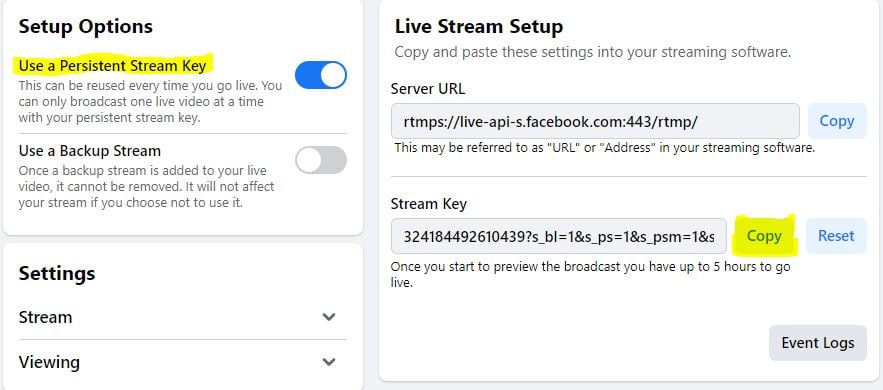
Return to your Facebook streaming options page. We recommend using a “Persistent Stream Key” so that you have the same stream key each time you live stream. Turn the “Persistent Stream Key” option on and copy the stream key Facebook provides:
 Step 8:
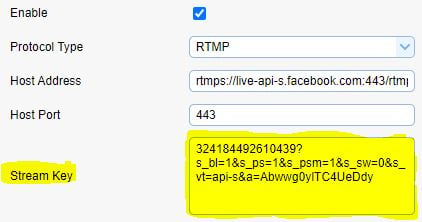
Return to Stream Publish and paste the Stream Key information copied from Facebook. Hit save:
 Step 9:
Navigate to Configuration -> DNS in the camera interface. In the "Preferred DNS Server" field enter 8.8.8.8. Enter 8.8.4.4 in the "Alternative DNS Server" field.
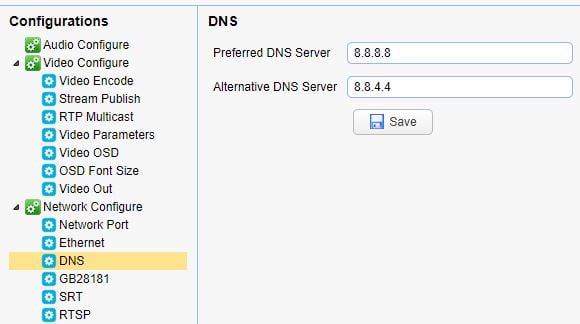 Hit save and reboot the camera one more time.
Step 10:
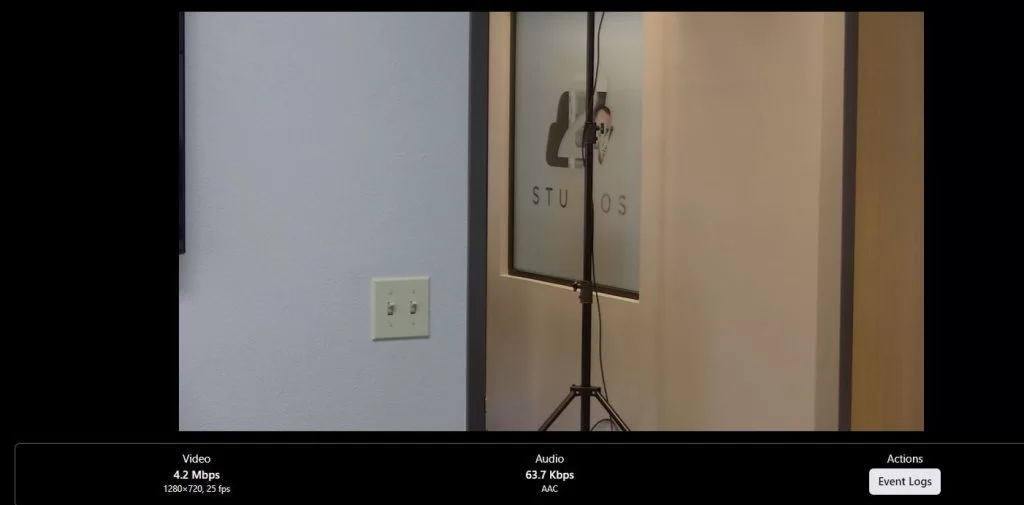
Once the camera has rebooted, the video feed will be sent to your Facebook page and you will see a preview your live stream on your stream setting page at the top (there may be a delay, so please be patient):
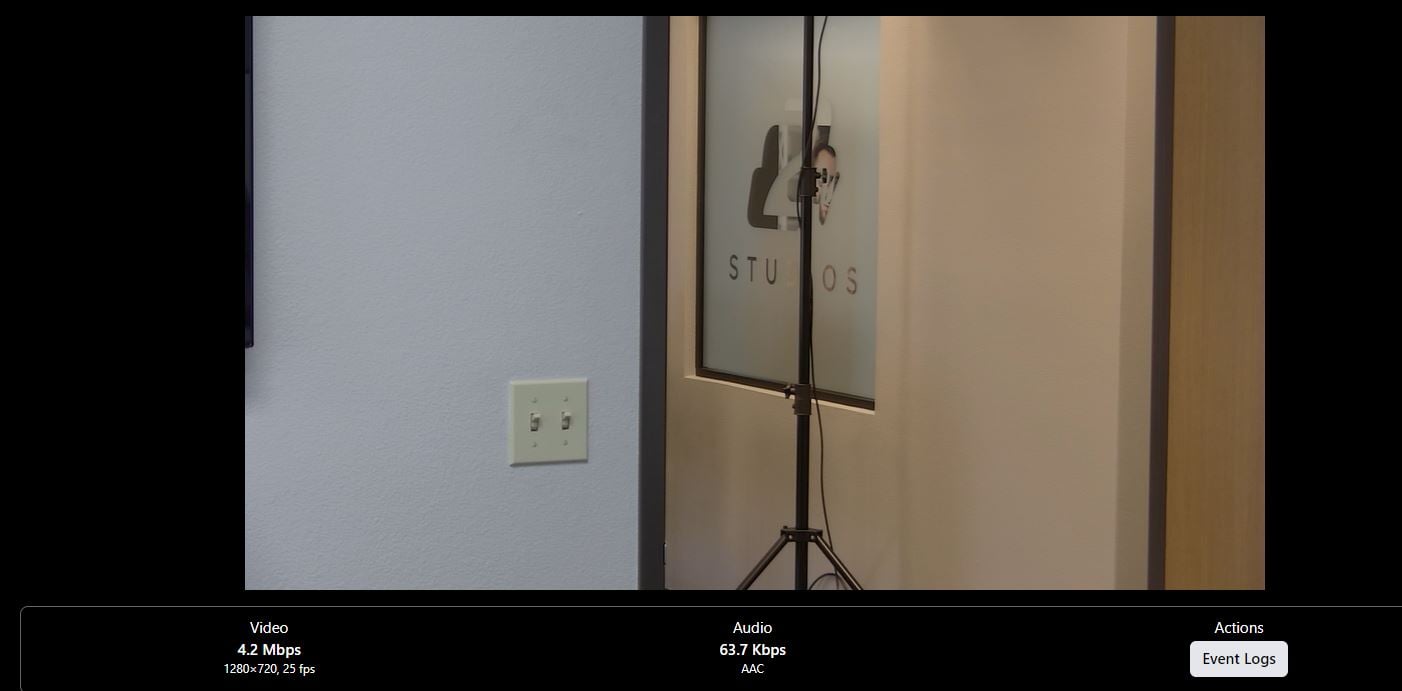 When ready, hit “Go Live” on the bottom left of your Facebook. You are live!
The next time you want to live stream, simply turn your “Persistent Stream Key” on and it will connect to your camera.
 Step 3:
Open a second tab in your web browser and login to your camera’s web interface. From the Configuration page, go to “Audio Configure” and enable the audio. For the best audio, select AAC for “Encode Type” and change “Bit Rate” to 128Kbps. Hit save and reboot camera for audio settings to take effect. (Will have to re-login to camera after reboot):
 .
Step 4:
Since Facebook limits live streams to 720p, we need to change the resolution. This can be done by selecting “Video Encode” under Configurations, then selecting “1280 x 720” from the “Image Size” dropdown. Hit save once selected:
 Step 5:
Navigate to “Stream Publish”. Enable the Main Stream box. Make sure Protocol Type is RTMP.
In the “Host Address” box, enter the “Server URL” information provided from Facebook. Return to your open Facebook streaming options page and select “Copy” next to the “Server URL” address provided:
 Return to "Stream Publish" on the camera interface and paste the Server URL copied from Facebook into the "Host Address" field.
 Step 6:
Change “Host Port” to 443 (1935 is for YouTube)
Step 7:
Return to your Facebook streaming options page. We recommend using a “Persistent Stream Key” so that you have the same stream key each time you live stream. Turn the “Persistent Stream Key” option on and copy the stream key Facebook provides:
 Step 8:
Return to Stream Publish and paste the Stream Key information copied from Facebook. Hit save:
 Step 9:
Navigate to Configuration -> DNS in the camera interface. In the "Preferred DNS Server" field enter 8.8.8.8. Enter 8.8.4.4 in the "Alternative DNS Server" field.
 Hit save and reboot the camera one more time.
Step 10:
Once the camera has rebooted, the video feed will be sent to your Facebook page and you will see a preview your live stream on your stream setting page at the top (there may be a delay, so please be patient):
 When ready, hit “Go Live” on the bottom left of your Facebook. You are live!
The next time you want to live stream, simply turn your “Persistent Stream Key” on and it will connect to your camera.
Get insider
updates & offers
Learn more
Get insider updates and offers
Join our vibrant community of BZBGEAR insiders today and unlock a world of exclusive updates, irresistible offers, and invaluable education.
Sales Inquiries
Leave your phone number, and one of our specialists will reach out to you shortly.
Call Us
Technical support
Monday - Friday
8.00 a.m. - 5.00 p.m. (PST)
8.00 a.m. - 5.00 p.m. (PST)
Saturday - Sunday
10.00 a.m. - 3.00 p.m. (PST)
(by appointment only)
10.00 a.m. - 3.00 p.m. (PST)
(by appointment only)
Phone & Email Support


