


How to Connect your BZBGEAR Camera to the Network (Mac)
For the VPTZ Series of cameras please refer to the following article: https://bzbgear.com/knowledge-base/how-to-connect-your-bzbgear-vptz-camera-to-your-network/
The biggest hurdle most people face when installing their IP-enabled camera is getting it onto their network. We created this set-by-step tutorial to help make this task as easy as possible.
*Before beginning consult with your Network Administrator. Your network setup may differ from the examples provided.*
To successfully complete this process you will need several pieces of information. The first is the IP address of your computer. You will also need to select an unused IP address on your local network (This is the address you will set the camera to). The third piece is the default IP address of your camera. Finally, you will need the IP address of your Default Gateway/Router. If you are unfamiliar with how to obtain
With the exception of the VPTZ series, all BZBGEAR cameras have a default IP address of:
192.168.5.163
The computer must be on the same subnet as the camera to connect successfully, therefore the computer must be connected to the 192.168.5.x subnet. We can achieve this via the Local Area Network Properties on the computer.
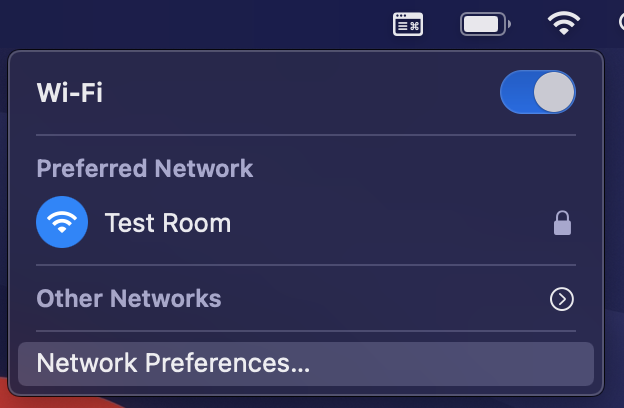
To begin, click on the internet connection icon at the upper right corner of the desktop and select “Network Preferences”.
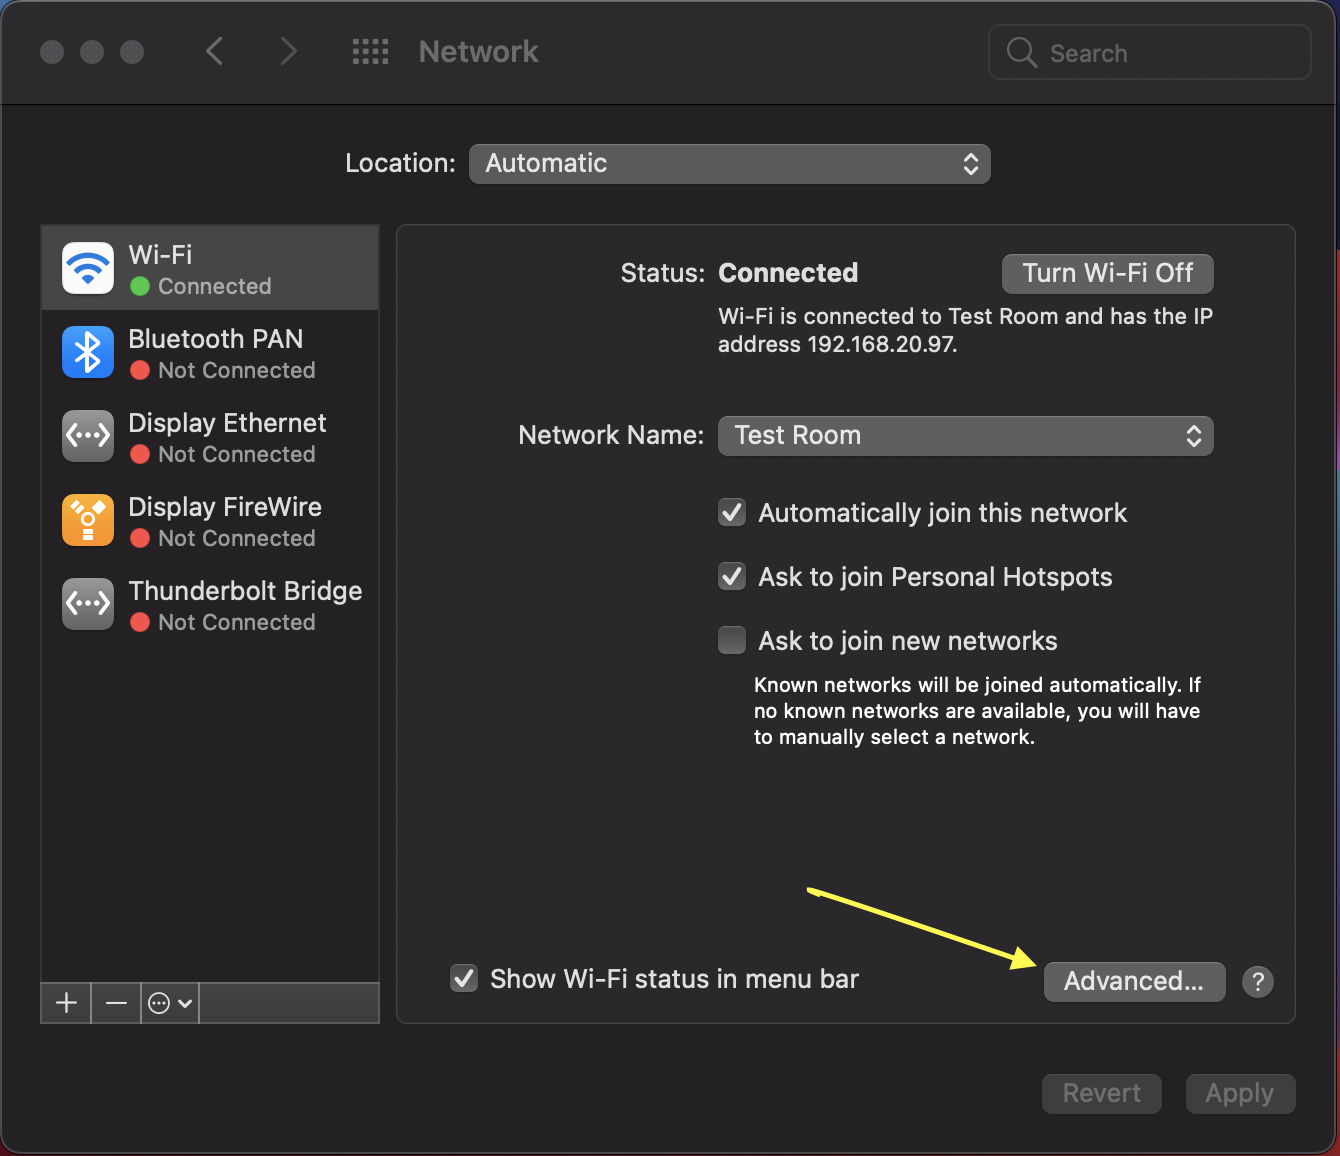
 Highlight your network connection and select “Advanced”.
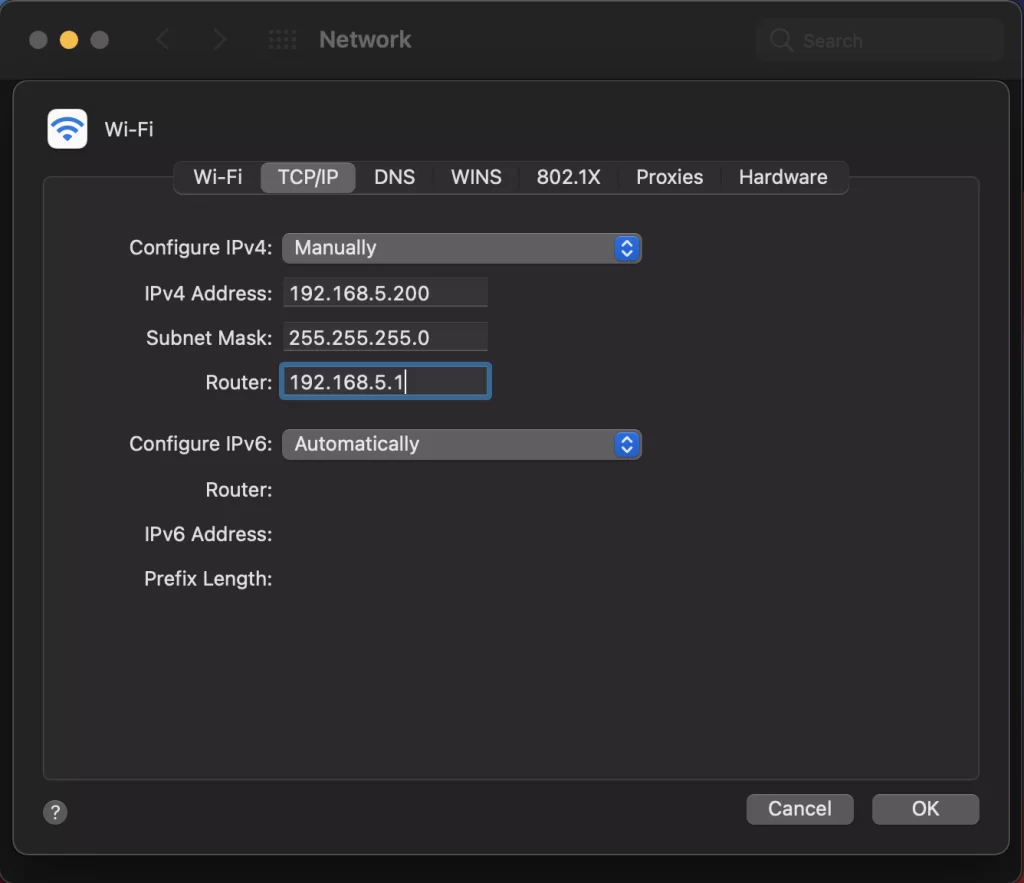
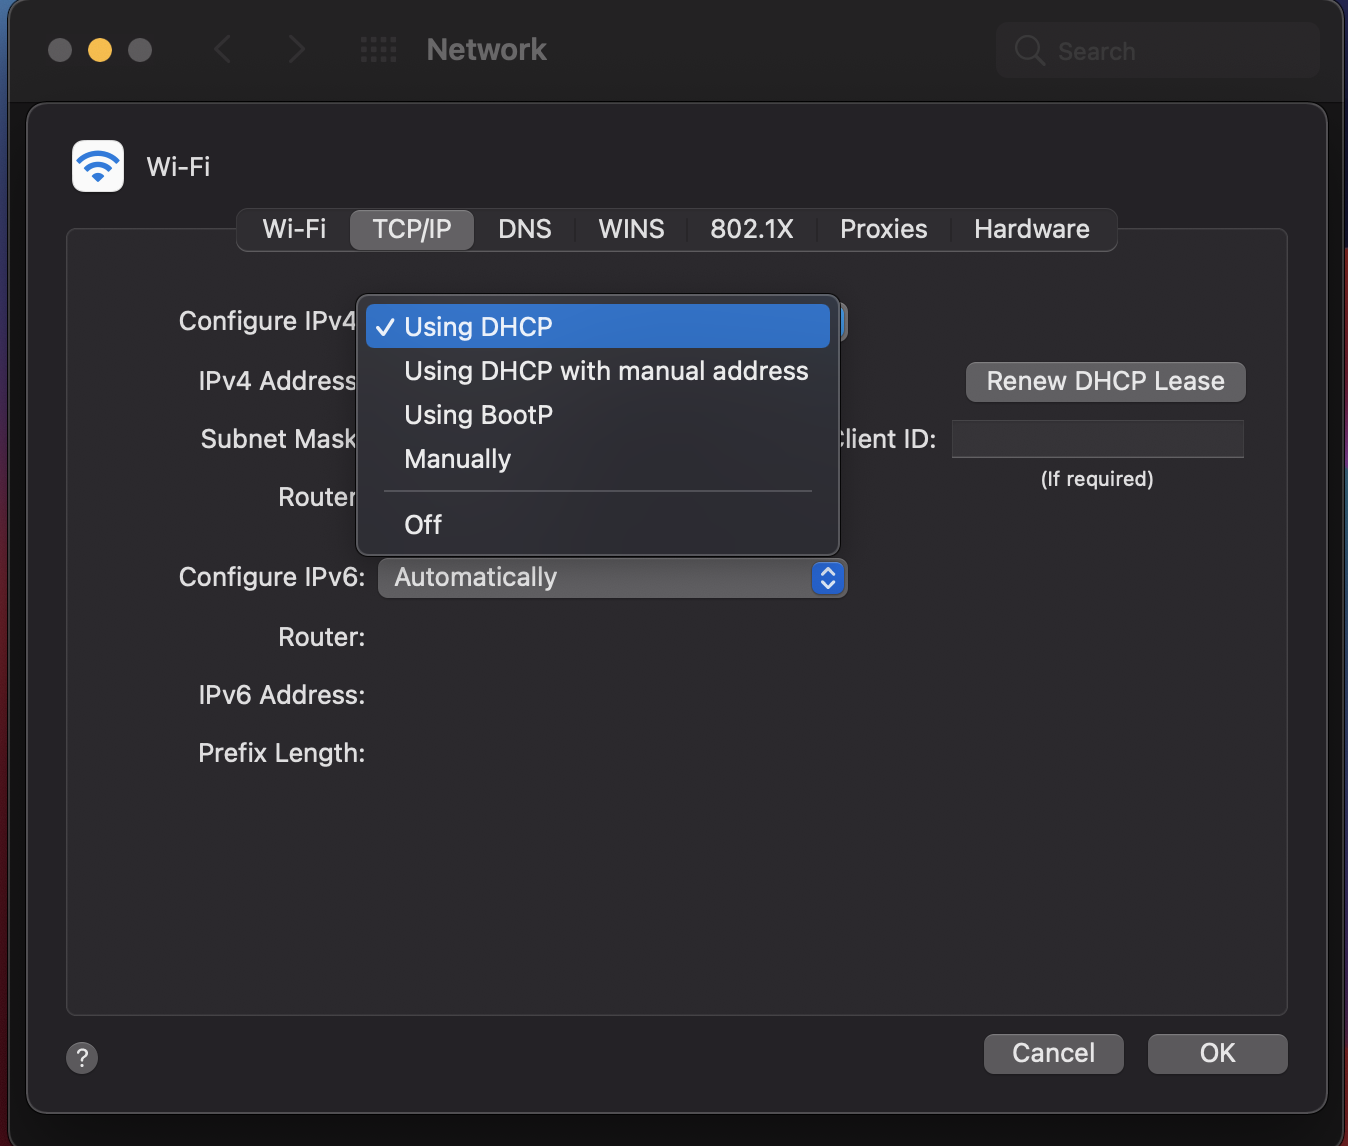
 Select the TCP/IP tab, then click the pull-down menu for "Configure IPv4" and select "Manually"
In the IP address field enter a non-conflicting IP address on the same subnet as the camera. If there is another device with the same IP address you will not be able to connect.
In the example below we are using 192.168.5.200
In the Subnet mask field enter 255.255.255.0
In the Router field type 192.168.5.1
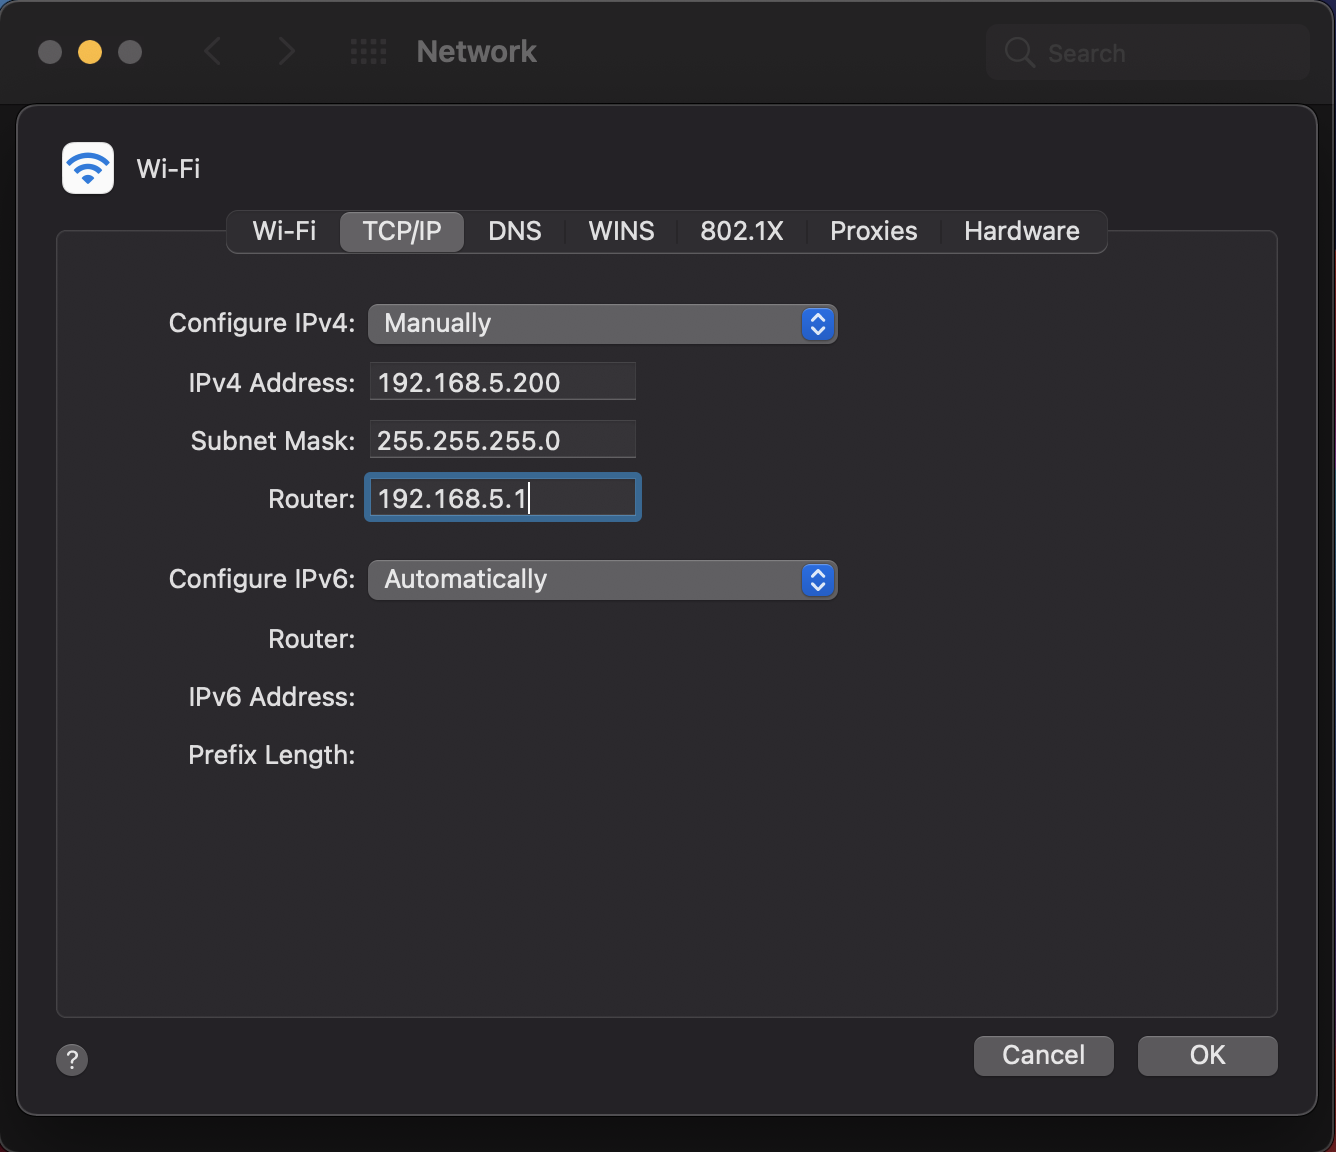
Select the TCP/IP tab, then click the pull-down menu for "Configure IPv4" and select "Manually"
In the IP address field enter a non-conflicting IP address on the same subnet as the camera. If there is another device with the same IP address you will not be able to connect.
In the example below we are using 192.168.5.200
In the Subnet mask field enter 255.255.255.0
In the Router field type 192.168.5.1
 NOTE: When you are finished configuring the camera you will need to return to this screen, click the pull-down for "Configure IPv4", and select "Using DHCP".
Click OK to apply your settings.
Click OK to close the network properties screen.
Once you have applied your settings open your web browser and enter the IP address of your camera.
Enter the login information to access the interface. The username and password should both be admin for a default camera. You will now be looking at the camera preview window. At the top right select Configuration.
NOTE: When you are finished configuring the camera you will need to return to this screen, click the pull-down for "Configure IPv4", and select "Using DHCP".
Click OK to apply your settings.
Click OK to close the network properties screen.
Once you have applied your settings open your web browser and enter the IP address of your camera.
Enter the login information to access the interface. The username and password should both be admin for a default camera. You will now be looking at the camera preview window. At the top right select Configuration.
 On the left side below the Network Configure heading select Ethernet.
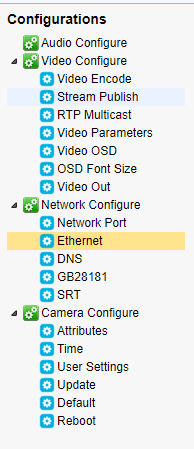 In the IP address field you will enter the unused IP address you selected at the beginning. Our example will use an address of 192.168.20.186
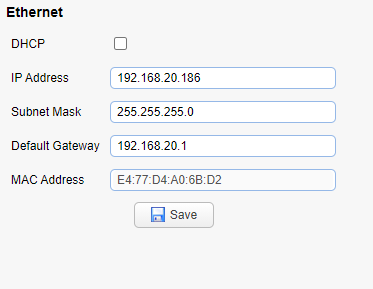 *This address MUST NOT be in use by any other device on your network or you will create an IP conflict and be unable to access your camera.*
In the Subnet Mask field enter 255.255.255.0 the enter the IP address of your Default Gateway in the field below. Double-check your values and click the Save Button.
Next you need to select DNS on the left-hand side of the screen. Unless you are given different information by your network administrator you should enter 8.8.8.8 for Preferred DNS Server and 8.8.4.4 for Alternative DNS Server. Click Save.
On the left-hand side of the screen click the Reboot option, then click the Reboot button that appears.
Once your camera reboots repeat the steps above for "Configure IPv4" and select "Using DHCP". Click Apply or OK to close all network-related screens.
*This address MUST NOT be in use by any other device on your network or you will create an IP conflict and be unable to access your camera.*
In the Subnet Mask field enter 255.255.255.0 the enter the IP address of your Default Gateway in the field below. Double-check your values and click the Save Button.
Next you need to select DNS on the left-hand side of the screen. Unless you are given different information by your network administrator you should enter 8.8.8.8 for Preferred DNS Server and 8.8.4.4 for Alternative DNS Server. Click Save.
On the left-hand side of the screen click the Reboot option, then click the Reboot button that appears.
Once your camera reboots repeat the steps above for "Configure IPv4" and select "Using DHCP". Click Apply or OK to close all network-related screens.
 Your computer and camera should now be on your network. Open your web browser and enter the IP address you assigned to your camera and your setup is complete.
Highlight your network connection and select “Advanced”.
Select the TCP/IP tab, then click the pull-down menu for "Configure IPv4" and select "Manually"
In the IP address field enter a non-conflicting IP address on the same subnet as the camera. If there is another device with the same IP address you will not be able to connect.
In the example below we are using 192.168.5.200
In the Subnet mask field enter 255.255.255.0
In the Router field type 192.168.5.1
NOTE: When you are finished configuring the camera you will need to return to this screen, click the pull-down for "Configure IPv4", and select "Using DHCP".
Click OK to apply your settings.
Click OK to close the network properties screen.
Once you have applied your settings open your web browser and enter the IP address of your camera.
Enter the login information to access the interface. The username and password should both be admin for a default camera. You will now be looking at the camera preview window. At the top right select Configuration.
In the IP address field you will enter the unused IP address you selected at the beginning. Our example will use an address of 192.168.20.186
*This address MUST NOT be in use by any other device on your network or you will create an IP conflict and be unable to access your camera.*
In the Subnet Mask field enter 255.255.255.0 the enter the IP address of your Default Gateway in the field below. Double-check your values and click the Save Button.
Next you need to select DNS on the left-hand side of the screen. Unless you are given different information by your network administrator you should enter 8.8.8.8 for Preferred DNS Server and 8.8.4.4 for Alternative DNS Server. Click Save.
On the left-hand side of the screen click the Reboot option, then click the Reboot button that appears.
Once your camera reboots repeat the steps above for "Configure IPv4" and select "Using DHCP". Click Apply or OK to close all network-related screens.
Your computer and camera should now be on your network. Open your web browser and enter the IP address you assigned to your camera and your setup is complete.
Get insider
updates & offers
Learn more
Get insider updates and offers
Join our vibrant community of BZBGEAR insiders today and unlock a world of exclusive updates, irresistible offers, and invaluable education.
Sales Inquiries
Leave your phone number, and one of our specialists will reach out to you shortly.
Call Us
Technical support
Monday - Friday
8.00 a.m. - 5.00 p.m. (PST)
8.00 a.m. - 5.00 p.m. (PST)
Saturday - Sunday
10.00 a.m. - 3.00 p.m. (PST)
(by appointment only)
10.00 a.m. - 3.00 p.m. (PST)
(by appointment only)
Phone & Email Support

