


BZBGEAR PTZ Camera Setup Guide
This guide walks you through the general process of setting up BZBGEAR PTZ cameras from initial power up to basic configuration and troubleshooting.
1. Powering the Camera
Power the camera using either PoE (Power over Ethernet) or the included power supply, depending on how you plan to deploy it long-term.
- When using PoE, make sure the Ethernet cable is connected to a PoE-enabled port on your network switch. Verify port labeling carefully.
- If you are using a managed network switch, confirm that PoE is enabled on the port and properly configured.
Startup Check:
When powered on, the camera should perform a self-check:
- Front indicator light blinks red
- Camera pans/tilts during initialization
- Camera returns to its Home/Center position
- Indicator light turns green
If the light continues blinking red and does not complete this process, contact support.
2. Network Connection
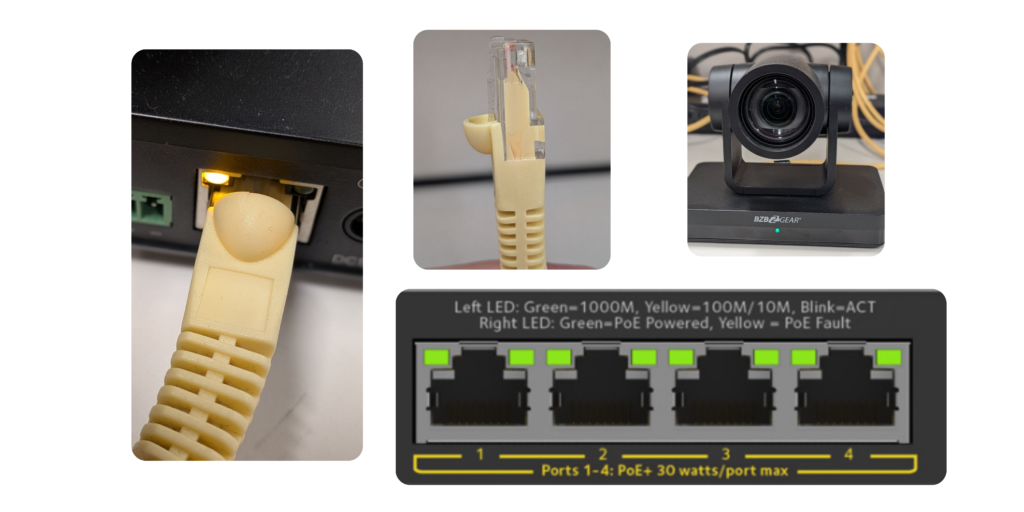
- If powered via PoE, the camera is already connected to the network.
- If using the power adapter, connect the camera to a network switch or directly to your computer via Ethernet.
What to look for:
The Ethernet port should show green and amber link lights or at least just amber, indicating a stable network connection and data activity.
3. Accessing the Web GUI
Most configuration is done through the camera’s Web GUI, unless you plan to use only:
- IR remote control
- Serial (RS-232/RS-485) control
- Physical video outputs without IP streaming
If you want to adjust image settings, configure IP streaming, or manage network parameters, you will need to log in to the Web GUI.
Default IP Addresses:
- BG-ADAMO / BG-UPTZ / LVPTZ models: 192.168.5.163
- BG-VPTZ models: 192.168.1.162
4. Configuring Your Computer’s IP
Your computer must be on the same subnet as the camera:
- The first three octets must match the camera’s IP
- The last octet must be unique
- Subnet mask and gateway should match
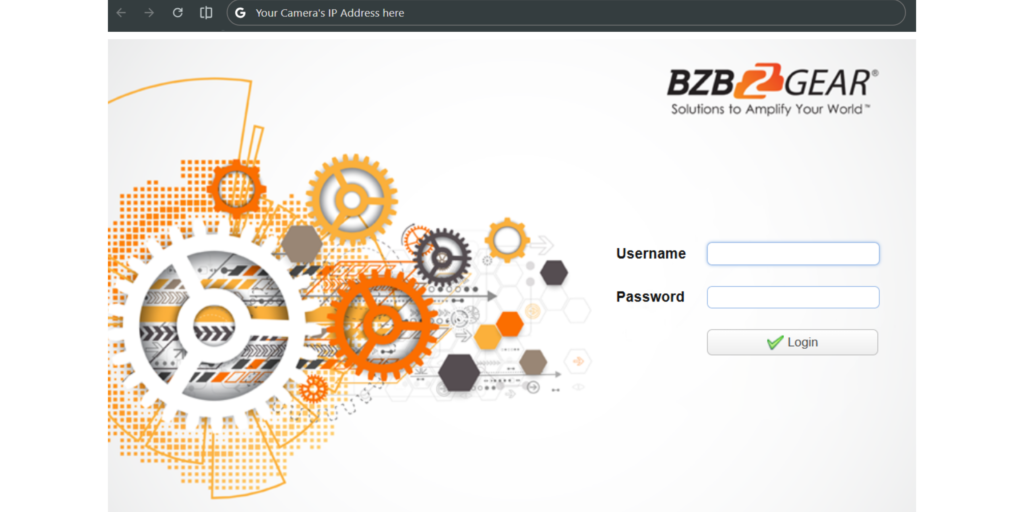
Once configured, open a web browser and enter the camera’s IP address in the address bar.
Default Login:
- Username: admin
- Password: admin
If the page does not load:
- Confirm you are on the same network
- Ensure your computer is not using the same IP as the camera
- Check for IP conflicts on the network
5. Initial Web GUI Checks
After logging in:
- Confirm you see a clear live preview
- Verify the camera responds to pan, tilt, and zoom controls
These checks confirm the camera is functioning correctly and communicating over the network.
6. Key Configuration Tabs
The following Web GUI sections are commonly used during initial setup:
- Ethernet Tab
Change the camera’s IP address if needed. Always save and reboot after making changes. - Video Out
Configure HDMI and SDI output resolutions and formats. - Video Encode
Adjust IP streaming resolution, frame rate, and compression. - Video Parameters
Fine-tune image quality settings such as color, exposure, white balance, and more. Check out the PTZ Image Parameters Overview
7. Helpful Tips & Troubleshooting
- To quickly check the camera’s IP address, connect it to a monitor via HDMI or SDI and reboot. The IP will appear briefly in the top-left corner.
- On supported models, you can also use the IR remote to display the IP address using the shortcut * + * + 3.
- If there is no video output, try lowering the output format by frame rate (for example: 1080p60 → 1080p30).
- If you experience screen tearing or latency on the IP stream, reduce the resolution or frame rate in the Video Encode settings.
When configuring multiple cameras of the same model, set them up one at a time to avoid IP address conflicts.
8.00 a.m. - 5.00 p.m. (PST)
10.00 a.m. - 3.00 p.m. (PST)
(by appointment only)


