


Universal Advanced Serial and IP PTZ Joystick Controller with 5'' Touch LCD Screen and POE/NDI/RS-232/422/485


and engineering support


Overview
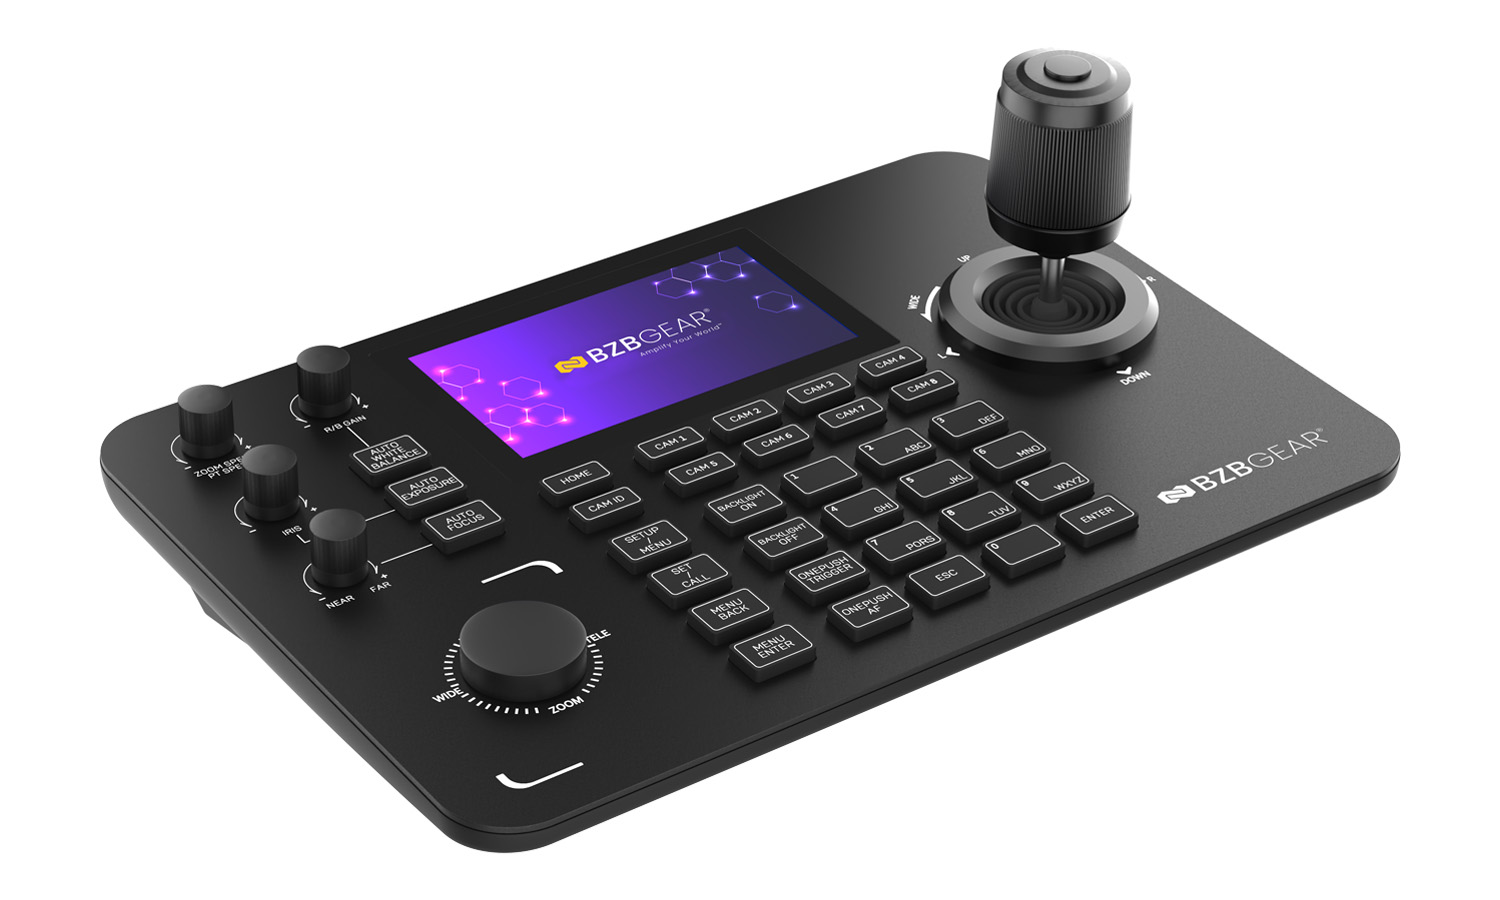
The BG-Commander-G2 is our 2nd generation Commander PTZ joystick controller delivering precise control for both IP and serial PTZ cameras. With high-quality backlit buttons, the BG-Commander-G2 offers a pleasing user experience - even in low-light conditions. The solid metal chassis provides a durable, stable platform and is designed to stand up to years of heavy use. This controller is a great choice for live events, houses of worship, and broadcast settings.
Capable of controlling over 250 cameras, the BG-Commander-G2 provides a clean and uncluttered platform with 7 camera hot keys for your favorite devices and the capability to select other cameras with a simple button press makes this unit ideally suited for small- to medium-scale productions.
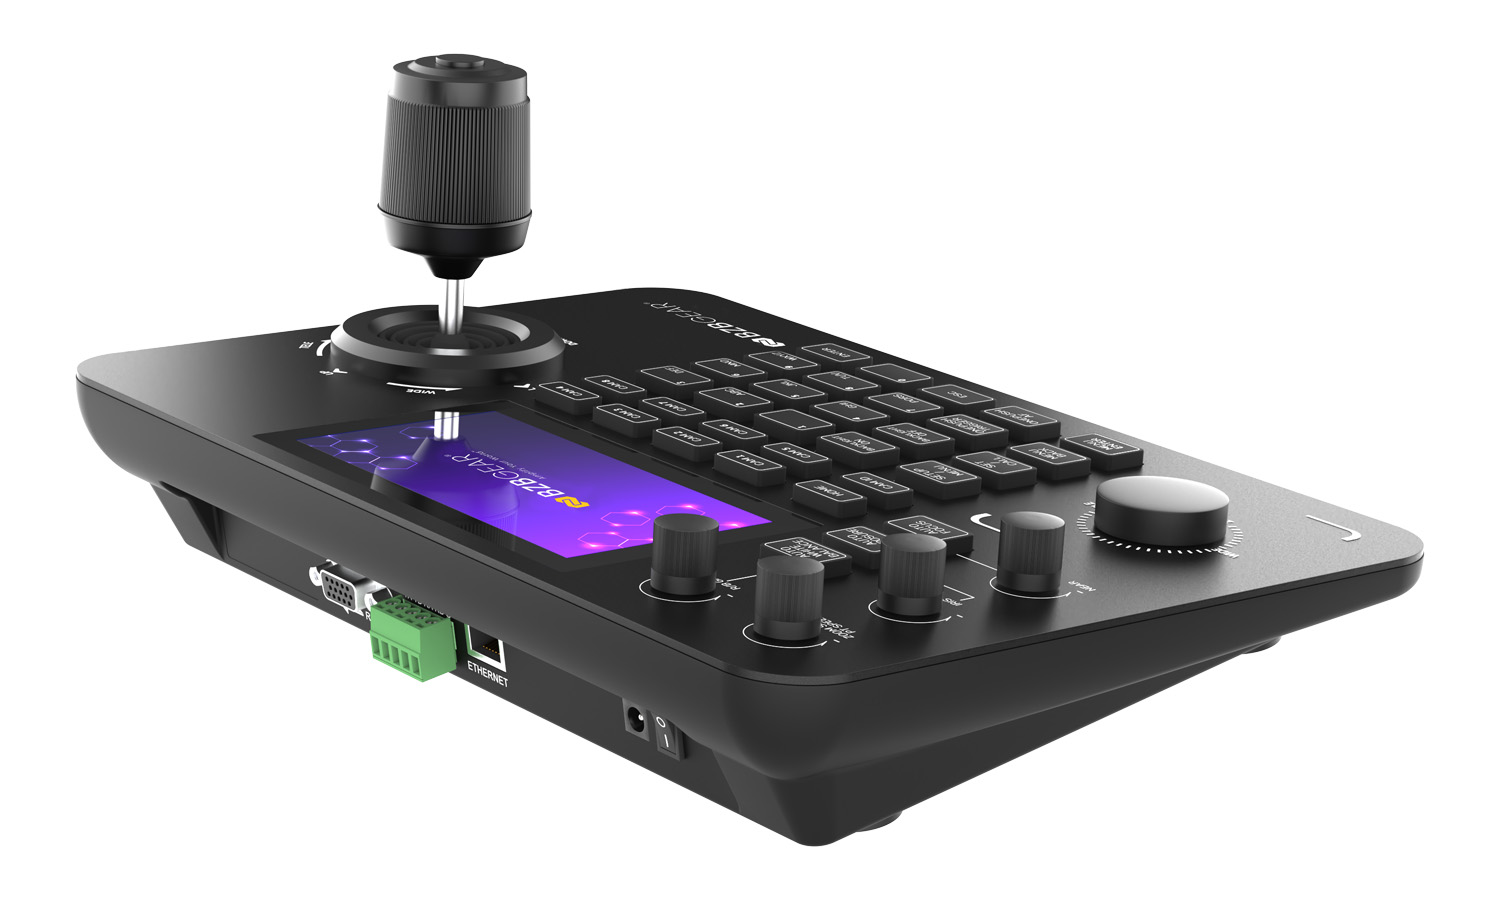
Control for either IP or serial based PTZ cameras is provided by a LAN port or RS232, RS422, and RS485 connections. The BG-Commander-G2 supports IP VISCA, ONVIF, VISCA, PELCO-D, and PELCO-P control protocols.
Features
-
![cloud-arrow-down-light-1]() IP-CONTROLEasily control any compatible IP camera
IP-CONTROLEasily control any compatible IP camera -
![img8]() POE ENABLEDSingle cable installation
POE ENABLEDSingle cable installation -
![8K Exclusive Features]() 5-inch Touchscreen DisplayThe large touchscreen display makes management and monitoring simple
5-inch Touchscreen DisplayThe large touchscreen display makes management and monitoring simple -
![img10-1]() VARIABLE SPEEDAdjust PTZ speed to get the perfect shot every time
VARIABLE SPEEDAdjust PTZ speed to get the perfect shot every time -
![Four-Control-Modes]() FOUR CONTROL MODESIP VISCA, ONVIF, RS422, and RS232
FOUR CONTROL MODESIP VISCA, ONVIF, RS422, and RS232 -
![FrameCorners]() INTEGRATED LCD SCREENReview settings at a glance
INTEGRATED LCD SCREENReview settings at a glance
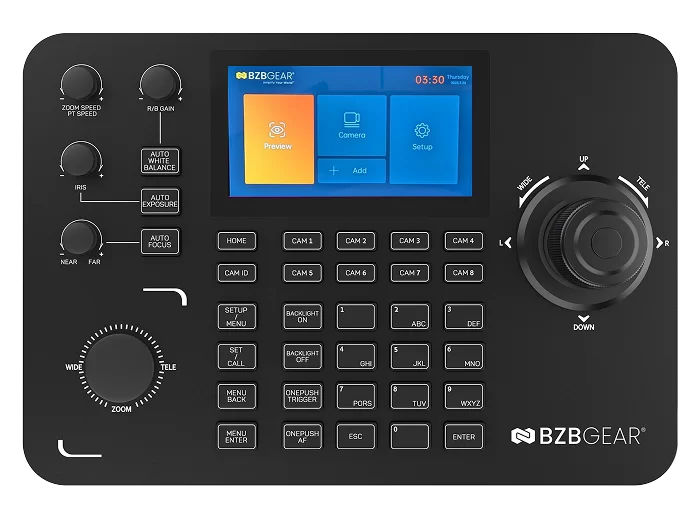
Seamless PTZ Control, Management,
and Monitoring with 5-Inch Touchscreen Interface
- Intuitive touch and joystick controls for effortless operation.
- Bright, full-color display for clear visibility in any lighting conditions.
- Designed for simple, streamlined setup and user-friendly navigation.
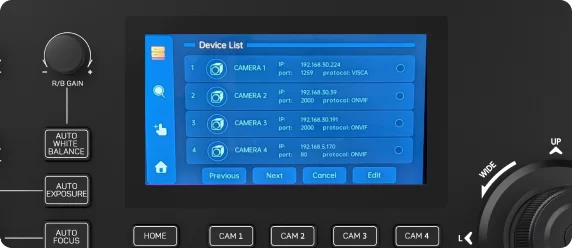
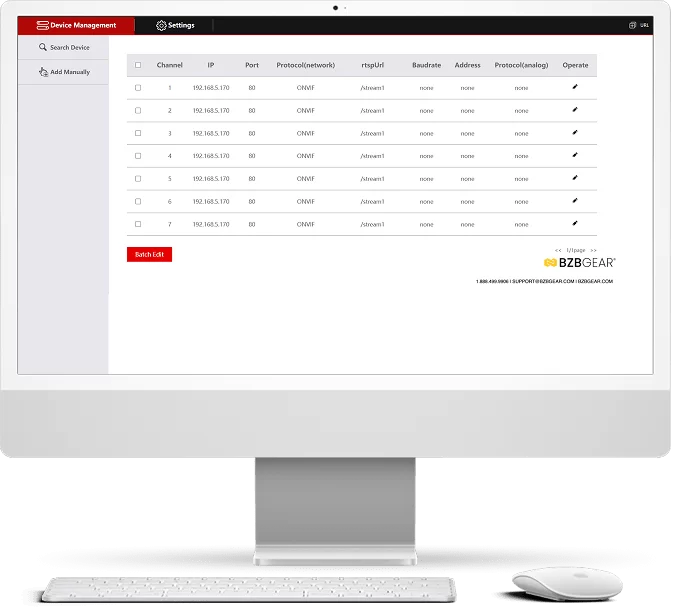
Discover and Manage Cameras with Ease
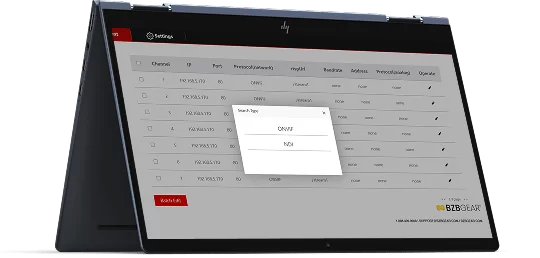
- Automatically search for and add all cameras on the network.
- Manually add cameras and customize existing camera settings.
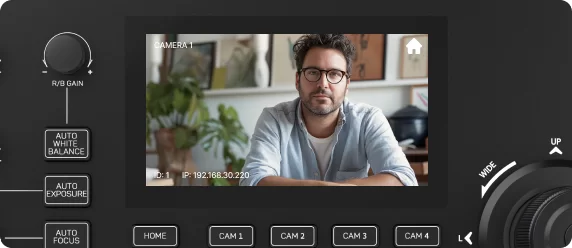
Real-Time Control and Adjustment
- Access the preview feature to operate cameras and view real-time video streams.
- PTZ control and image parameter adjustments are reflected instantly during operation.
Effortless Camera Management
- Effortlessly add and manage cameras.
Access device settings and perform maintenance with ease. - User-friendly web interface designed for intuitive navigation.
Quick Import & Export
- Easily export and import data for quick configuration transfers and efficient troubleshooting.

Automatic Camera Discovery
- Automatically discover all available cameras on the network using ONVIF or NDI protocols.
- Easily add and manage discovered cameras directly from the Web GUI.
Videos


Tech Specifications
| Technical | |
| Operating System | Linux |
| Supported Protocols | VISCA over IP (UDP/TCP), ONVIF, NDI, VISCA, PELCO-P, PELCO-D |
| Camera Search Protocols | ONVIF, NDI |
| Communication Interfaces | RS-422, RS-232, RJ45 |
| Display | HD touchscreen (720x1280) |
| Cue Tone | Button sound prompt (On/Off) |
| Mechanical | |
| Key Physical Features | Self-resetting knob, stepless knob, backlit silicone buttons, 4D joystick |
| Power Consumption | ≤5W |
| PoE Standards | PoE 802.3af/802.3at/802.3bt standards |
| Power Supply | DC12V-2A (Center Positive, Outer Negative) |
| Operating Temperature | 14°F to 131°F / -10°C to 55°C |
| Operating Humidity | 20% to 80% (non-condensing) |
| Storage Temperature | 14°F to 140°F / -10°C to 60°C |
| Storage Humidity | 0% to 90% (non-condensing) |
Resources


PACKAGE CONTENTS
- 1 x BG-Commander-G2
- 1 x DC12V-2A Adapter
- 1 x Product Manual
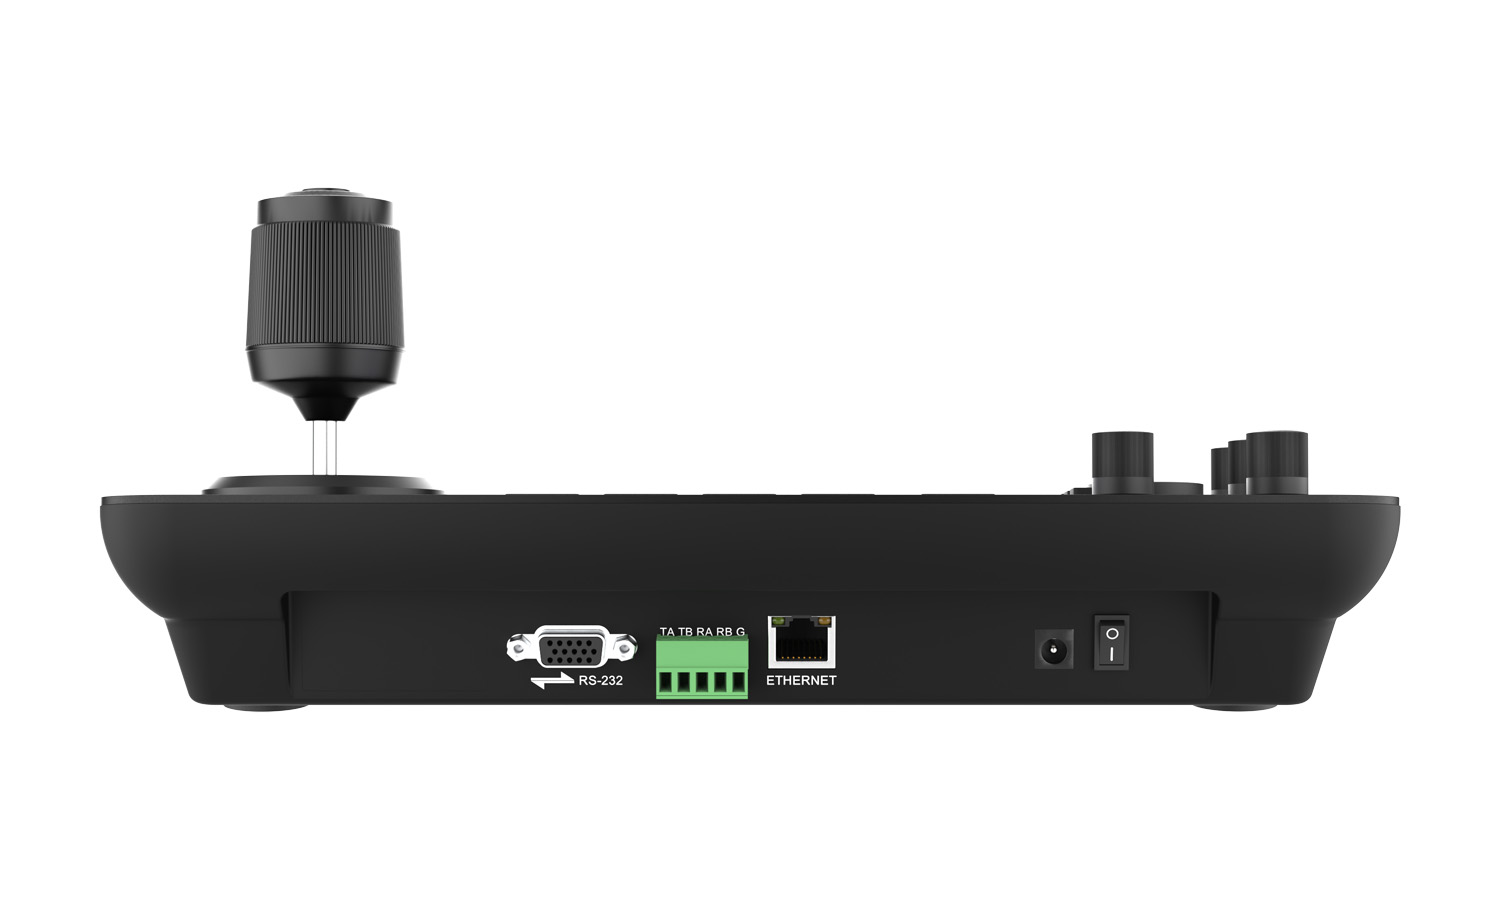
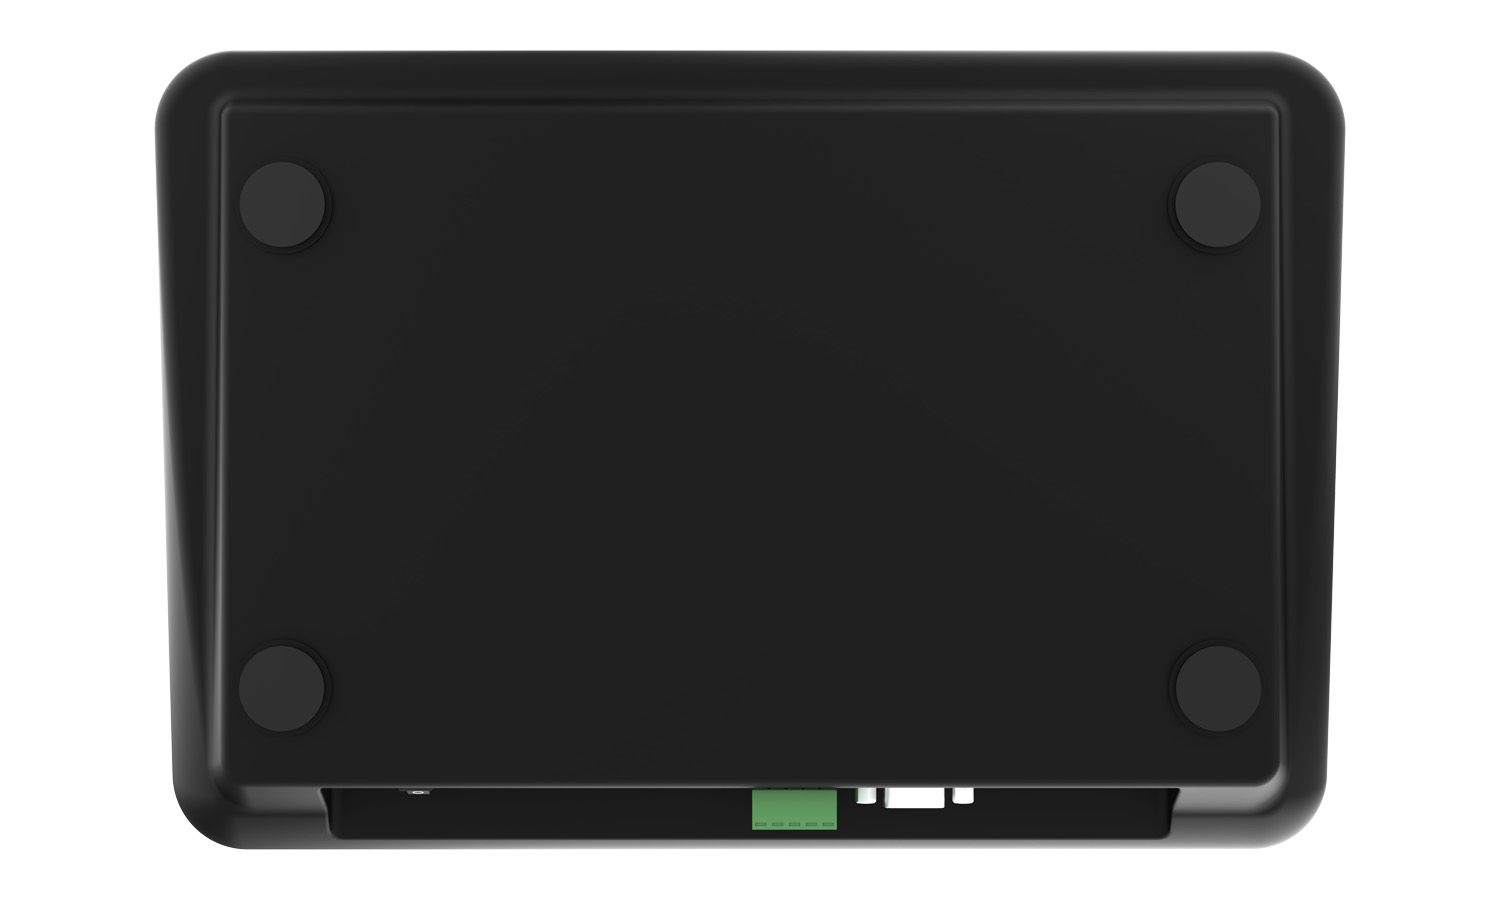
Interfaces
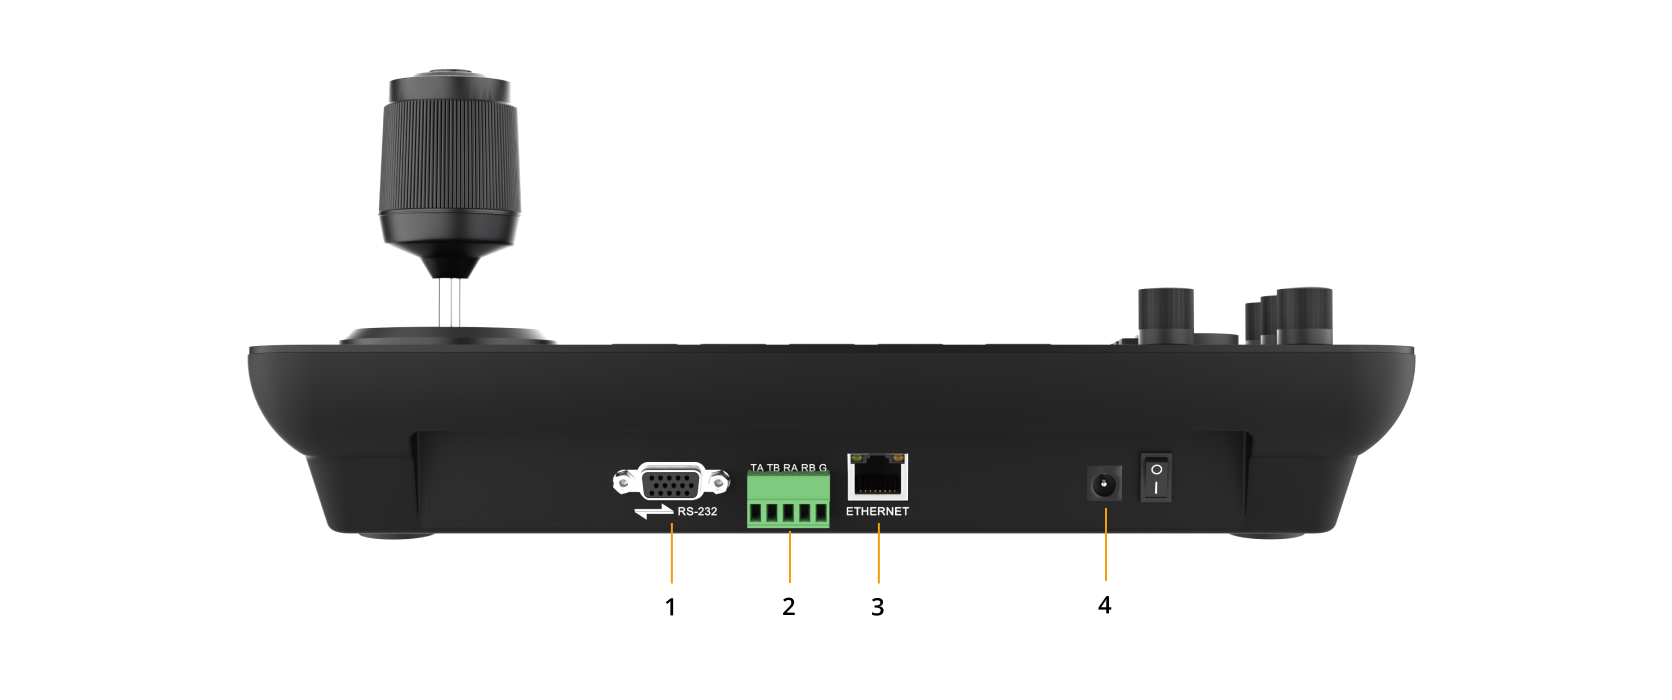
- RS-232: Use RS-232 to 8-pin Mini-DIN cable to connect 1st camera and Mini-DIN visca cables for cascadable connections.
- RS-422/485: Use RS-422 port to control your cameras over long distances up to 328ft.
- Ethernet: Connect to a network switch via category cable to supply power (PoE) and TCP/IP control.
- Power: Connect supplied 12V power adapter.


