


Setting Up User Control in the Switch Control App
This guide explains how to set up User Control in the Switch Control app, which is available on Windows, IOS, and Android devices. User Control allows you to create an Admin account with full access and then restrict what guest users can see or control.
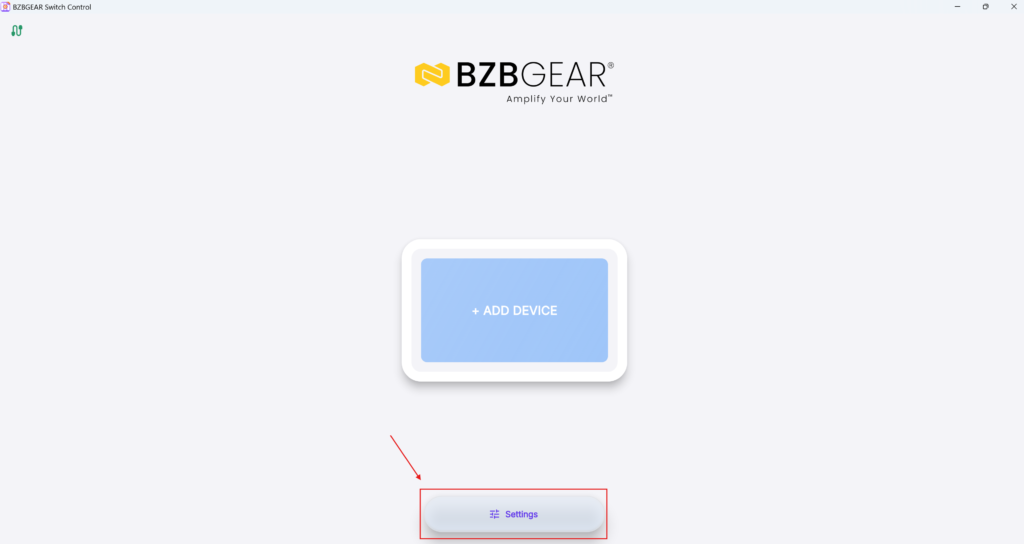
1. Open Settings
Start by opening the Switch Control app.
From the main screen, click Settings:
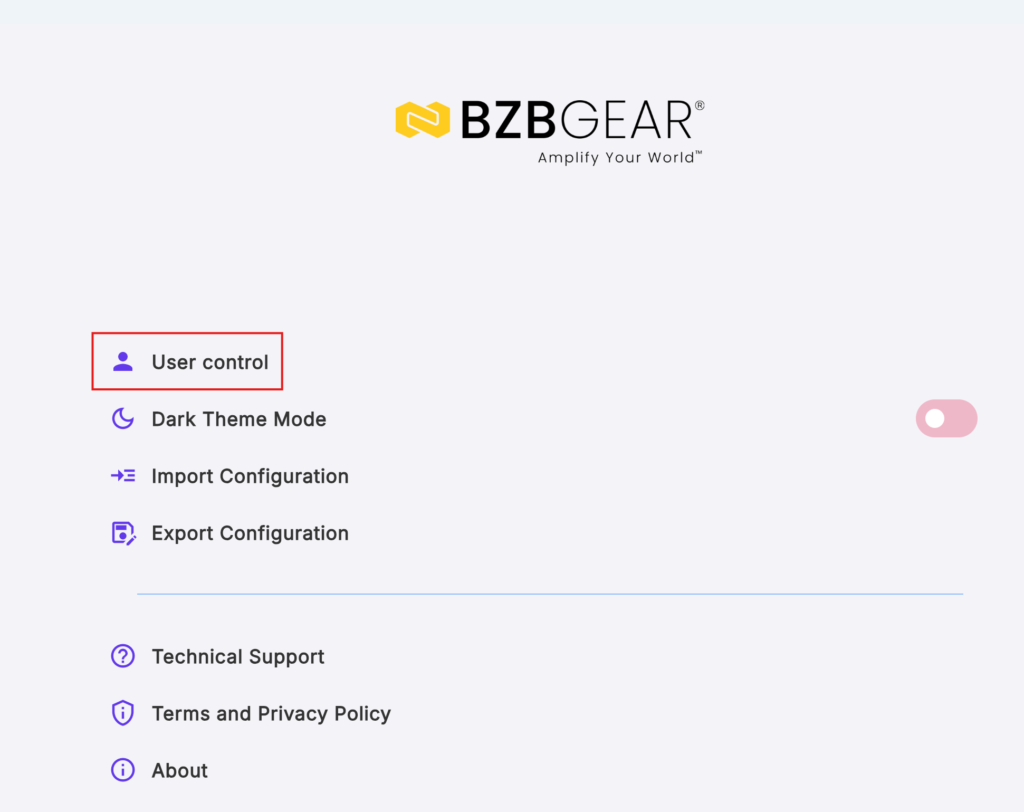
2. Open User Control
Inside Settings, click User Control.
This is where you can create and manage user accounts:
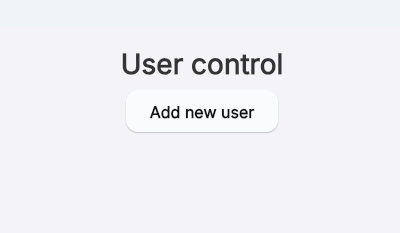
3. Add a New User
Click Add New User.
This opens the user setup screen where you can create login accounts:
4. Create the Admin Account First
When setting up User Control for the first time, create an Admin account first.
The Admin account should have:
- Full control access
- Permission to manage settings
- Permission to limit access for other users
Enter the admin login information, including:
- Name
- Login
- Password
Make sure this account is configured with full admin control:
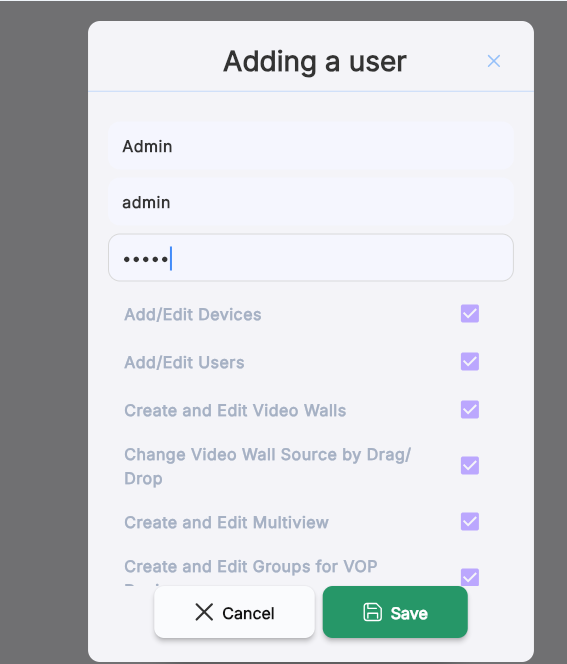
5. Save the Admin Account
Click Save to confirm the Admin setup.
Once saved, the Admin account will be available for full system access.
6. Create Guest Users
After the Admin account is created, you can add guest users.
For each guest user, enter:
- Name
- Login
- Password
Then choose which features or sections they are allowed to access.
This allows you to limit guest access based on your needs:

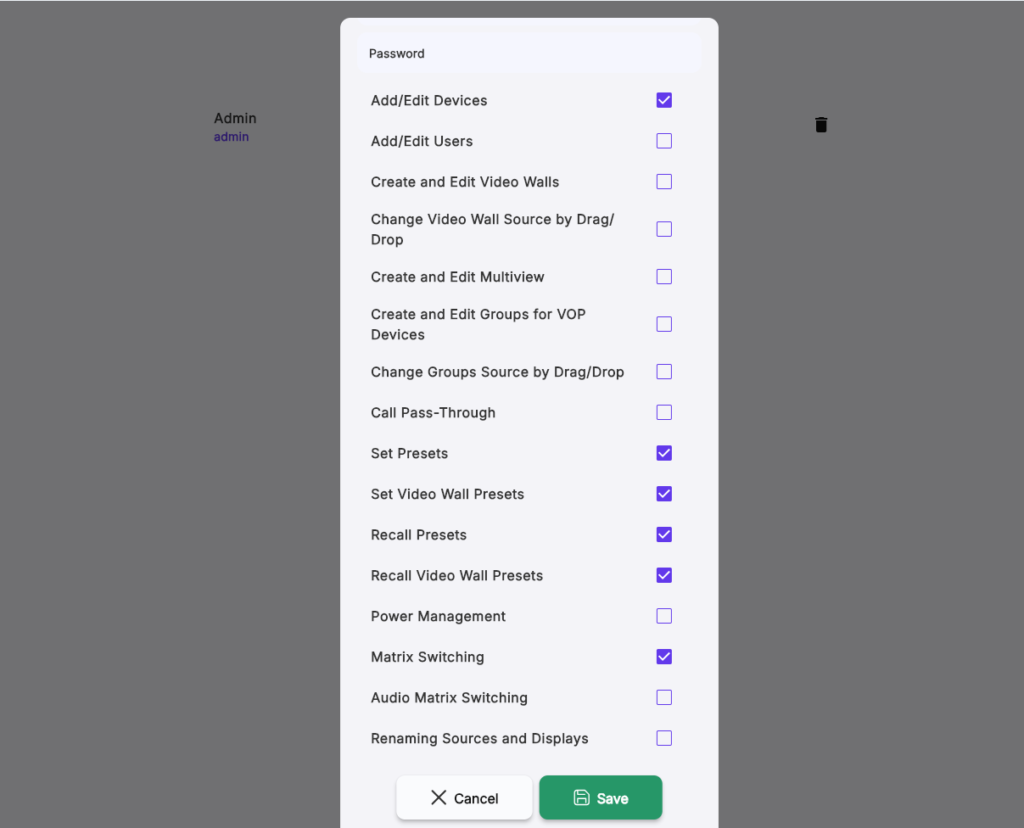
7. Set Guest User Permissions
For each guest user, select only the features you want them to have access to.
For example, you can restrict access to:
- Add/Edit Devices
- Set and Recalling Presets
- Matrix Switching
This gives the Admin control over what guest users can and cannot do:
8. Save the Guest User Setup
After entering the guest user details and selecting permissions, click Save.
Repeat this process for any additional guest users you want to create.
9. Close and Reopen the App
After all users have been created, close the app.
Reopen it to fully activate the login screen.
Once reopened, users will be prompted to log in with their assigned credentials.

8.00 a.m. - 5.00 p.m. (PST)
10.00 a.m. - 3.00 p.m. (PST)
(by appointment only)


