







How to Set Up and Control the BG-4K-88MA 8x8 Matrix via the Web GUI
The BG-4K-88MA is part of BZBGEAR's new 4K matrix series — an 8x8 matrix with eight inputs to eight outputs, supporting up to 4K at 60Hz with 4:4:4 chroma sampling. (The series also includes a 4x4 and a 16x16, so whether you need more or fewer inputs and outputs, there's a match.) This guide covers getting the unit on your network, logging into the web GUI, and using it to route your video and audio, adjust your inputs and outputs, and save presets.
Let's break it down.
A Quick Note on Control Options
There are several ways to control the BG-4K-88MA:
- IR remote
- Front panel push buttons
- Web GUI
- RS-232 for serial commands
- The Switch Control app, available on iPad, Windows, and Mac
For this guide, we'll get the unit on the network and control it through the web GUI.
Part 1: Get the Unit on Your Network
Step 1: Connect to your network
Plug the BG-4K-88MA into your network. If you're on a DHCP server, the unit will pull an IP address automatically — you just need to confirm DHCP is enabled on the unit.
Step 2: Confirm DHCP and find the IP address
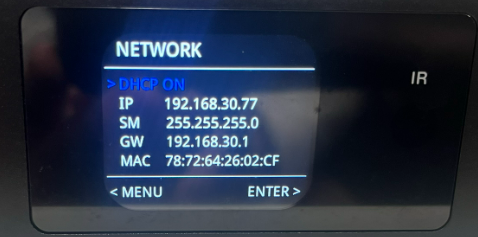
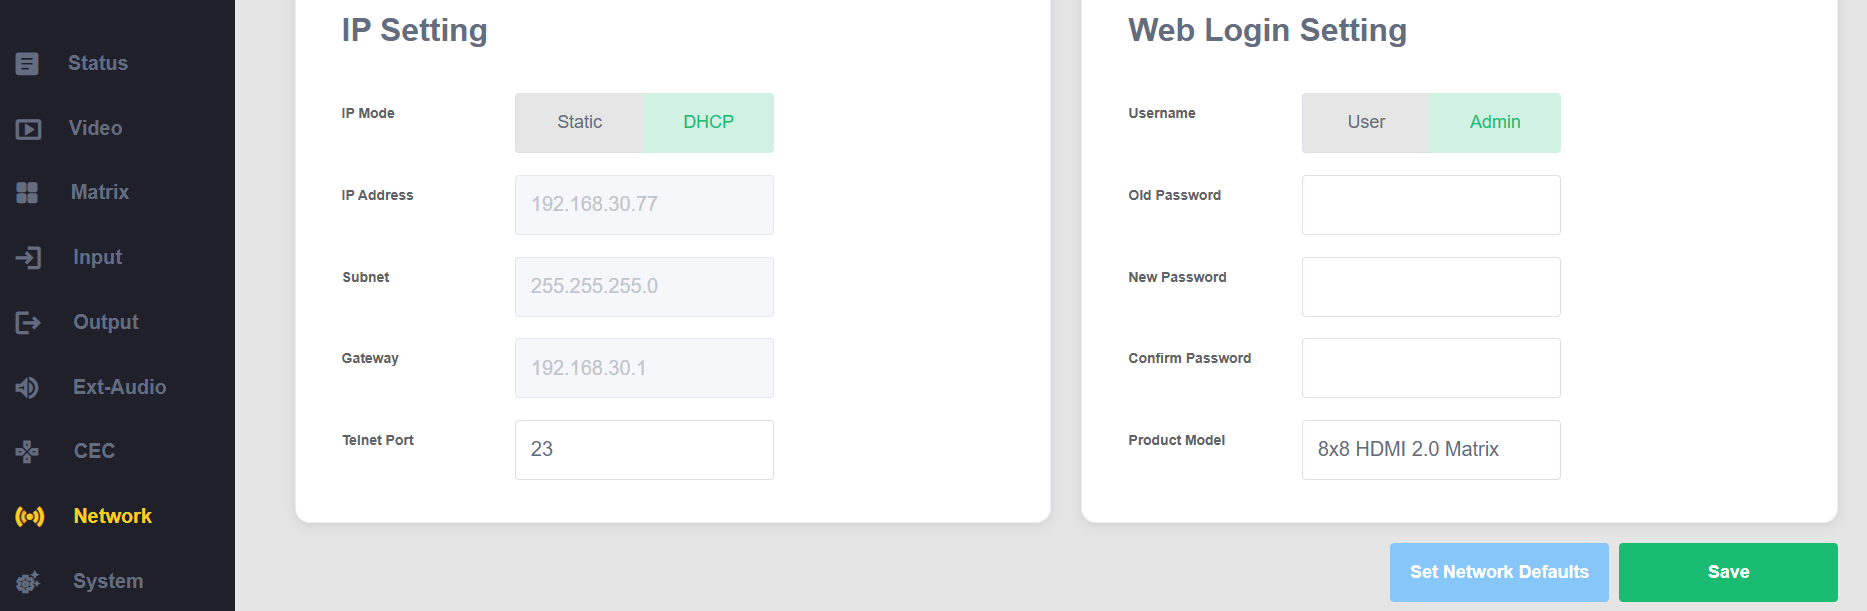
On the unit, press the Menu button, go down to Setup and hit enter, then go to Network and hit enter. Make sure DHCP is on. With DHCP enabled, the unit pulls an available IP address from your network — in our demo it came up as 192.168.30.77 (yours will differ).
Step 3: Log in to the web GUI
Enter the unit's IP address into your web browser. At the login screen, enter the default credentials — username admin and password admin — and log in.

Part 2: Get Familiar with the Status Page
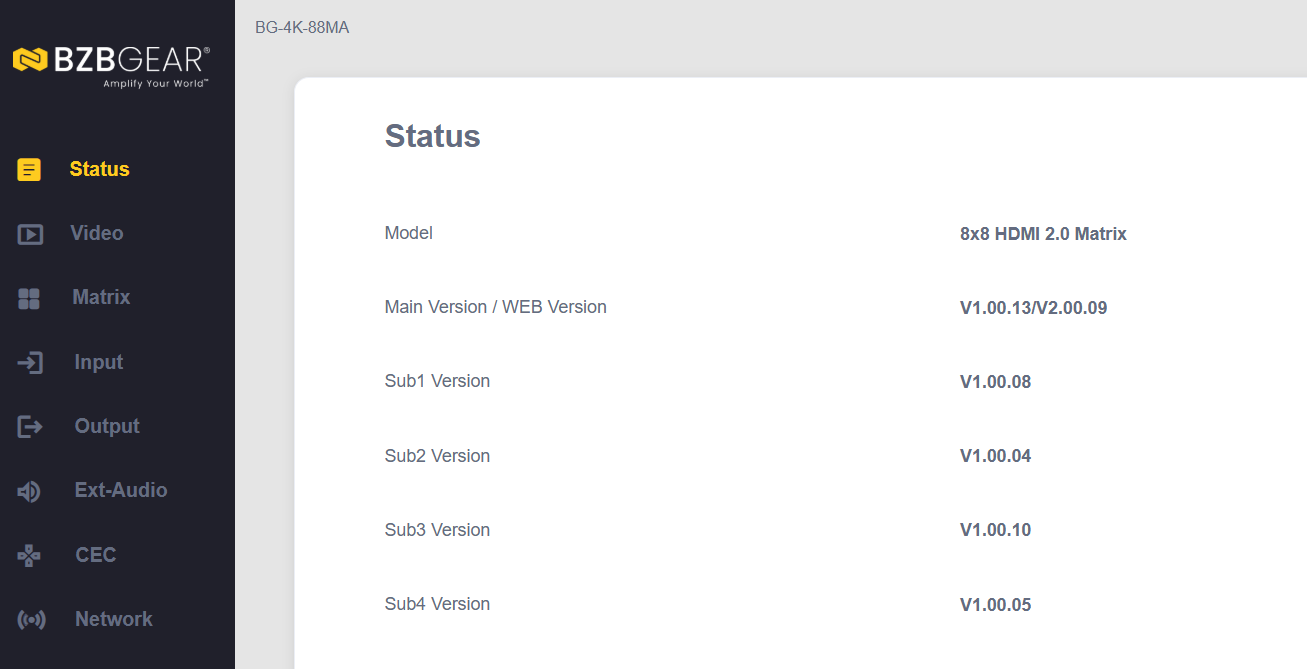
Like most BZBGEAR matrixes, the first page you'll land on is the Status page. It shows all the key information about the unit — firmware version, IP address, and even the unit's temperature so you can keep an eye on whether it's running too hot.
Part 3: Route Video and Audio in the Matrix
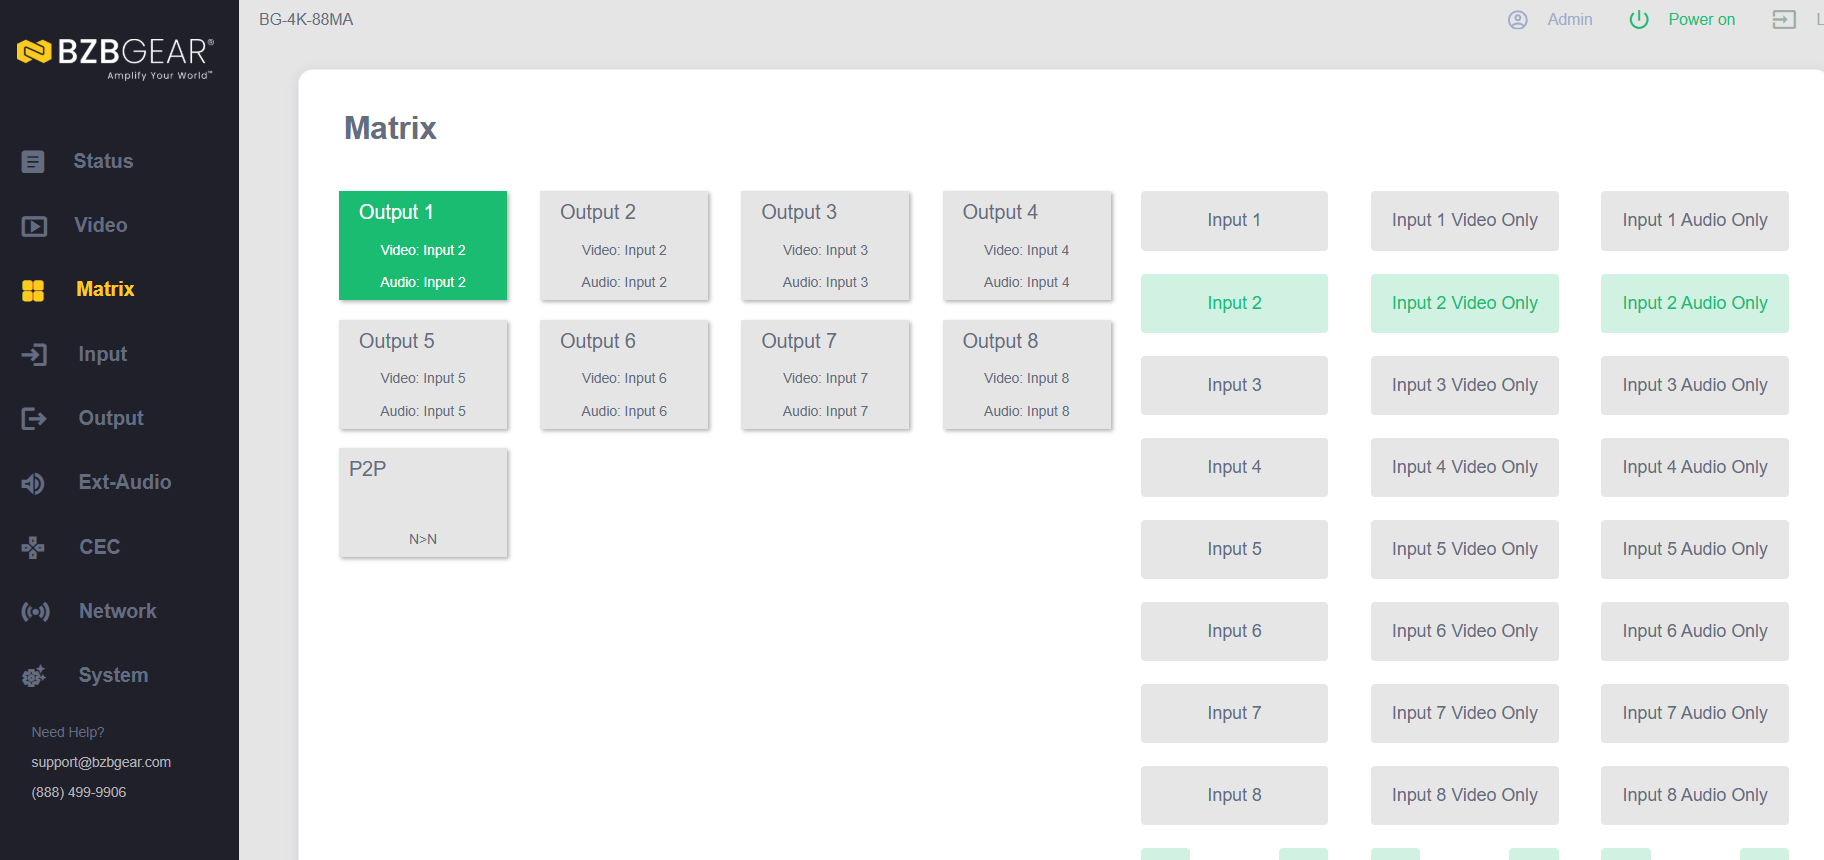
The Matrix page is where all the fun happens. Here you'll see the status of each output and route your sources to your displays.
Switch a source to an output
Pick the output you want to change, then select the source you'd like to send to it — just like any matrix. It takes only a second or two to switch.
Matrix your audio independently
One of the standout features of this unit is how easy audio matrixing is. For each output you can have the source and its audio follow together, or you can mix and match — for example, sending one source's video to an output while pairing it with the audio from a different source. The unit also supports audio de-embedding, so you can extract audio digitally or through the analog connectors on the back.
Reset to point-to-point
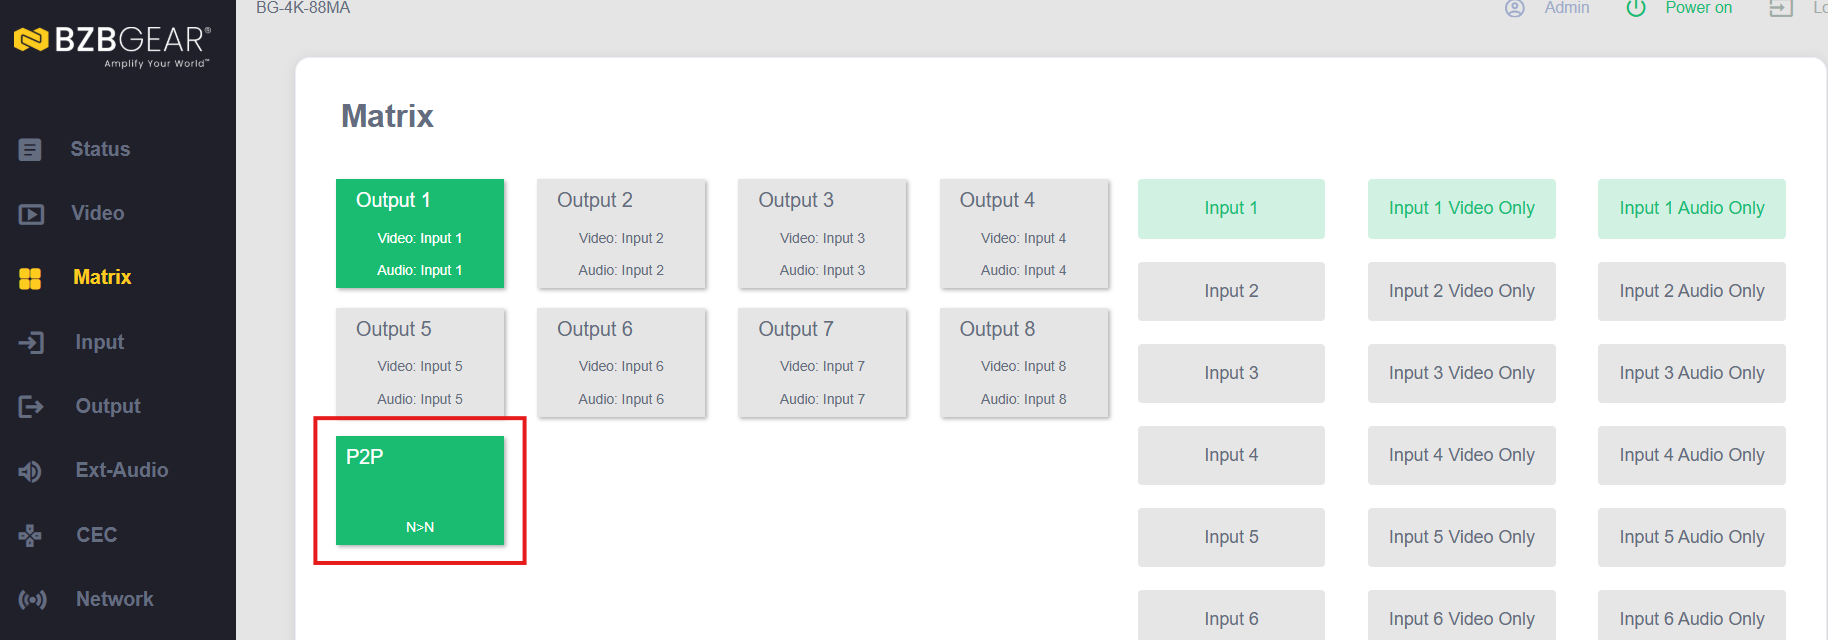
Need to get back to a clean default? Click the PTP (point-to-point) button and hit OK, and everything returns to a 1-to-1 routing — Input 1 to Output 1, and so on.
Part 4: Configure Your Inputs
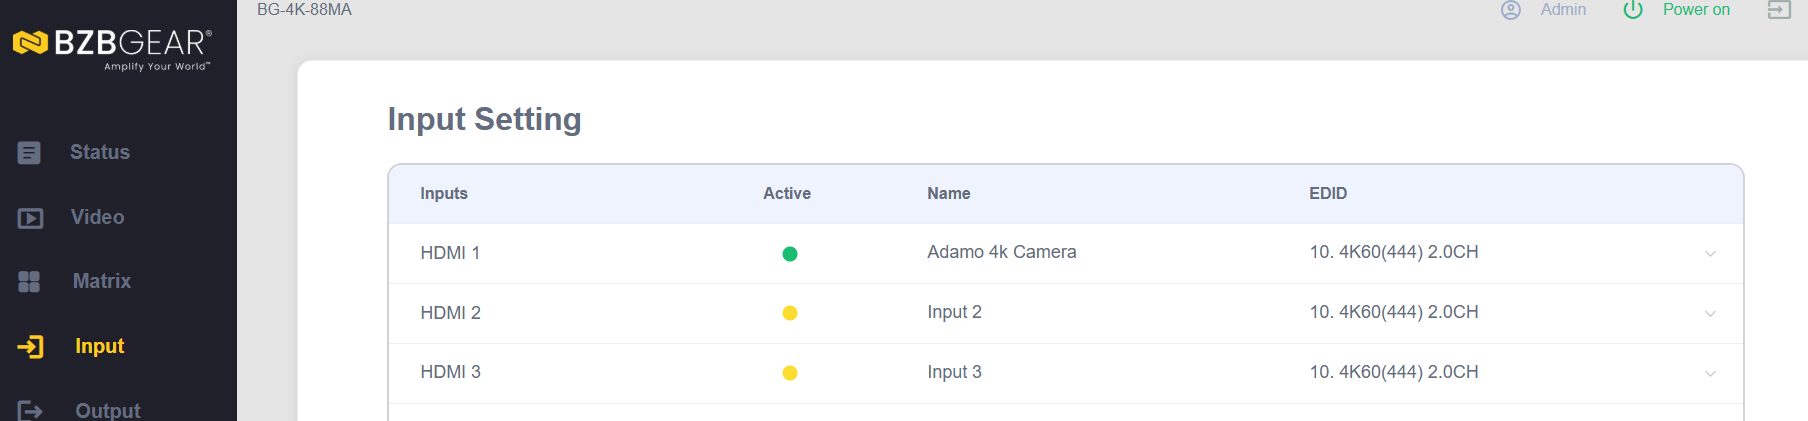
On the Input tab, you can set up each input. Rename your inputs so you always know what's what, and adjust the EDID for each one — there are plenty of options, from 4K all the way down to 1080p, along with HDR support and different audio channel configurations.
Part 5: Configure Your Outputs
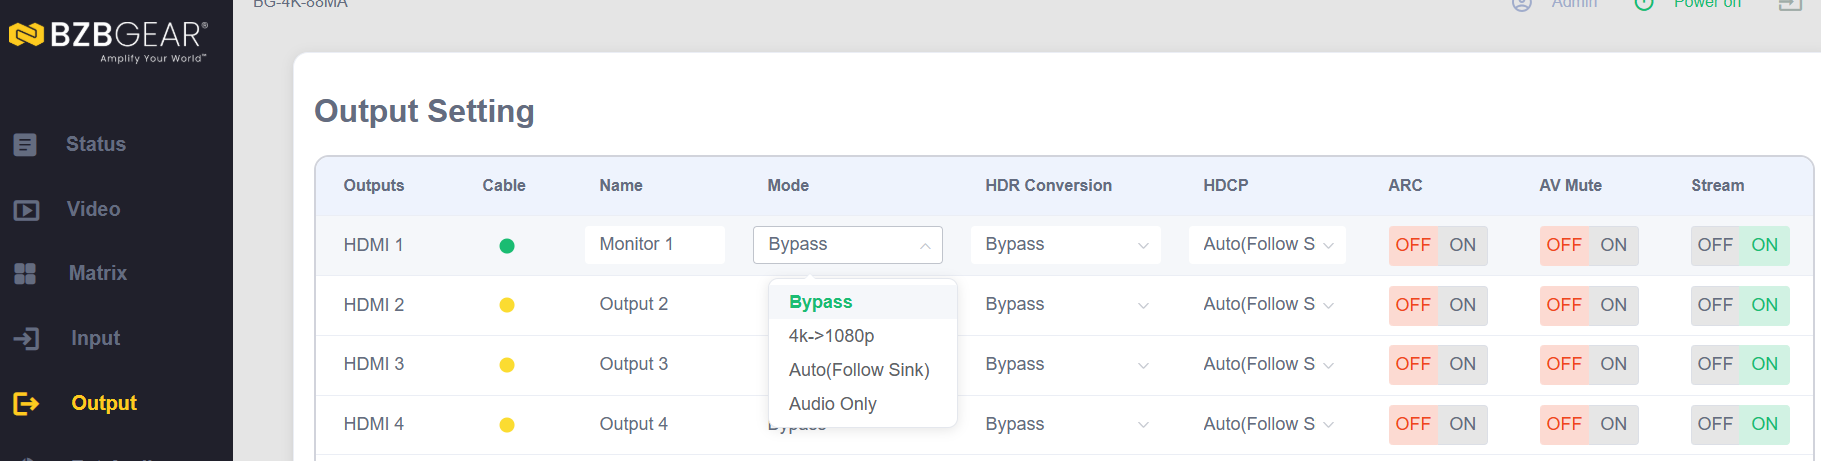
On the Output tab, you can label each output — handy when your displays are spread across a building, so you can name them things like "Ballroom 2" or "Hallway 1."
You'll also find a range of output settings, including:
- Downscaling from 4K to match a source or display
- Follow sync and HDR options
- An HDCP option that's worth checking if you run into display issues
- ARC support, to extract audio from a smart TV
- The ability to mute an output's audio
Part 6: Fine-Tune Your Audio
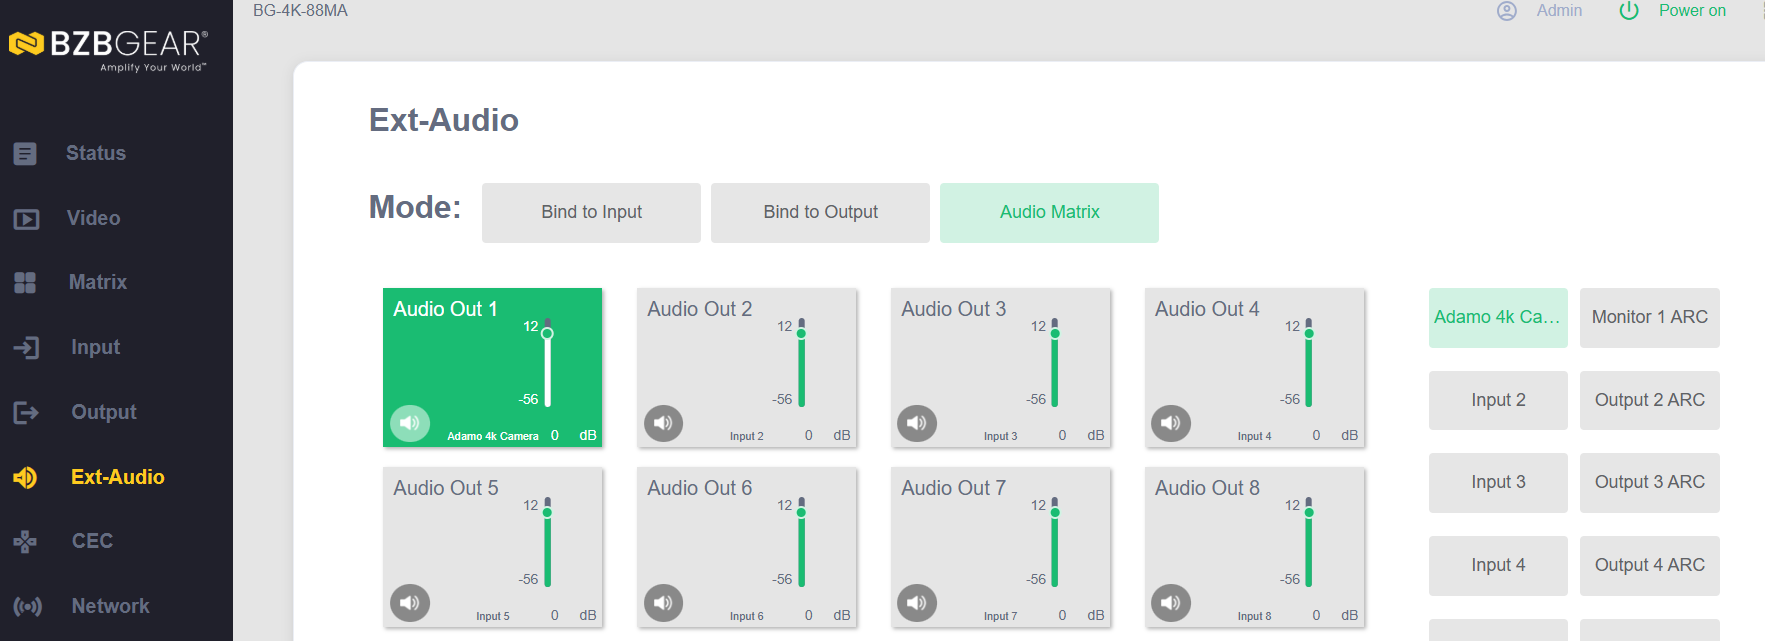
There's also a dedicated audio matrixing page where you can individually adjust the sound for each output when you're extracting audio. Head to Audio Matrix to select where each output's audio comes from — for example, pulling the audio for Output 4 from its ARC source. It makes managing audio across your outputs quick and easy.
Part 7: Save Presets and Adjust System Settings
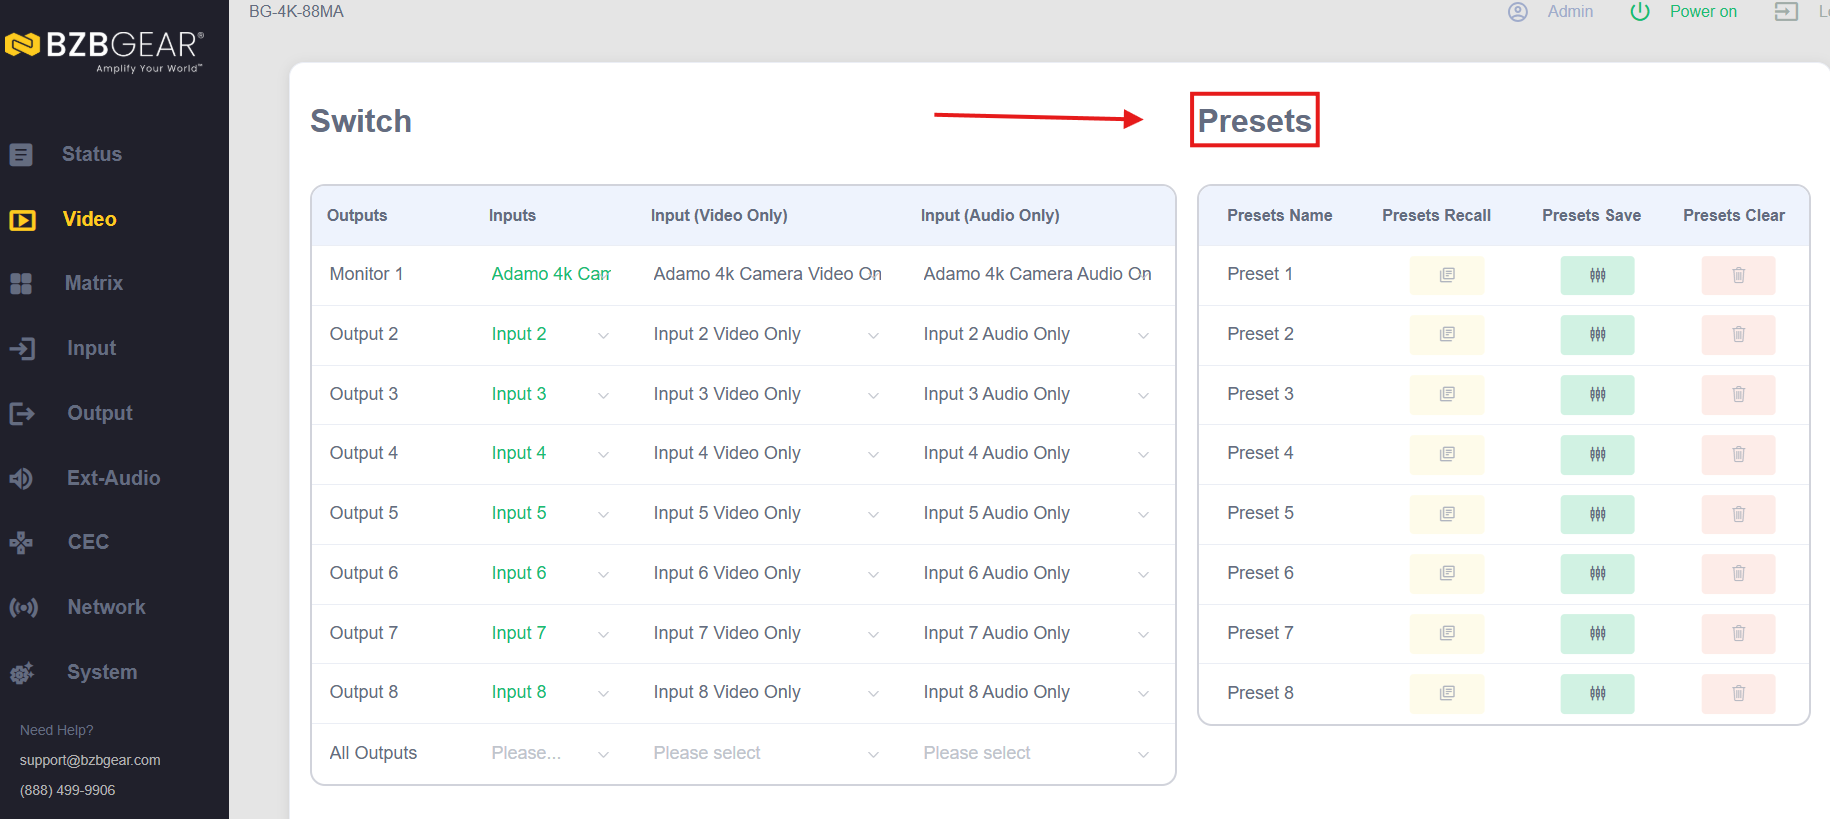
Presets. On the Video page you can save your routings so switching between setups is quick and repeatable later.
Network Settings. On the Network page, you can adjust your IP settings (static or DHCP) as well as adjust login settings (change password, create user accounts).
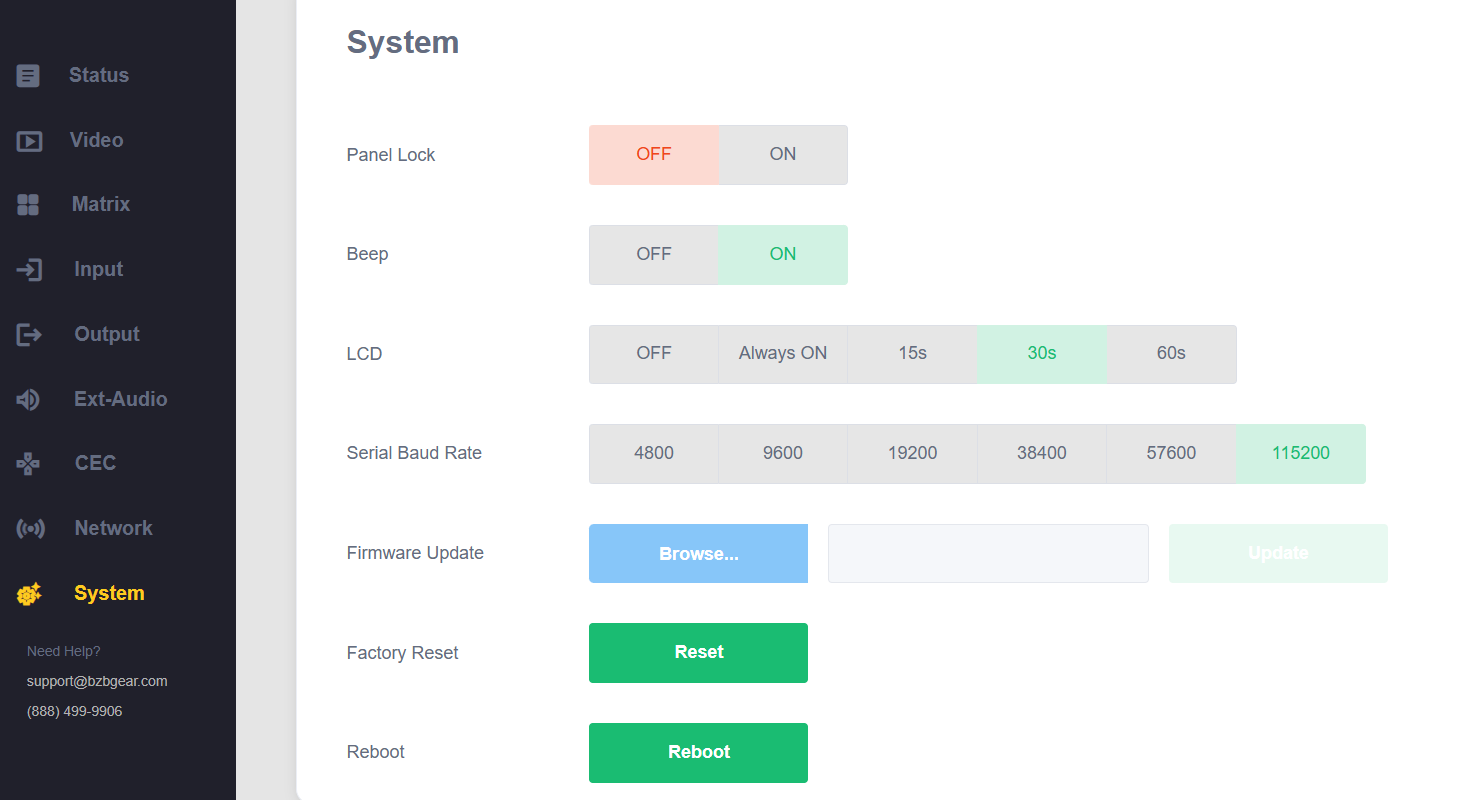
System settings. The System page covers the basics — including the option to turn off the unit's beep (handy, since it can be loud, though useful in a noisy environment), plus factory reset and firmware updates.
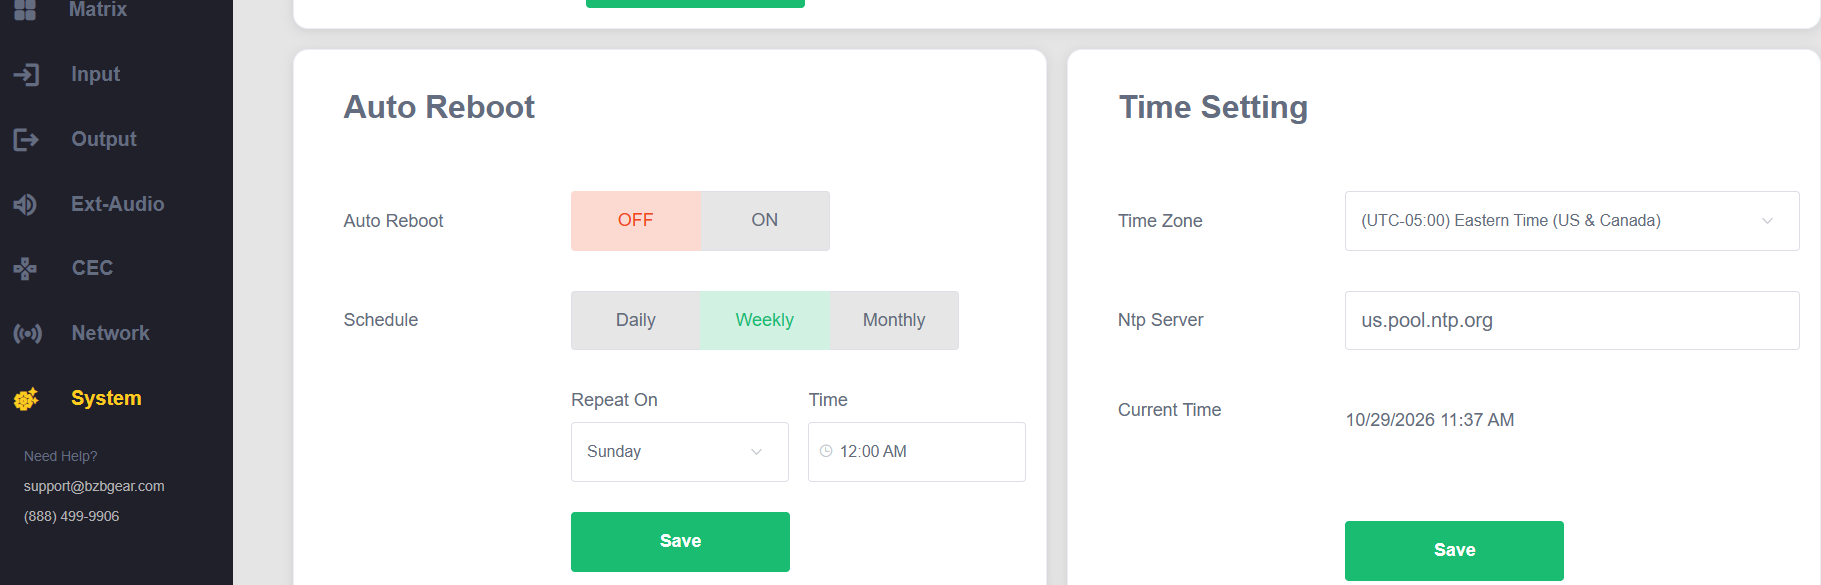
It also has the option to set an Auto Reboot Scheduler to automatically reboot the unit consistently at a desired timeframe.
That's How Simple It Is
That's the BG-4K-88MA — get it on your network, log into the web GUI, and you've got full control of your video and audio routing, EDID and output settings, audio extraction, and presets. Like the rest of BZBGEAR's matrixes, it's built to be easy to use.
Need a Hand?
If you run into any installation or technical questions along the way, our support team would love to help you get over any speed bumps. They can be reached at support@bzbgear.com For more details on the BG-4K-88-MA and the rest of the BZBGEAR lineup, visit BZBGEAR.com.


8.00 a.m. - 5.00 p.m. (PST)
10.00 a.m. - 3.00 p.m. (PST)
(by appointment only)
