





How to Encode an HDMI Camera to an NDI Stream with the BG-STREAM-DE
Got a great HDMI camera that isn't NDI enabled, but you want to bring it into your NDI ecosystem? You don't have to replace it. This guide walks you through using the BG-STREAM-DE to take a straight HDMI source — like a 4K camera with no built-in network protocols — and encode it into an NDI stream your whole network can use.
The BG-STREAM-DE is a versatile stream encoder and decoder. As an encoder, it takes an HDMI (or SDI) input and converts it into a network streaming protocol like NDI, Dante, or RTSP. That means a plain HDMI camera can join your NDI or Dante world without swapping hardware. It also handles line-in audio embedding and audio extraction, and it can even record — but all the magic happens inside its web interface. For this walkthrough, we're focusing on taking a non-NDI HDMI camera and encoding it to NDI.
Let's break it down.
What You'll Need
Before you start, make sure you have the following ready:
- A BG-STREAM-DE encoder/decoder
- An HDMI camera or source (for this demo, we're using a straight BG-ADAMO 4K camera that isn't NDI or Dante enabled)
- A network switch and your local network (the BG-STREAM-DE is PoE-powered and DHCP-enabled, so it powers over Ethernet and grabs a local IP automatically)
- A computer connected to the same local network, with NDI Tools / Studio Monitor installed to verify the stream
- An HDMI cable to connect your camera to the encoder
The key thing to remember: every device — the camera, the encoder, and your computer — needs to be on the same local network so they can talk to each other.
Part 1: Connect Everything to the Network
Step 1: Connect your HDMI source
Run an HDMI cable from your camera's HDMI output into the HDMI IN on the BG-STREAM-DE. This is the signal the unit will encode. (The BG-STREAM-DE also has an SDI input, so you can embed over that type of signal as well.)
Step 2: Connect the BG-STREAM-DE to the network
Plug the BG-STREAM-DE into your network switch. It's PoE-powered, so a single Ethernet cable handles both power and the network connection, and DHCP assigns it a local IP address automatically.
Step 3: Put your computer on the same network
Connect your computer to the same local network. You'll use it to log into the encoder's web interface and to confirm the NDI stream in NDI Studio Monitor.
Part 2: Log In to the BG-STREAM-DE Web GUI
Step 1: Find the unit's IP address
The BG-STREAM-DE is DHCP-enabled out of the box, so it grabs a local IP as soon as it's on your network — just run a simple network scan to find it. You can also connect the HDMI output of the STREAM-DE to a local monitor and after a reboot, the current IP address will display for a brief moment. For our example, the ip address of our BG-STREAM-DE is 192.168.30.141. The IP address of your device will be different depending on your network setup.
Step 2: Open the web interface
Type the unit's IP address into your web browser's address bar and hit Enter.
Step 3: Log in
Enter the default credentials:
- Username: admin
- Password: 0000
Hit login, and you're in.
Part 3: Confirm Your HDMI Source
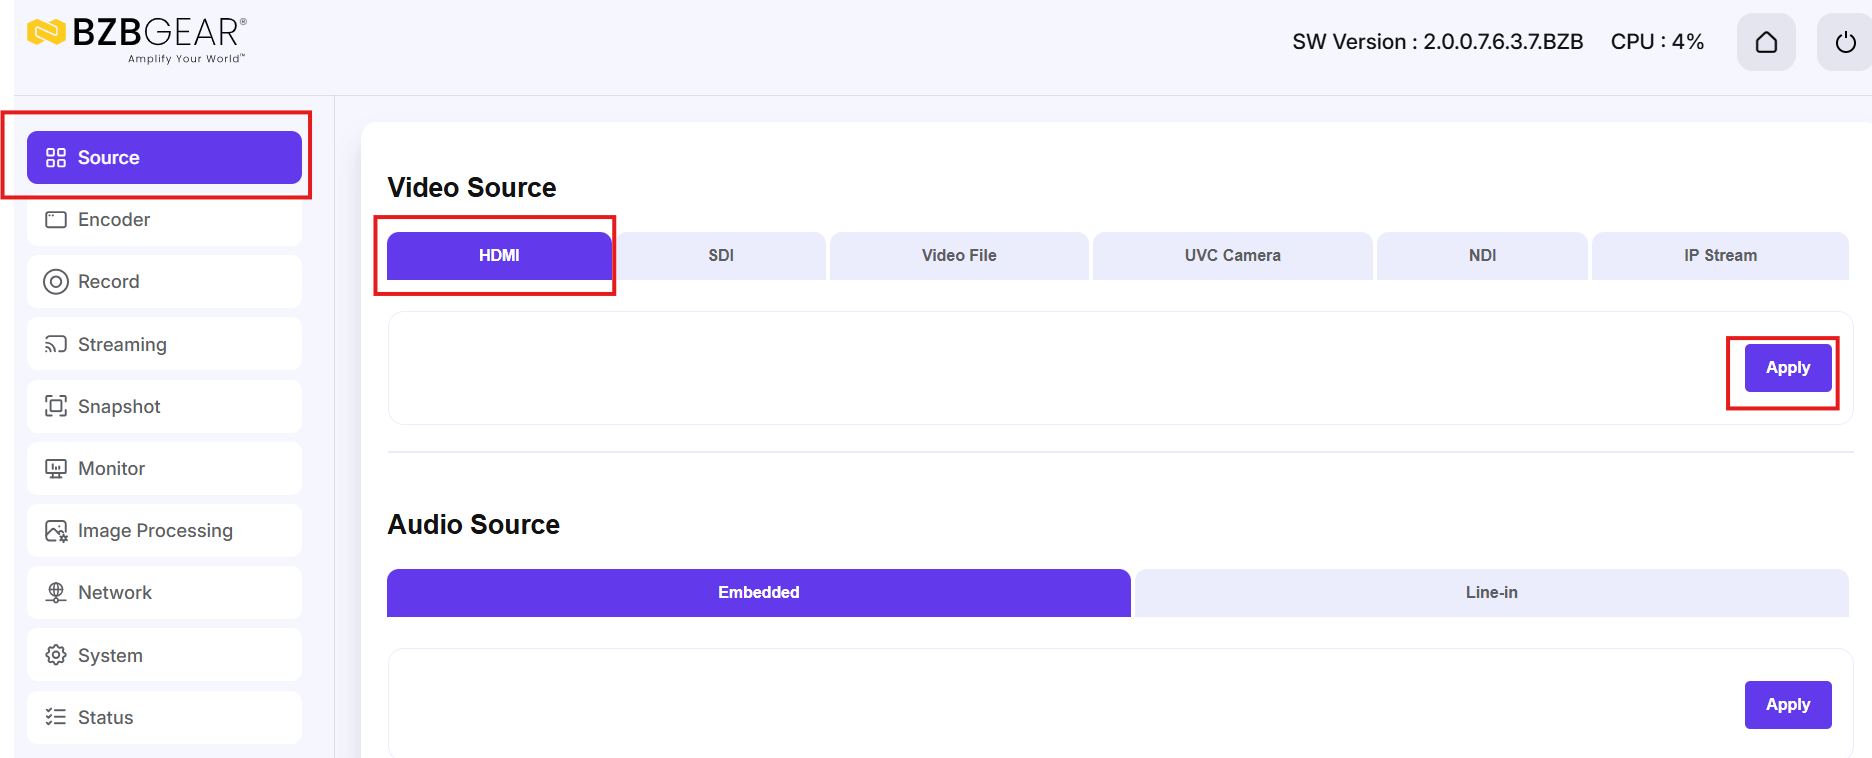
Before you encode anything, make sure the unit is pulling from the correct input. On the Source page, set your source to HDMI and hit Apply. The unit may reboot as it makes the switch — that's normal — and then your HDMI input is confirmed and ready to encode.
Part 4: Encode to NDI
Step 1: Open the Streaming page
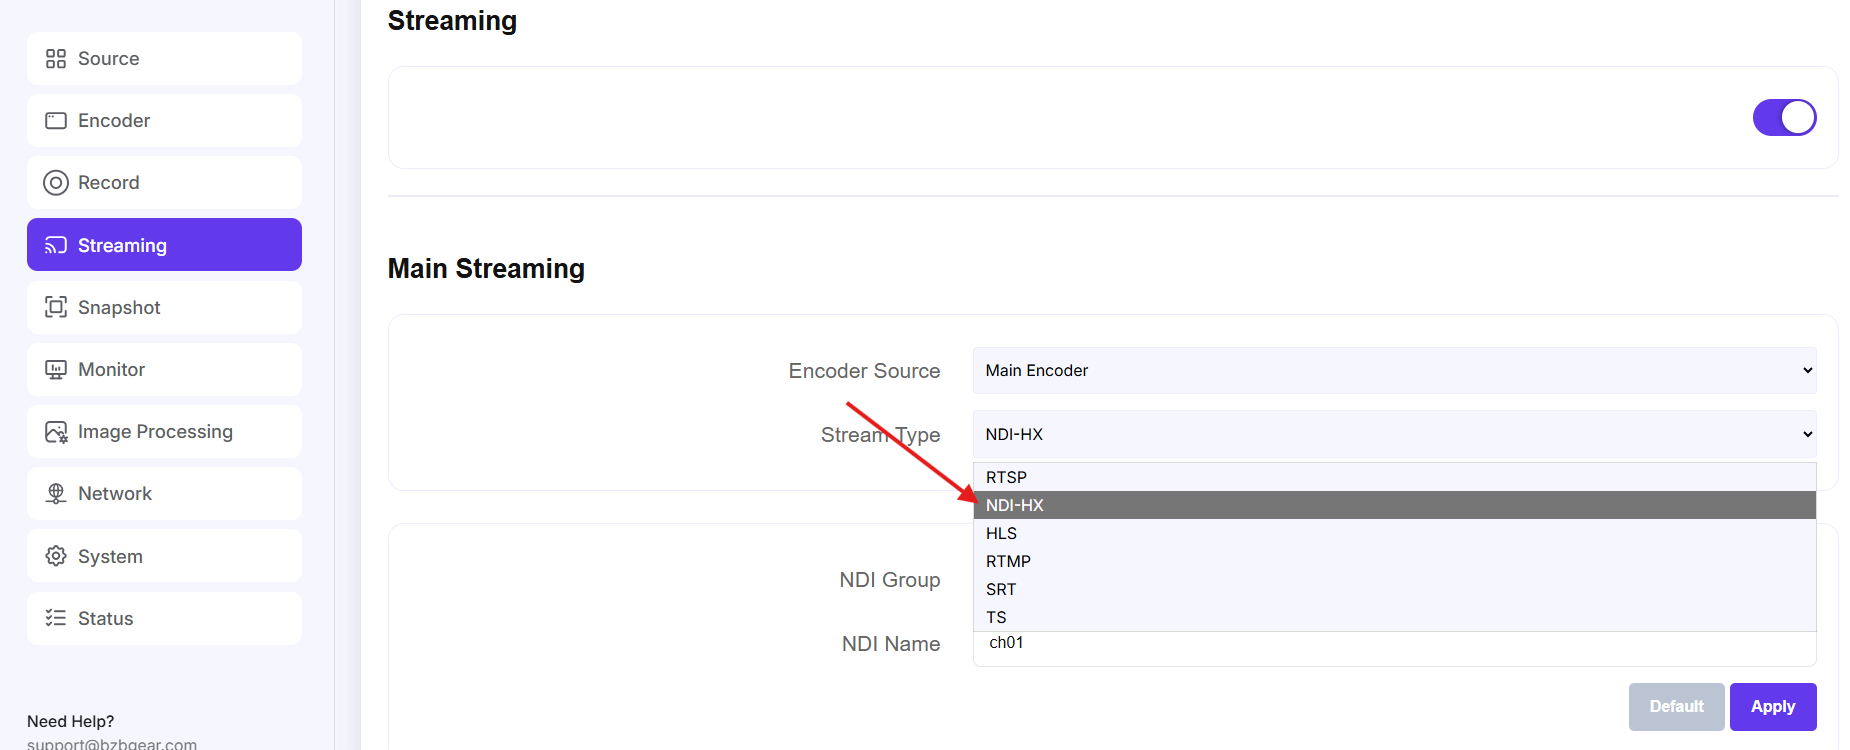
Head to the Streaming page. This is where you take the HDMI source coming into the unit and encode it into the network protocol of your choice.
Step 2: Select NDI
Choose NDI as the protocol you want to encode the hdmi source.
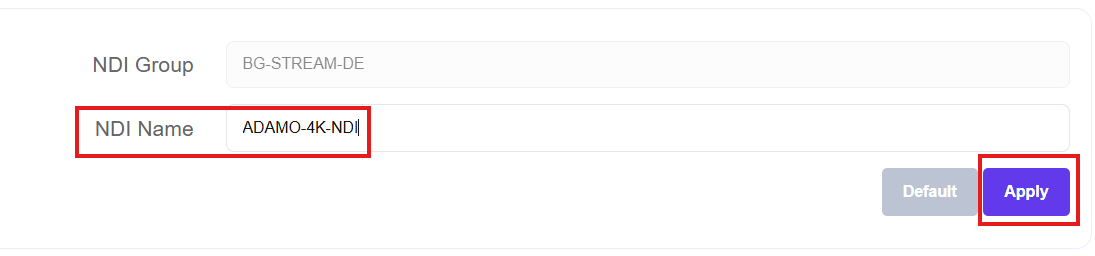
Step 3: Name your stream
Give your stream a name — this is what it will show up as on the network, so pick something you'll recognize (for example, the camera or location). Note that the group name is automatically the name of the unit.
Hit Apply to confirm the settings:
Step 4: Turn on the stream
Switch the streaming toggle to on to begin encoding. The toggle switch will be grayed out when active:

Your plain HDMI camera is now published as an NDI source on your network.
Part 5: Verify in NDI Studio Monitor
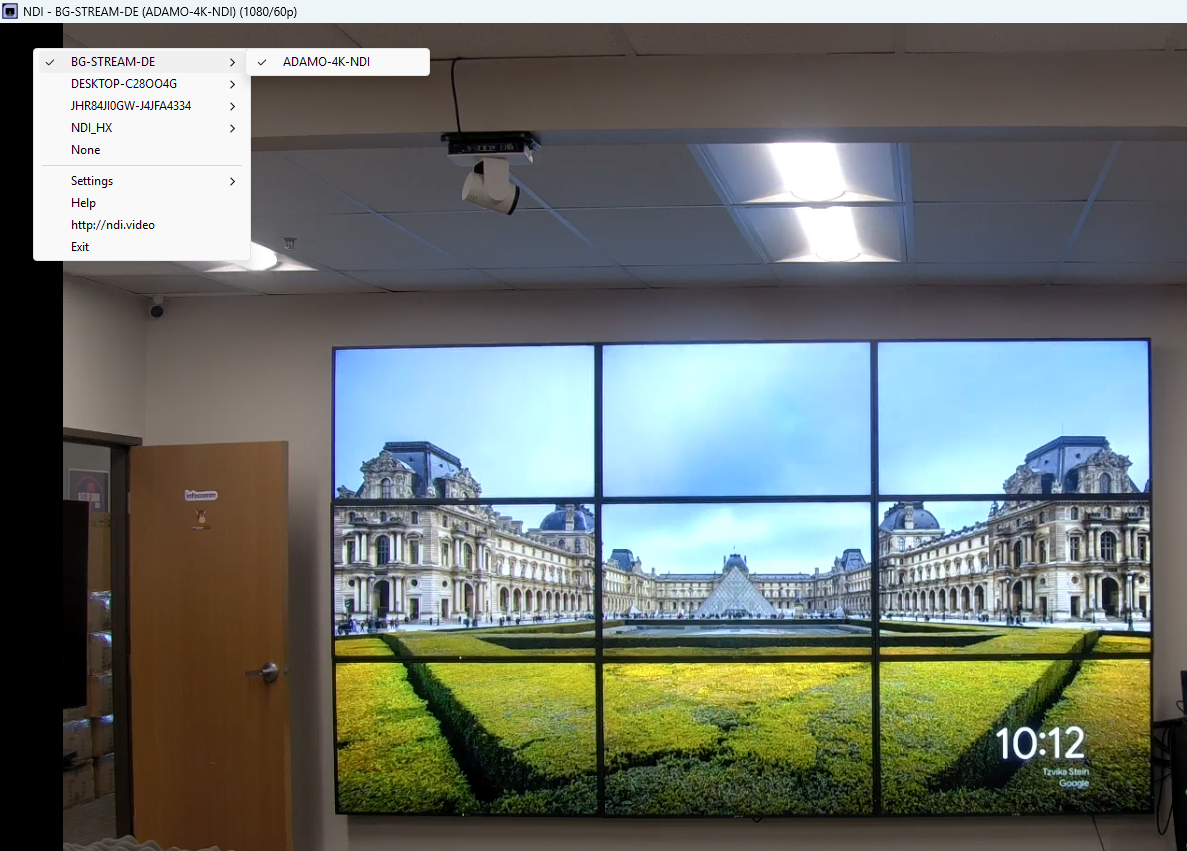
Open NDI Studio Monitor on your computer and browse your available NDI sources. Your newly encoded stream should appear in the list — select it, and your HDMI camera's feed shows up as a full NDI source. That's it: a camera that was HDMI-only is now officially an NDI camera on your network.


8.00 a.m. - 5.00 p.m. (PST)
10.00 a.m. - 3.00 p.m. (PST)
(by appointment only)