


How to Create Video Walls with the Latest Switch Control App Update
In this article, we will go over how to create video walls in the BZBGEAR Switch Control application using the latest update. The process is slightly different from previous versions, so this guide provides a clear step-by-step walkthrough.
The workflow is the same for all supported BZBGEAR video wall processors in the Switch Control App, including:
- BG-4K-VP series
- BG-MVS series
- Other supported models
For this example, we will use the BG-4K-VP44.
1. Open the App and Connect to the Processor
Start by opening the BZB Switch Control app.
From the supported device list:
- Select your video wall processor
- Connect to the unit using its IP address
Once connected, you will be ready to create a video wall layout:

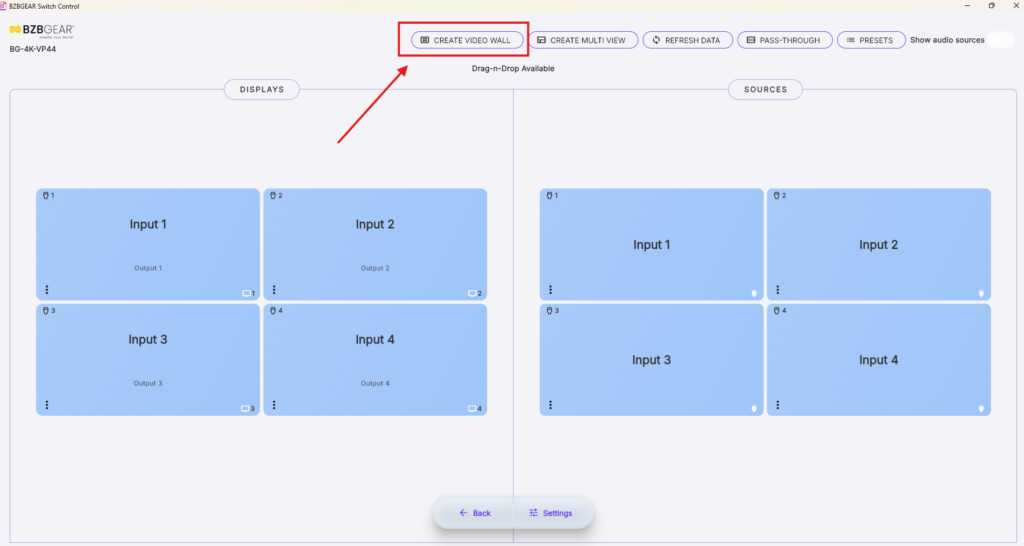
2. Select Create Video Wall
At the top of the app, click Create Video Wall.
This opens the video wall setup interface:
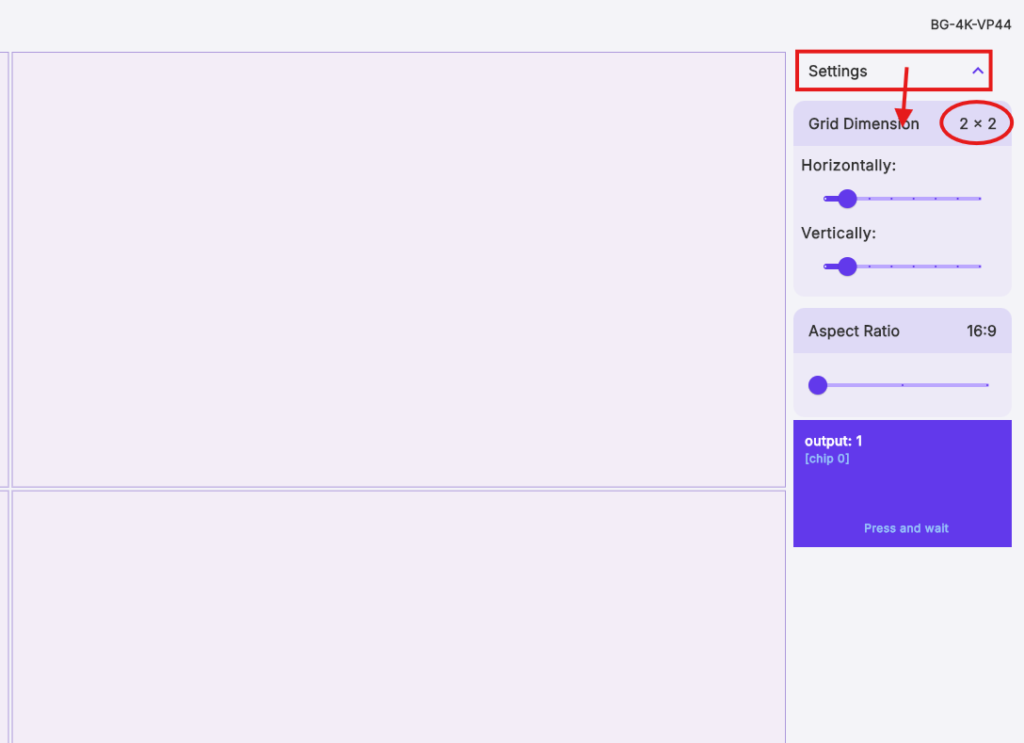
3. Set the Video Wall Layout Size
Next, choose the layout size you want to use, such as:
- 2x2
- 3x2
- 3x3
For this example, we will create a 2x2 video wall.
To set the layout:
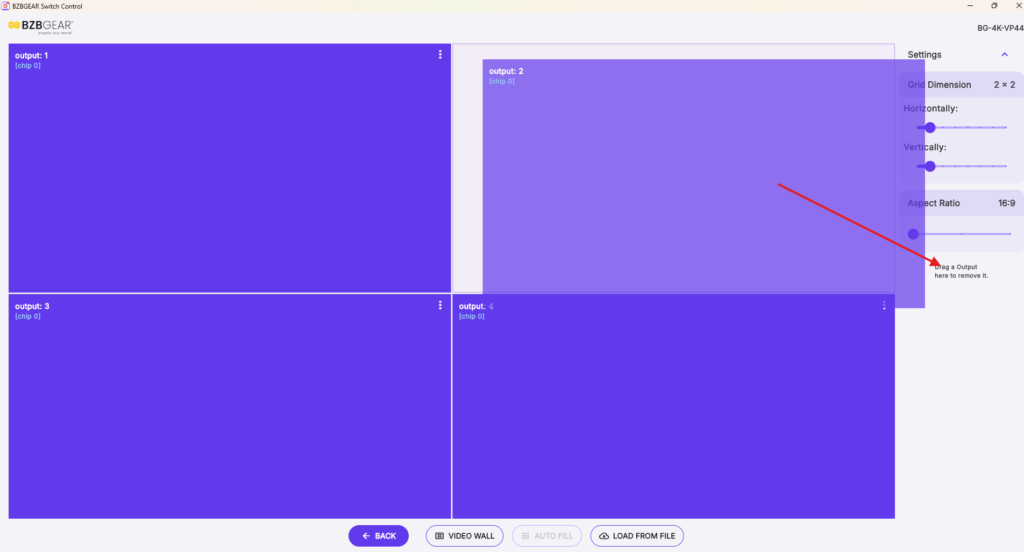
- Click Settings in the top-right corner
- Adjust the horizontal and vertical grid size using the sliders
- Set the grid to 2x2
As you make these changes, the video wall layout grid will update automatically:
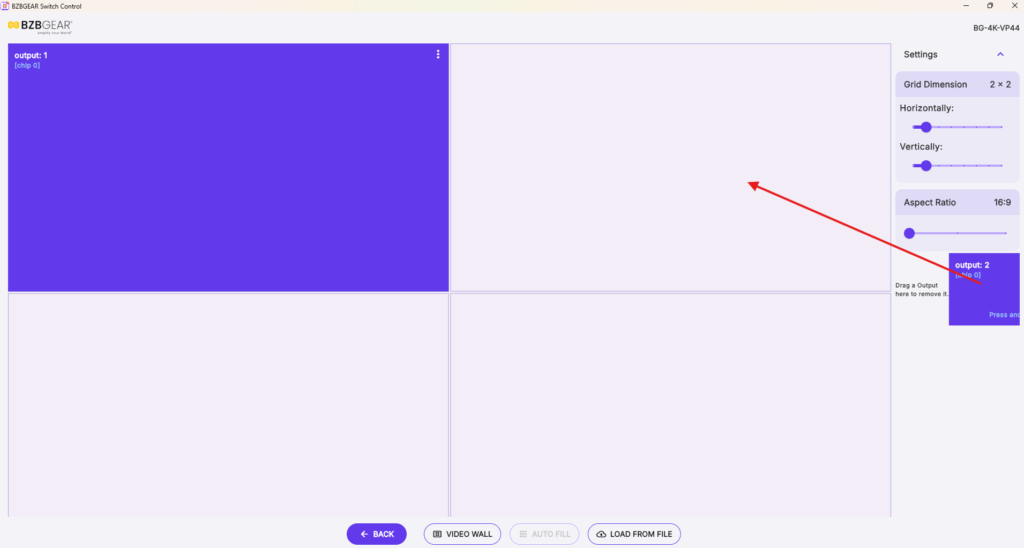
4. Assign Displays to the Layout
Now fill the layout with the displays you plan to use.
There are two ways to do this:
Option 1: Drag Outputs Manually
Drag each output one by one into the desired position on the layout grid:
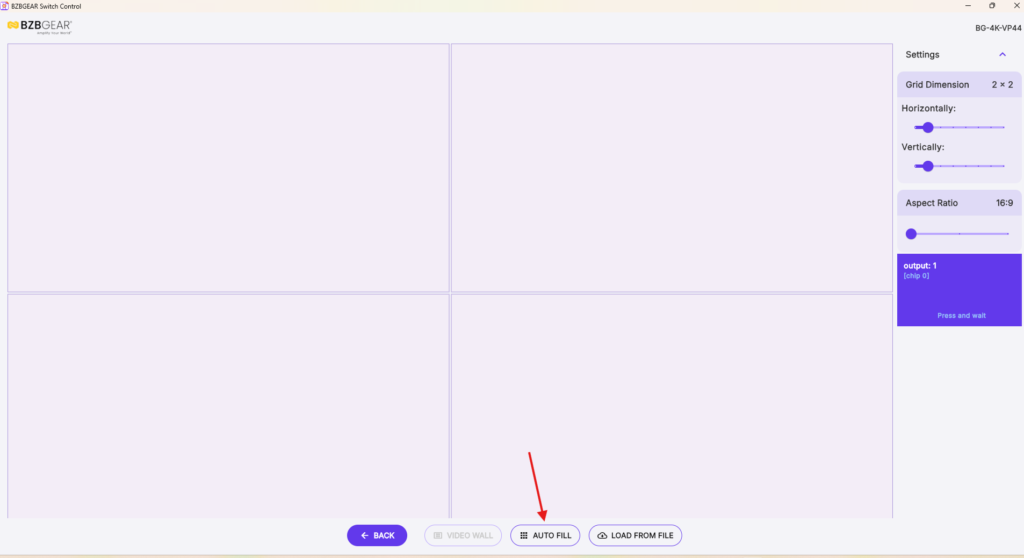
Option 2: Use Auto Fill
Click Auto Fill at the bottom of the screen to automatically place all displays into the layout.

Note:
If you need to remove an output, click and drag it to the section labeled “Drag an Output to remove it.”
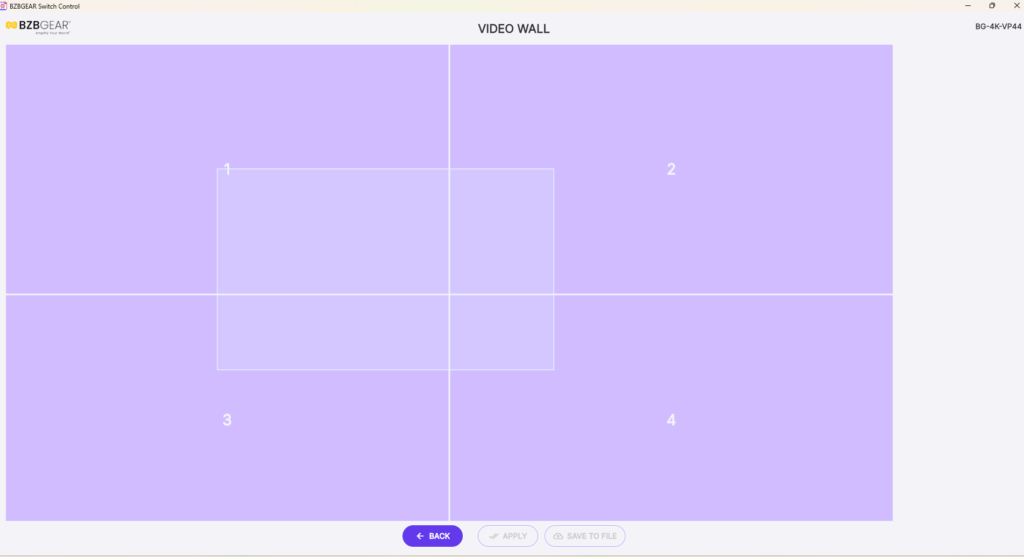
5. Open the Video Wall Configuration Page
Once the layout and displays are set, click the Video Wall button at the bottom of the screen.
This opens the page where you define the active video wall area:

6. Create the Video Wall
To create the 2x2 video wall:
- Click and drag a box from Output 1 to Output 4
- Highlight all 4 displays in the layout:
This will open the Video Wall Settings window.
7. Configure the Video Wall Settings
In the settings window, you can:
- Enter a Video Wall name
- Select the input source for the video wall
- Adjust bezel settings if needed:
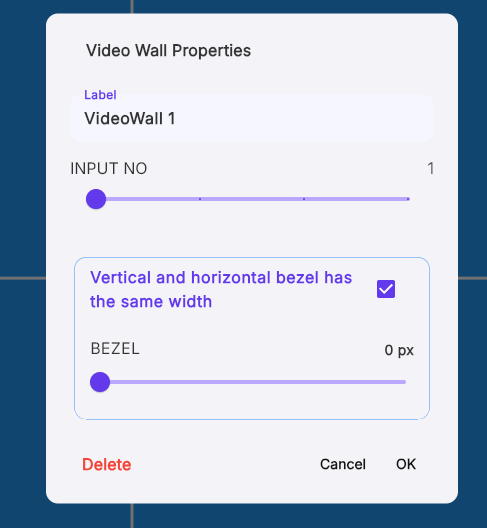
After entering the desired settings, click OK at the bottom.
Once saved, a Video Wall button will appear in the top-right corner. You can click this button later if you need to make adjustments.
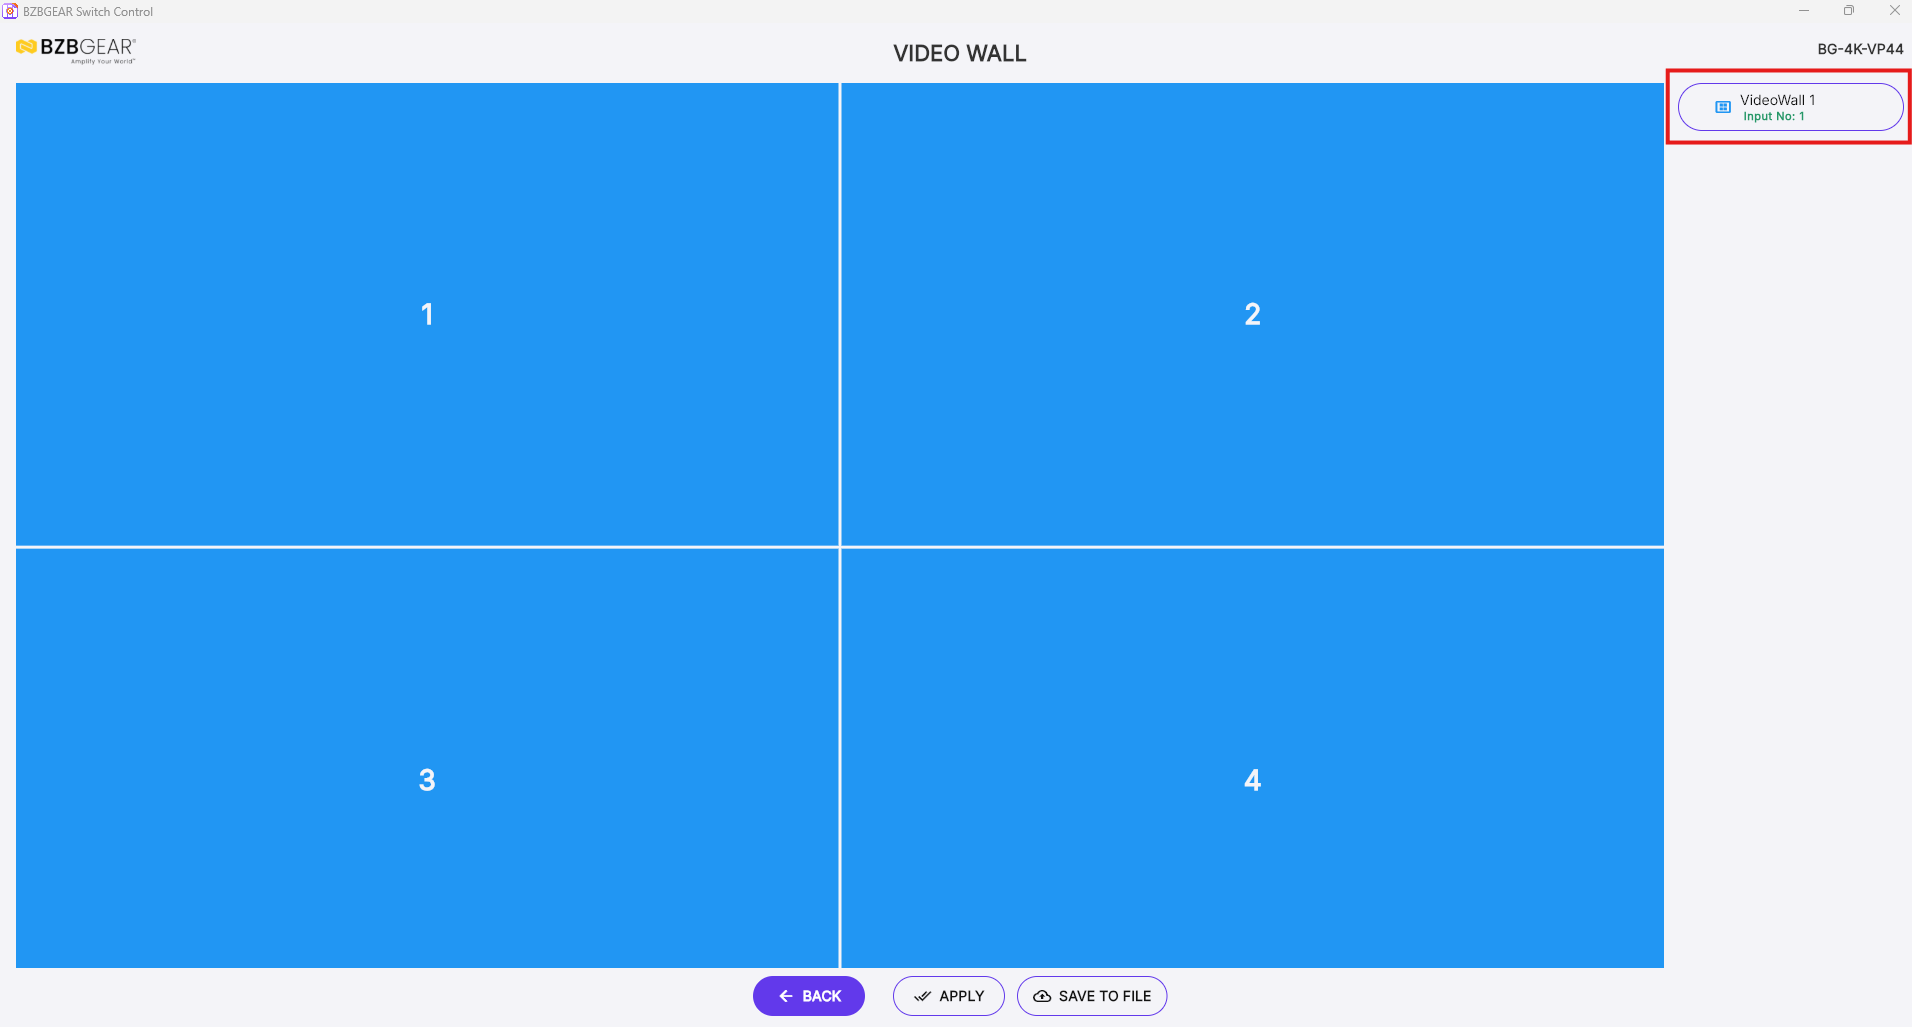
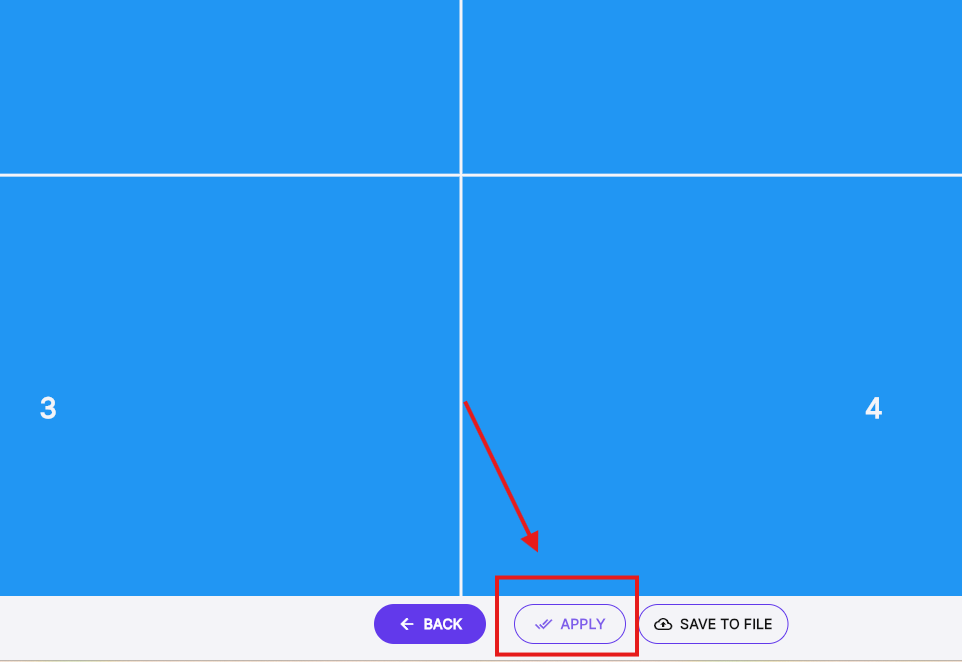
8. Apply the Video Wall
After everything is configured, click Apply at the bottom of the screen.
This activates the video wall:
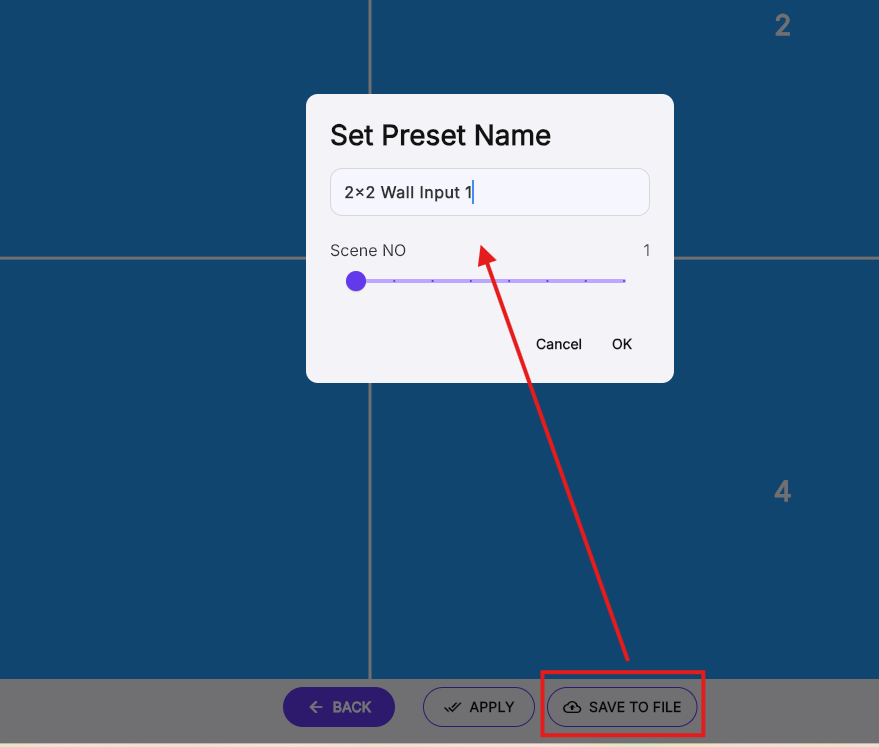
9. Save the Video Wall as a Preset
To make the video wall easy to recall later, save it as a preset.
To do this:
- Click Save to File at the bottom
- Enter a name for the preset
- Choose the preset number
- Click OK
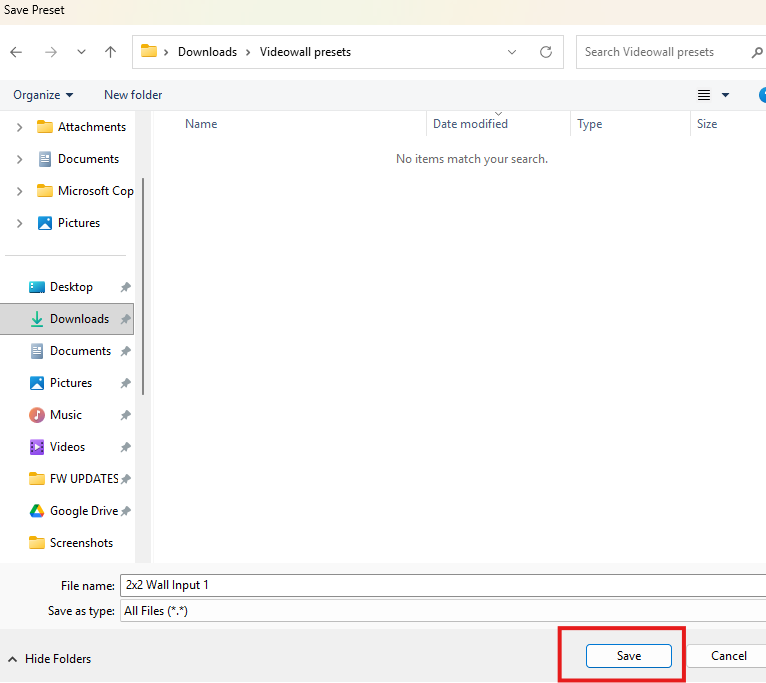
The app will then prompt you to save the preset file to your computer so it can be loaded again later.
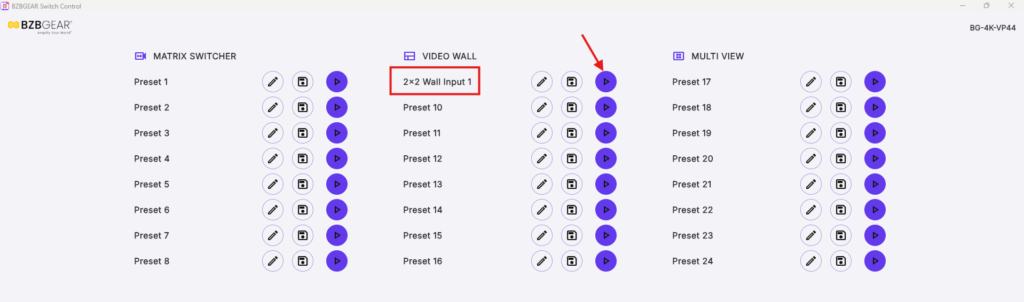
10. Recall the Preset Later
After saving, you can go back to the main page of the app and select the preset from the preset list.
For the BG-4K-VP44, saved video wall presets will appear under the VIDEO WALL section.
To recall a preset:
- Locate it in the VIDEO WALL section
- Click the Play button
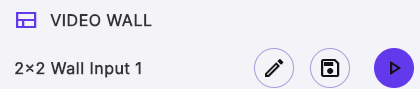
11. Edit or Overwrite a Preset
You can also manage saved presets directly in the app.
Available options include:
- Pencil icon to edit the preset name
- Save Disk icon to overwrite the preset with updated settings
12. Create Additional Video Wall Layouts
To create more video wall layouts with different sources or configurations, simply repeat the same process.
This allows you to save and recall multiple video wall presets as needed.
8.00 a.m. - 5.00 p.m. (PST)
10.00 a.m. - 3.00 p.m. (PST)
(by appointment only)


