







How to Encode HDMI signal to NDI-HX with the BG-STREAM-NE
This guide explains how to use the BG-STREAM-NE to encode an HDMI source, such as a PTZ camera, into an NDI-HX source that can be routed and viewed on your local network.
The BG-STREAM-NE supports multiple streaming protocols, including NDI-HX, RTSP, RTMP, SRT, and more. This guide focuses specifically on converting an HDMI source to NDI-HX.
Part 1: Connect the Source
Step 1: Connect the HDMI source
Connect the HDMI output from your source device to the HDMI input on the BG-STREAM-NE.
Example source:
BG-ADAMO-4K PTZ Camera
In this example, the camera is not a native NDI camera. The BG-STREAM-NE is used to convert the HDMI signal into an NDI-HX stream.
Step 2: Connect the BG-STREAM-NE to the network
Connect the BG-STREAM-NE to your local network using Ethernet.
The BG-STREAM-NE supports PoE, so it can be powered through a PoE network switch. This makes setup easier because a separate power cable is not required.
Setup review:
- HDMI camera connected to the BG-STREAM-NE via HDMI cable
- BG-STREAM-NE connected to a PoE network switch via Cat cable
- Laptop connected to the same local area network via Cat cable
Step 3: Make sure your computer is on the same network
Connect your laptop or computer to the same local network as the BG-STREAM-NE.
This allows the computer to access the BG-STREAM-NE web GUI and detect the NDI-HX stream using NDI software.
Part 2: Log In to the BG-STREAM-NE Web GUI
Step 1: Find the encoder’s IP address
By default, the BG-STREAM-NE is set to DHCP. It will automatically receive an IP address from the local network if DHCP is enabled.
To find the assigned IP address, use a network scanner. Advanced IP Scanner is a great option for Windows. You can identify the device by its MAC address or local network information.

Example IP address:
192.168.30.242
Your IP address will be different depending on your network.
Step 2: Open the web GUI
- Open a web browser.
- Enter the BG-STREAM-NE IP address into the address bar.
- Press Enter.
Step 3: Log in
Use the default login credentials:
Username: admin
Password: 0000
After logging in, you will be taken to the BG-STREAM-NE web interface.
Part 3: Confirm the HDMI Input Signal
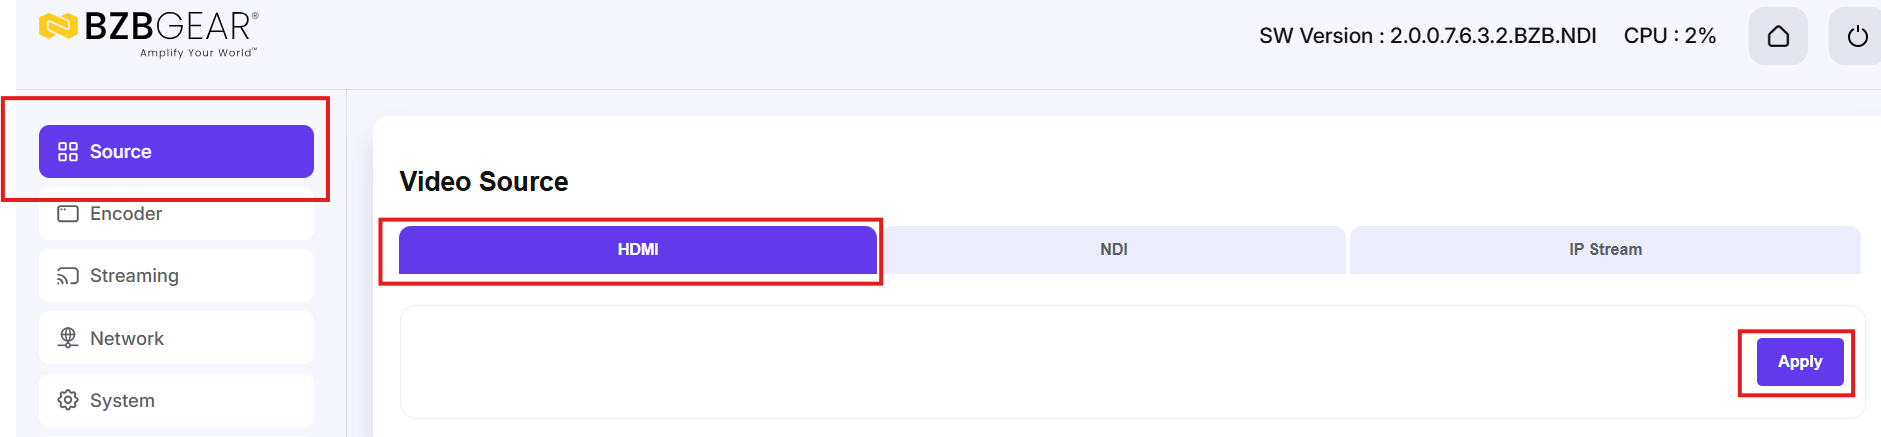
Step 1: Select the video source
Go to the Source settings and confirm that the source is set to HDMI.
This allows the encoder to establish the proper HDMI handshake with the connected source.
On initial setup, the unit may require a reset after the first HDMI handshake.
Step 2: Check the input status
Go to the Status page.
Confirm that the HDMI source is connected successfully:
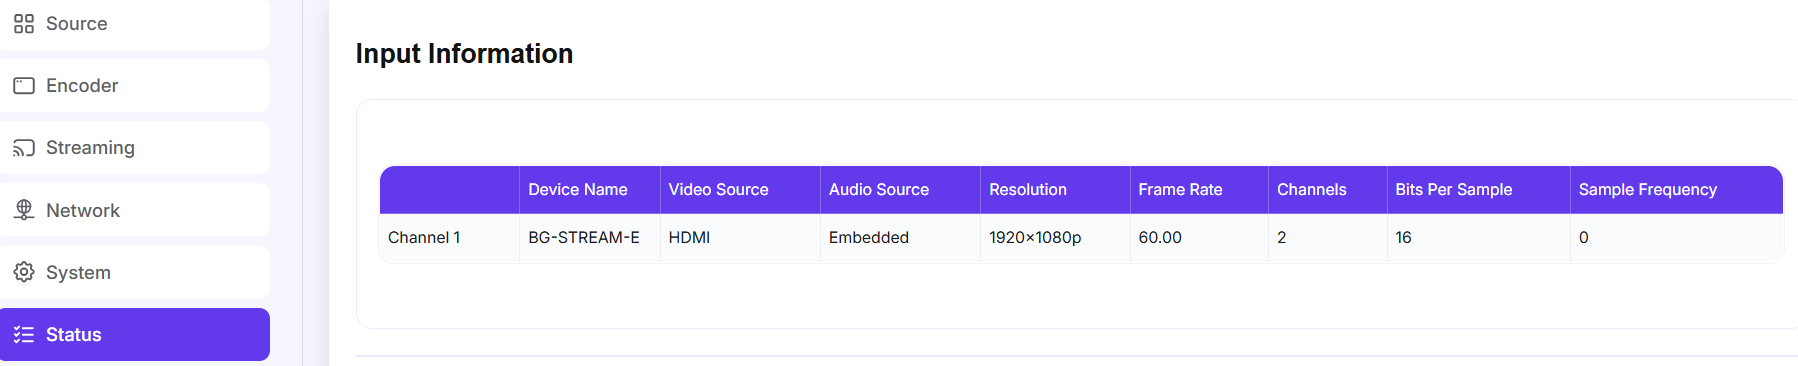
Once the video source is detected successfully, the encoder is ready to be configured for NDI-HX.
Part 4: Configure NDI-HX Streaming
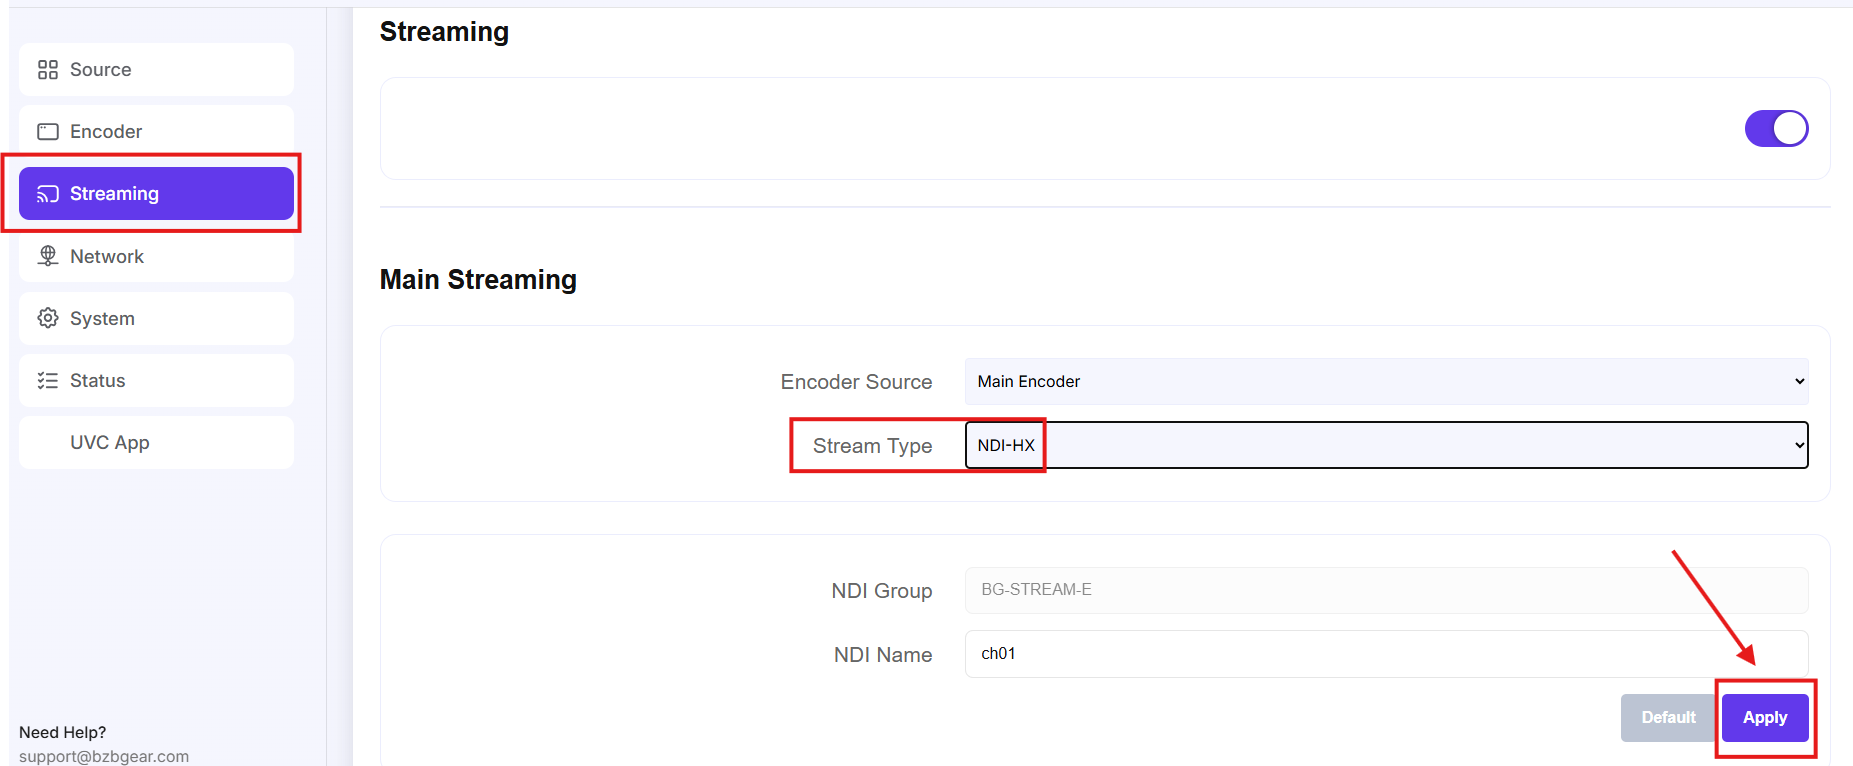
Step 1: Go to the streaming settings
Open the Streaming section in the web GUI.
This is where you can choose the output protocol for the encoded stream.
Step 2: Select NDI-HX as the stream type
In the main streaming settings, locate the Stream Type dropdown menu.
Available options may include:
- RTSP
- HLS
- RTMP
- SRT
- TS
- NDI-HX
Select NDI-HX.
Click Apply to save the stream type.
Step 3: Turn on streaming
After applying the NDI-HX stream type, enable streaming by turning on the streaming toggle switch.
When the switch is active, it will be grayed out, and the encoder will begin streaming the HDMI source as an NDI-HX signal.
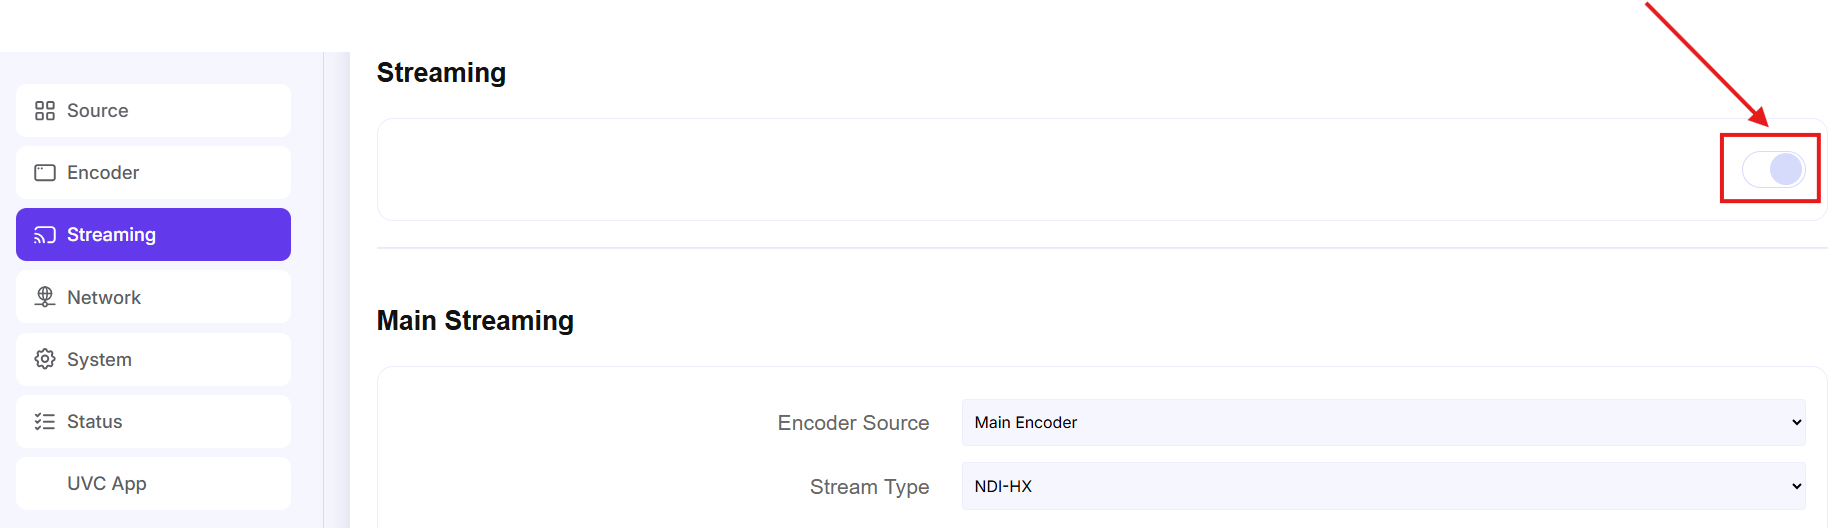
The toggle switch will look like this when active:

Step 4: Review additional settings if needed
The BG-STREAM-NE web GUI also includes additional system options, such as:
- Encoder settings
- Resolution settings
- Frame rate settings
- System settings
- Firmware updates
- Factory reset
- User settings
For a basic HDMI-to-NDI-HX setup, the most important settings are the HDMI input, stream type, and network configuration.
Part 5: View the BG-STREAM-NE in NDI Software
Step 1: Install NDI Tools
To view and test the NDI-HX stream, install NDI Tools on your computer.
Download NDI tools here: https://ndi.video/tools/
You can use NDI software such as Studio Monitor to confirm that the BG-STREAM-NE is visible on the network and that the video feed is working.
Step 2: Open NDI Studio Monitor
Open NDI Studio Monitor on your computer.
Make sure your computer is connected to the same network as the BG-STREAM-NE.
Step 3: Select the BG-STREAM-NE NDI-HX source
In NDI Studio Monitor, open the source selection menu.
You should see the BG-STREAM-NE listed as an available NDI-HX source.
Select the BG-STREAM-NE (ch01) source to view the HDMI video feed over the network.
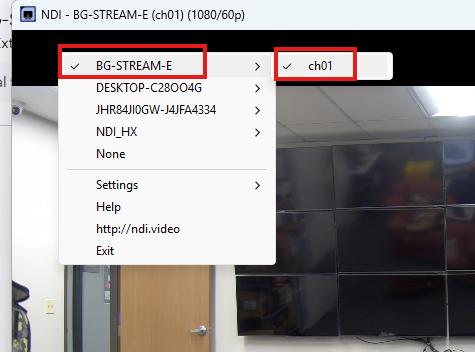
If the stream is working correctly, you should see the video feed from your source device.


8.00 a.m. - 5.00 p.m. (PST)
10.00 a.m. - 3.00 p.m. (PST)
(by appointment only)