







How to Convert any HDMI source to an RTSP Stream with the BG-STREAM-E
Sometimes you've got a great HDMI source — a camera, a switcher, a media player — and you need to get it onto your network as a stream that other software can pull in. That's exactly what an encoder is for. This guide walks you through using the BG-STREAM-E to take an HDMI input and turn it into an RTSP stream you can view and share across your local network.
The BG-STREAM-E is a straightforward, powerful little encoder. It takes your HDMI signal, compresses it, and publishes it as a network stream — all configured through its own built-in web interface, so you don't need extra software running on a computer to make it happen. For this walkthrough, we're focusing on creating an RTSP stream from an HDMI source.
Let's break it down.
What You'll Need
Before you start, make sure you have the following ready:
- A BG-STREAM-E encoder
- An HDMI source (a camera, switcher, computer, or any device with an HDMI output)
- A network switch connected to your local network
- A computer connected to the same local network
- An HDMI cable to connect your source to the encoder
- A media player like VLC Media Player to test the stream
The key thing to remember: the encoder and your computer need to be on the same local network so they can talk to each other.
Part 1: Connect Everything to the Network
Step 1: Connect your HDMI source
Run an HDMI cable from your source device into the HDMI IN on the BG-STREAM-E. This is the signal the encoder will capture and stream. For this example we are using a BG-ADAMO-4K camera.
Step 2: Connect the BG-STREAM-E to the network
Plug the BG-STREAM-E into your network switch. It's PoE-powered, so a single Ethernet cable handles both power and the network connection, and DHCP assigns it a local IP address automatically — no extra power supply needed.
Step 3: Put your computer on the same network
Connect your computer to the same local network. You'll use it to log into the encoder's web interface and, later, to test the stream.
Part 2: Log In to the BG-STREAM-E Web GUI
Step 1: Find the encoder's IP address
Since the BG-STREAM-E is DHCP-enabled, it grabs a local IP address as soon as it's on your network. Run a simple network scan to discover it — most scanning tools will list the device so you can grab its IP. For example, the encoder on our local network is 192.168.30.241 (The IP address will be different on your own local network)

Step 2: Open the web interface
Type the encoder's IP address into your web browser's address bar and hit Enter.
Step 3: Log in
Enter the default credentials:
- Username: admin
- Password: 0000
Hit login, and you're in.
Part 3: Confirm the HDMI Source
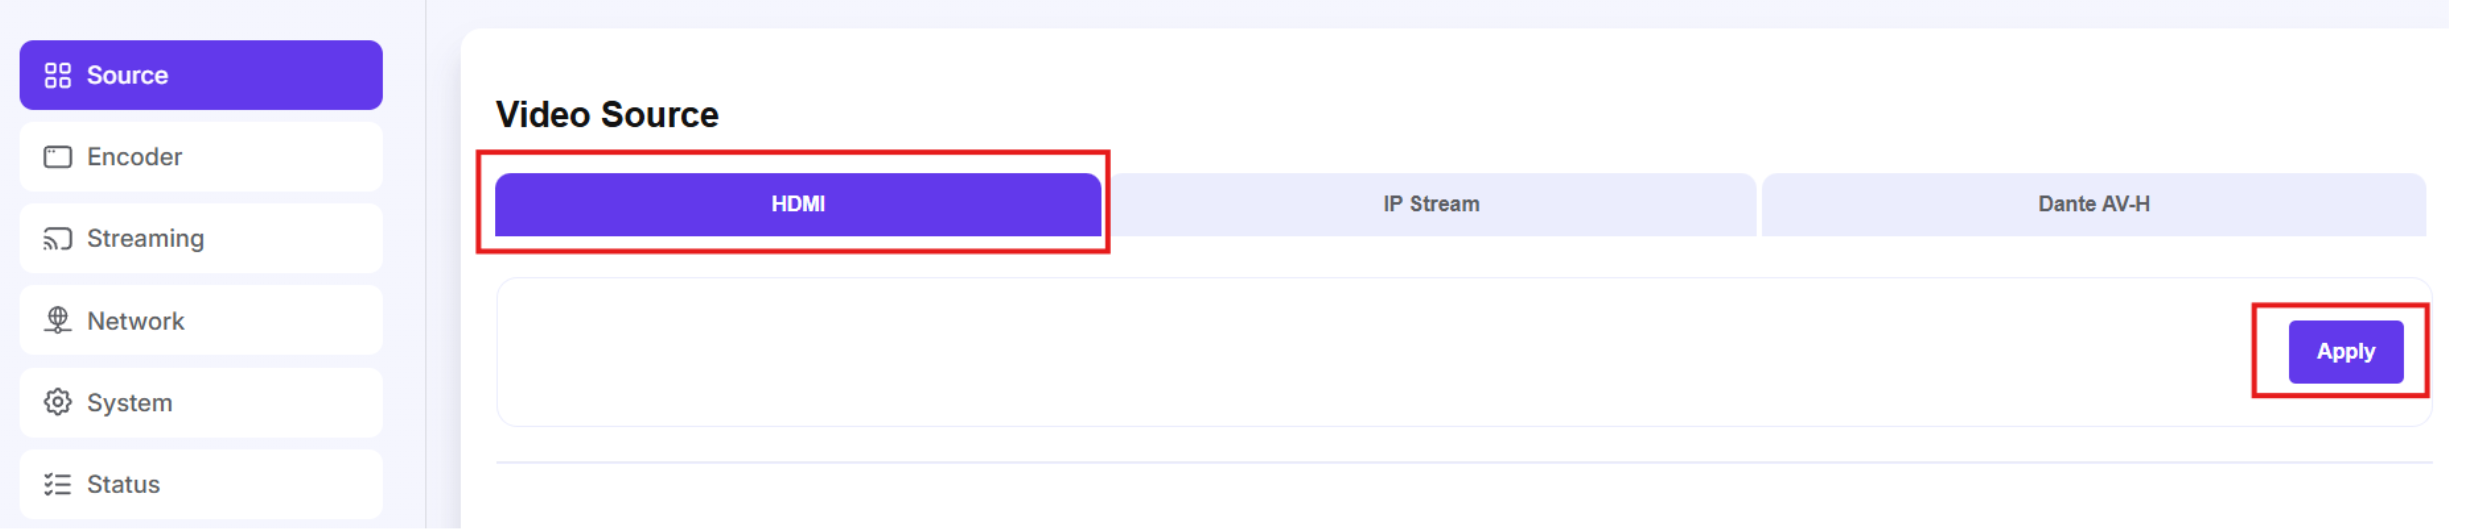
The first tab in the web interface is your Source tab. To confirm your HDMI connected source, select the HDMI input tab and select Apply:
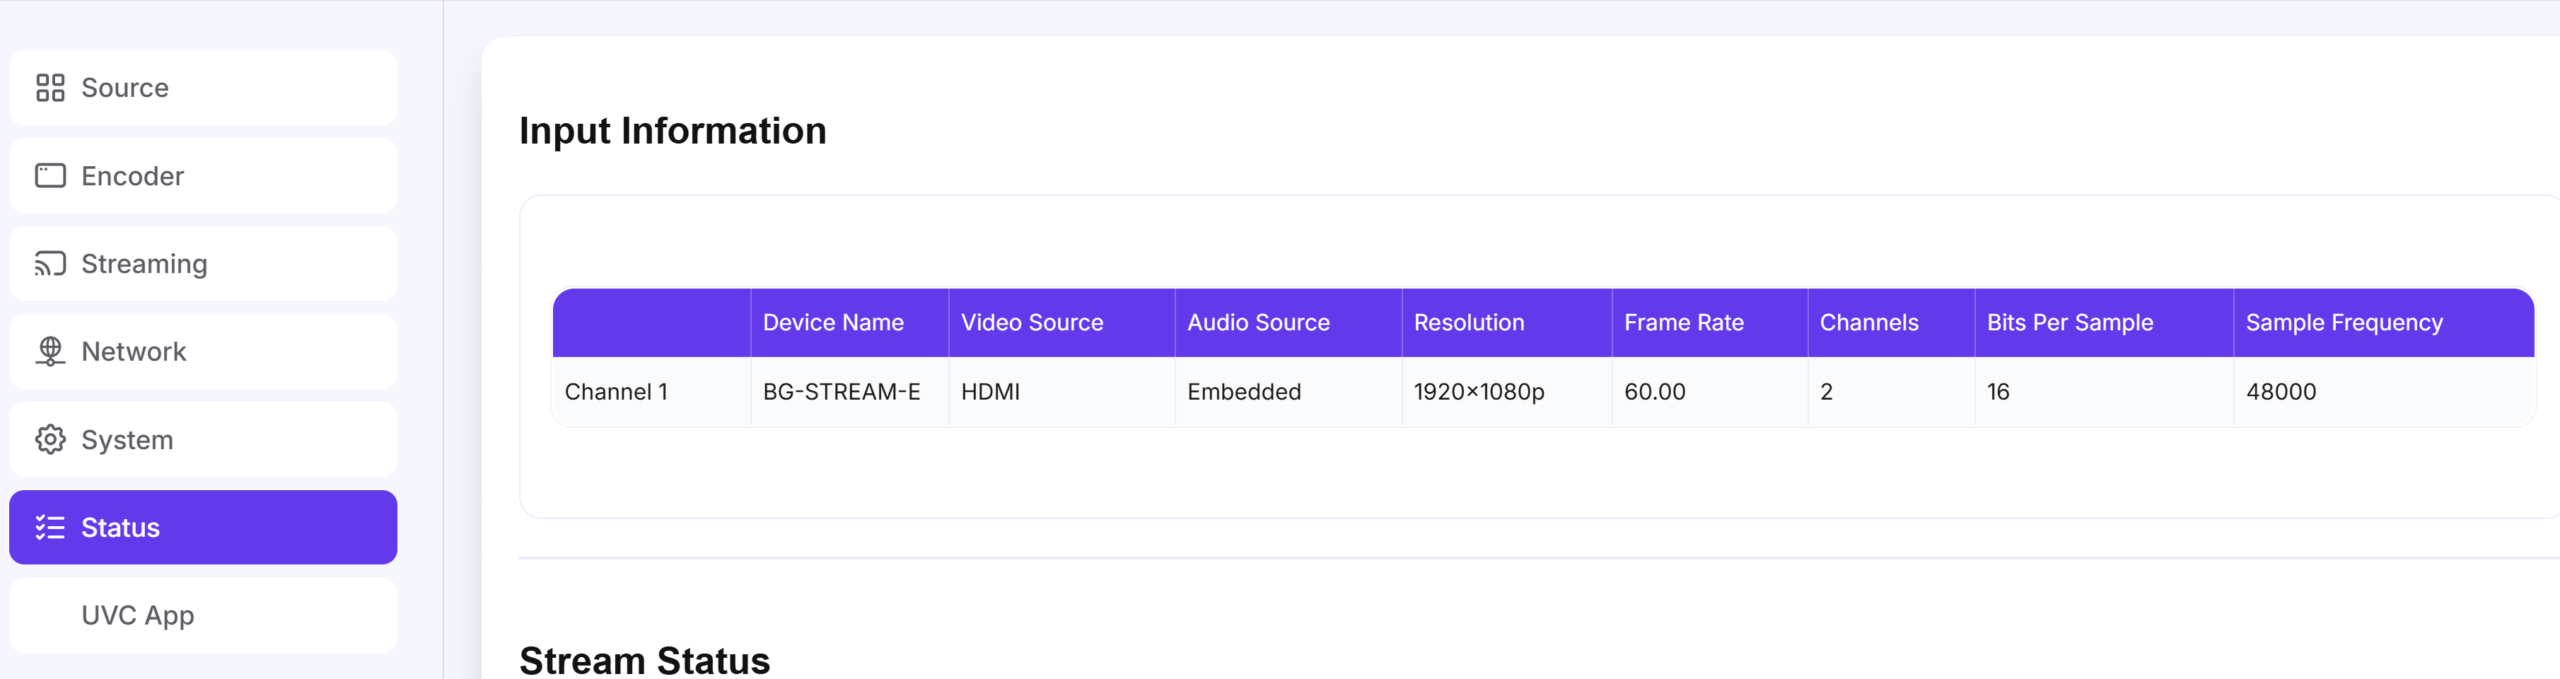
On the Status page you can check that the input source settings match your signal — you should see the incoming resolution and frame rate reflected here, confirming the HDMI source is connected and recognized:
Part 4: Configure Your Encoding Settings
Next, head to the encoding settings. This is where you shape how your stream looks and how much bandwidth it uses.
Resolution and frame rate. Set the output resolution and frame rate for your stream. Matching your source is a good starting point, though you can scale down if you need to conserve bandwidth.
Bit rate. The bit rate controls the balance between image quality and network load. A higher bit rate looks better but uses more bandwidth; a lower bit rate is lighter on your network. Choose the setting that fits your environment.
H.264 or H.265. Choose your compression standard. H.264 offers the broadest compatibility, while H.265 delivers similar quality at a lower bit rate — handy when bandwidth is tight, as long as your playback software and downstream devices support it.
Part 5: Set Up the RTSP Stream
Now head to the streaming settings, where you'll select the protocol you want to publish. The BG-STREAM-E supports several streaming protocols, but for this guide we're creating an RTSP stream.
Select RTSP as your protocol and apply the settings.
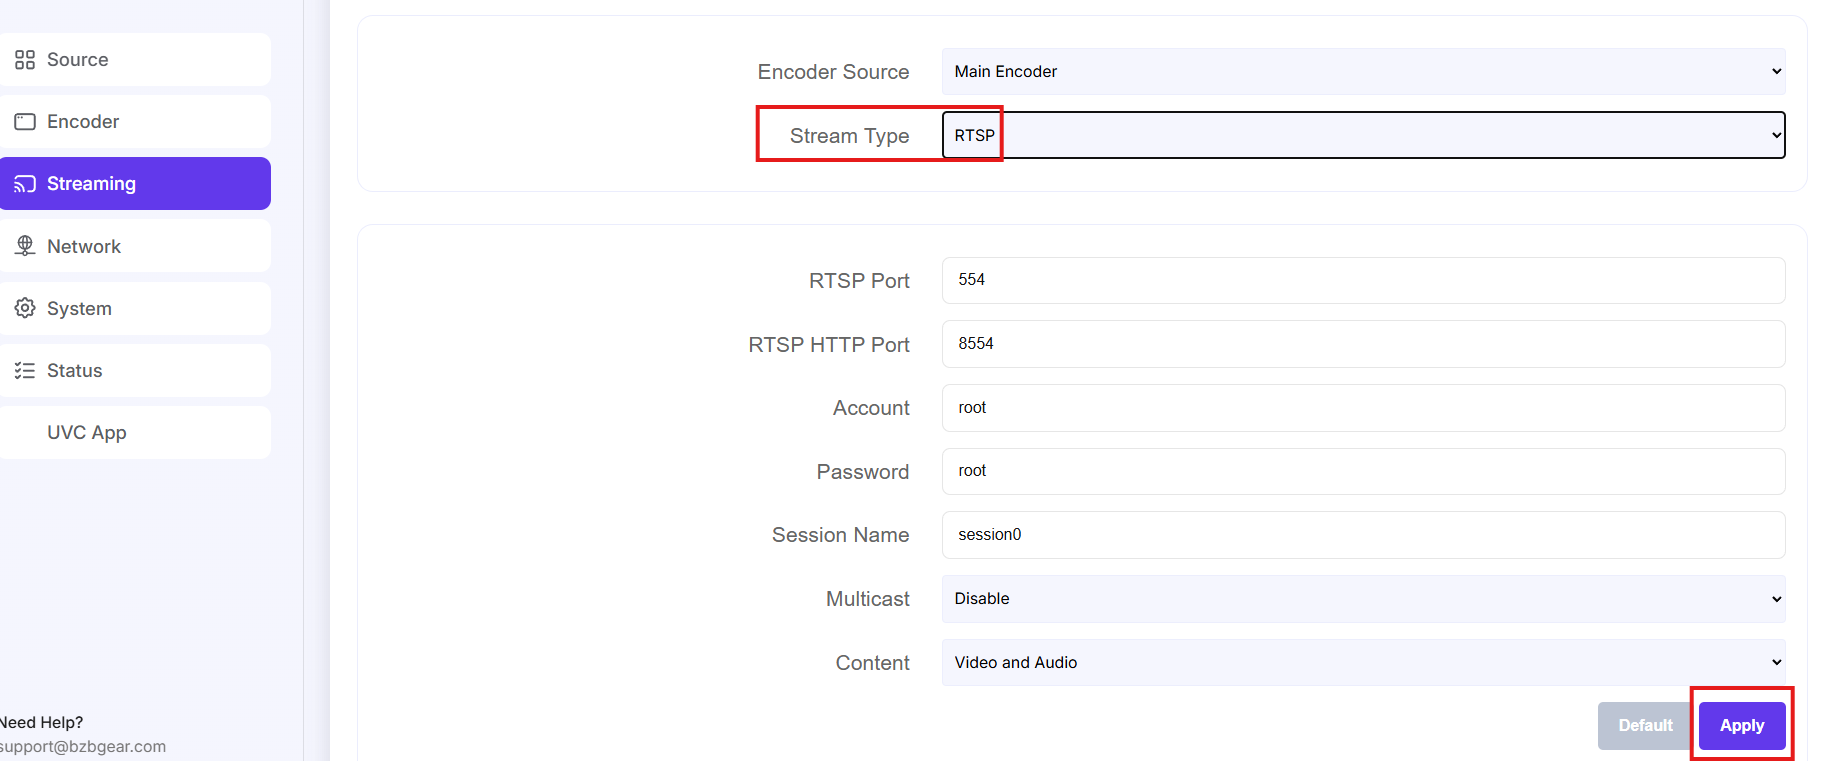
Next, activate the stream by selecting the toggle button. The button will be grayed out when active:

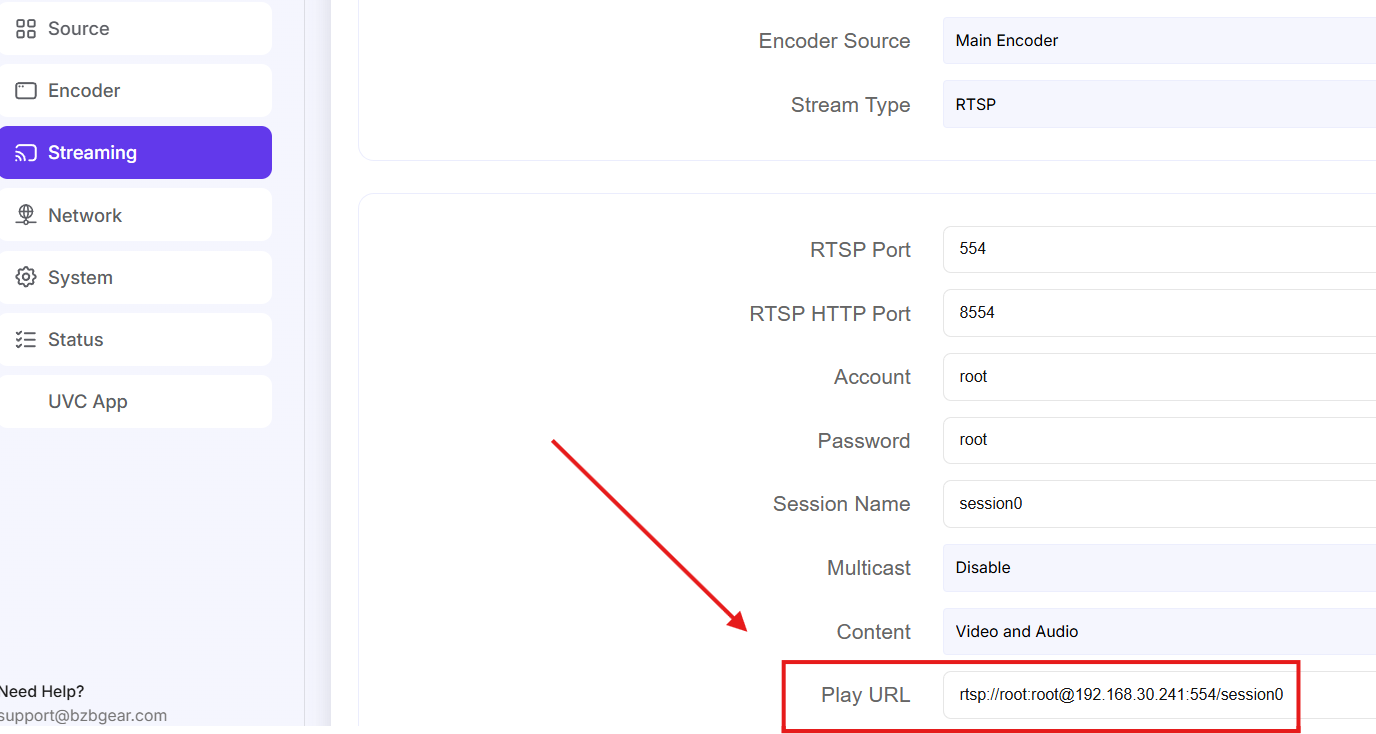
Once active, the web interface will provide the RTSP stream URL (scroll down) for your encoder — copy that URL, since you'll need it to view the stream anywhere on your network.
Part 6: Test the Stream in VLC
Step 1: Open VLC Media Player
On your computer, open VLC Media Player (or any media player that supports RTSP network streams).
Step 2: Open the network stream
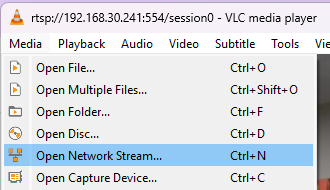
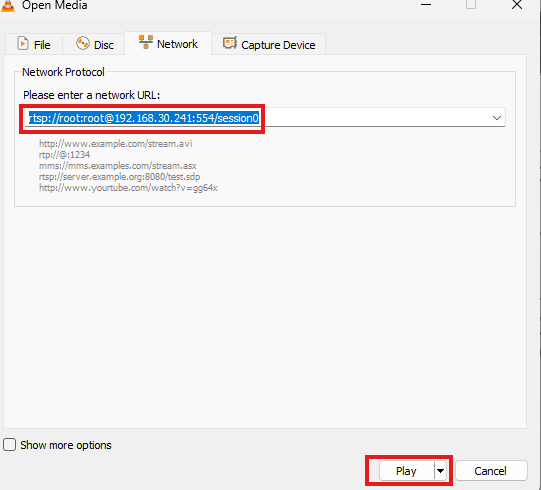
Go to Media → Open Network Stream, paste in the RTSP stream URL you copied from the encoder, and click Play:
Step 3: Confirm the live feed
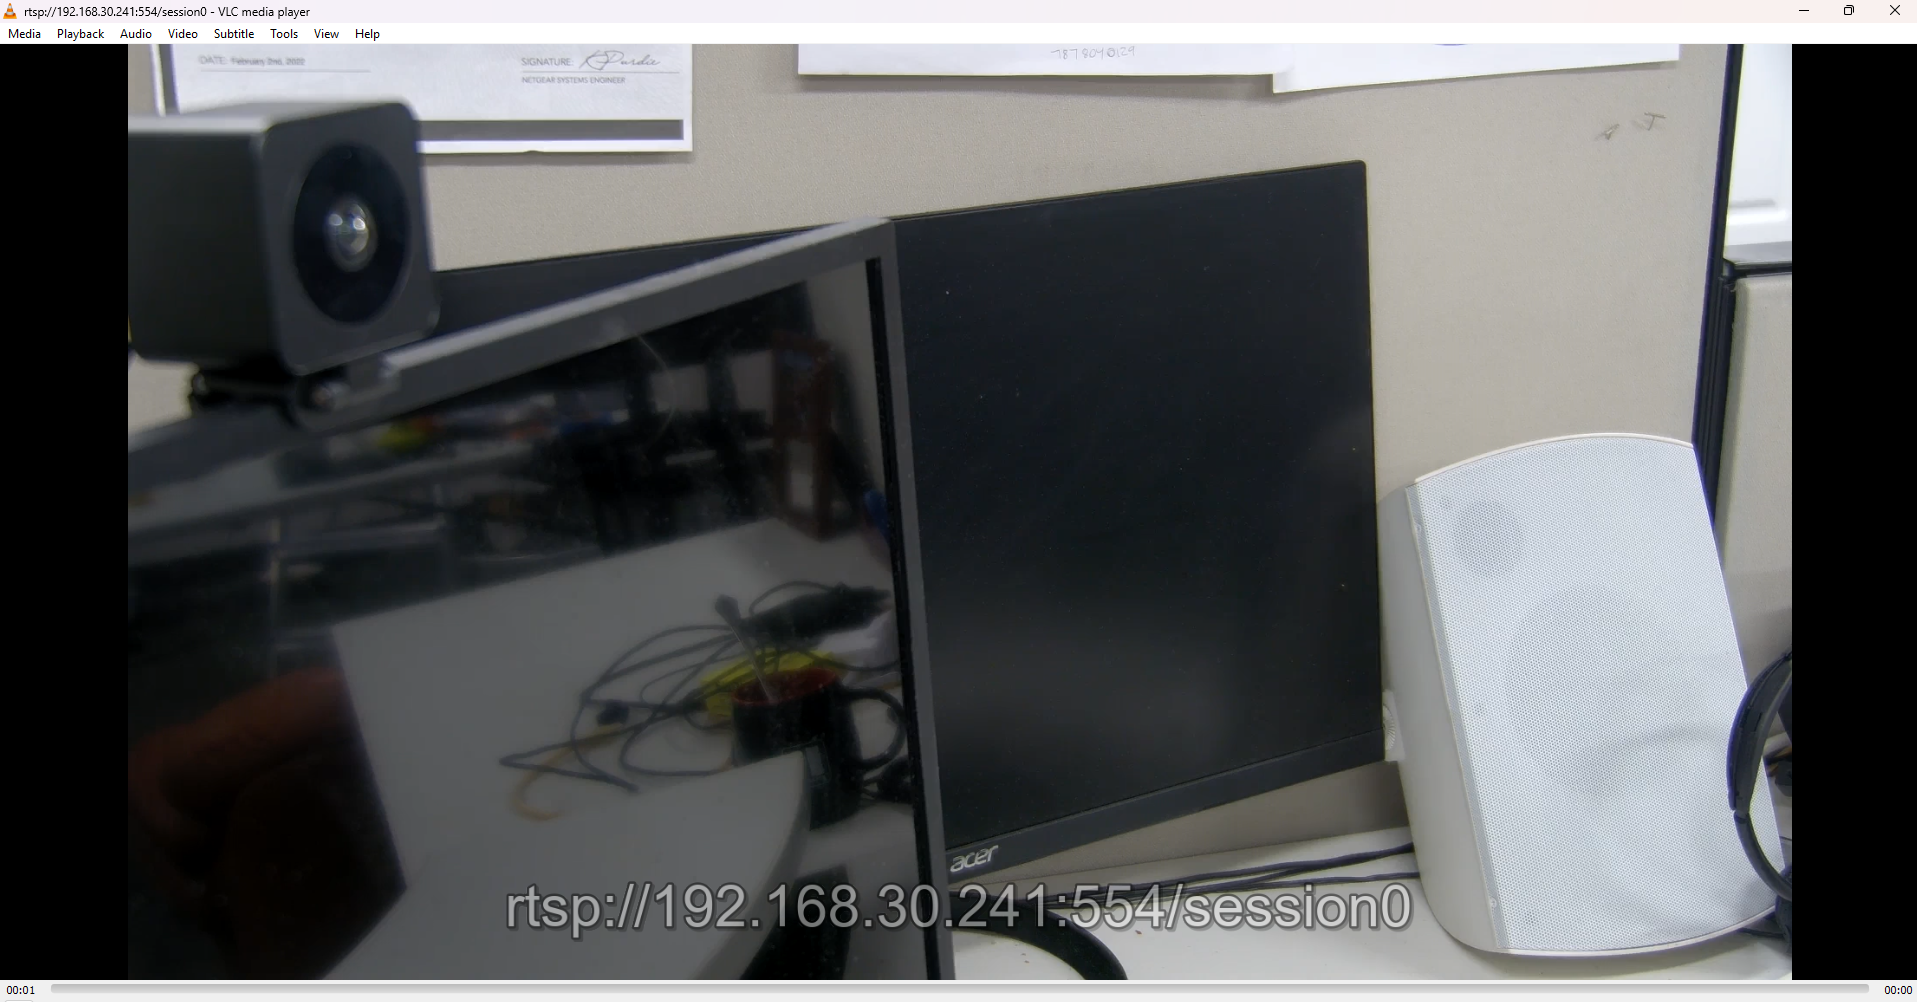
After a moment, your HDMI source appears in VLC — confirming the BG-STREAM-E is successfully encoding your HDMI signal into a live RTSP stream on your network. Keep in mind you may see a slight delay, which is normal for an RTSP stream.
That's How Simple It Is
Getting an HDMI source onto your network as a stream doesn't have to be complicated. With the BG-STREAM-E, it comes down to connecting your source, logging into the web interface, dialing in your encoding settings, and publishing an RTSP stream. From there, any compatible software on your network can pull in the feed.


8.00 a.m. - 5.00 p.m. (PST)
10.00 a.m. - 3.00 p.m. (PST)
(by appointment only)