Firmware Update Guide for the BG-ADAMO Camera Series
Follow the steps below to update the firmware on your BG-ADAMO camera successfully.
1. Download Firmware Files
- Access the firmware file folder and download the two required files (See example below):
- ARM file (e.g., BG20_ARM_V1.0.4_20241218.mrg)
- CAM file (e.g., BG4KC_NDI_UN30X_V1.0.8_R_20250110.mrg)
Note: Ensure you download the correct firmware files specific to your camera model. Pay attention to details such as zoom level (e.g., 12X, 25X) and whether the model supports NDI or Dante-AV-H.
Example: For the BG-ADAMO-4KND25X, the two files should look similar to the examples listed above.
2. Access the Camera's Web GUI
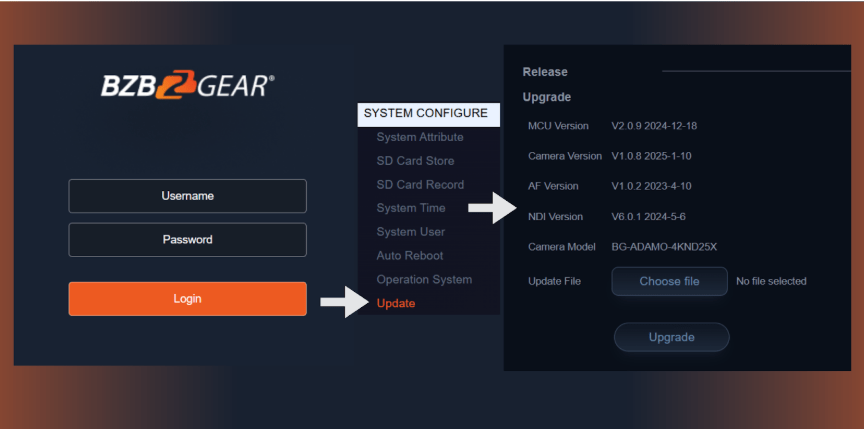
- Open a web browser and enter the camera's IP address.
- Log into the camera's Web GUI using your credentials.
- Navigate to Config > Update from the menu.
3. Upload and Apply the ARM File
- Click Browse and select the ARM firmware file.
- Click Upload and allow the camera to process the file.
- The camera will automatically reboot after the update is applied.
4. Upload and Apply the CAM File
- After the reboot, log back into the camera's Web GUI.
- Click Browse and select the CAM firmware file.
- Click Upload and wait for the camera to process the file.
- The camera will automatically reboot again upon completion.
5. Perform a Factory Reset
- After the second reboot, log back into the Web GUI.
- Navigate to Config > Factory Reset and complete the reset process.
Important: After performing the factory reset, the camera’s IP address will revert to the default 192.168.5.163. Ensure your network settings are updated accordingly to regain access.
6. Post-Update Verification
Once the firmware update and factory reset are complete, verify the following functions:
- ✅ PTZ (Pan-Tilt-Zoom) functionality
- ✅ Auto-tracking performance
- ✅ Video output on all interfaces (HDMI, SDI, USB, etc.)
- ✅ NDI or Dante connectivity (if applicable): Ensure the camera is discoverable and can be added to your NDI or Dante networks.
Troubleshooting Tips
- If the camera becomes unresponsive, power cycle the unit and retry accessing the Web GUI.
- Ensure that firmware files are not corrupted. Redownload if issues persist.
- Confirm that there are no network conflicts when connecting after the factory reset.
If problems persist after following this guide, contact technical support for further assistance.
Get insider
updates & offers
Learn more
Get insider updates and offers
Join our vibrant community of BZBGEAR insiders today and unlock a world of exclusive updates, irresistible offers, and invaluable education.
Sales Inquiries
Leave your phone number, and one of our specialists will reach out to you shortly.
Call Us
Technical support
Monday - Friday
8.00 a.m. - 5.00 p.m. (PST)
8.00 a.m. - 5.00 p.m. (PST)
Saturday - Sunday
10.00 a.m. - 3.00 p.m. (PST)
(by appointment only)
10.00 a.m. - 3.00 p.m. (PST)
(by appointment only)
Phone & Email Support