


BZBGEAR BG‑Connexio Comprehensive Setup Guide
This guide walks through installation, physical connections, network setup, wireless sharing, and peripheral integration step by step.
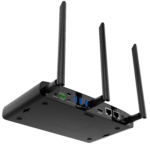
1. What’s in the Box
- BG-Connexio base unit
- External power adapter (regional plug included)
- 3x detachable antennas
- Quick start documentation
2. Physical Installation
Mounting Options
- Table-mounted (most common)
- Wall-mounted (behind or near the display)
Antenna Placement (Important for Performance)
- Position antennas vertically (perpendicular to the ceiling)
- Maintain:
- 50 cm (1.6 ft) from metallic surfaces
- 1 m (3.3 ft) from other RF devices (Wi-Fi APs, cordless phones, microwaves)
- 15 cm (6 in) from concrete walls
- Best performance is achieved with clear line-of-sight between Connexio and user devices
- Avoid placing antennas directly above seated users—side placement is recommended
3. Rear & Front Panel Overview
![]()
Front Panel
- USB Type-A – Mouse or touch control
- USB Type-C – Dongle pairing (optional)
- Power Button – Turn unit on/off
- LED Status Indicator
- Flashing RED – Booting
- Flashing GREEN – Powered on / waiting
- Solid GREEN – Ready to share
- Solid CYAN – Actively sharing
Note: Front USB-A and USB-C ports cannot be used simultaneously. USB-A takes priority.
Rear Panel
- HDMI Output (up to 4K / HDMI 2.0)
- Dual LAN Ports
- LAN 1: 100 Mbps
- LAN 2: 1000 Mbps + PoE
- 3.5mm Line Audio Output
- USB 3.0 ports (camera, speakerphone, touch)
- Rear USB-C (dongle pairing)
- RS-232 control
- Reset button (factory default)
- DC power input
- Kensington lock
4. Power & Video Connection
Power Options
- External Power Adapter
- PoE (Power over Ethernet) via LAN Port 2 (PoE-capable switch required)
Once powered, the Connexio boots automatically. Use the front power button for manual on/off.
![]()
Display Connection
- Connect HDMI output to a TV or projector
- Power on the display
- The Connexio Home Screen will appear automatically
5. Network Setup (Recommended)
While Connexio can operate without a network, connecting it to LAN enables:
- Easier device discovery
- Web-based management
- Firmware updates (OTA)
- Enterprise network integration
LAN Connection
- Connect Ethernet cable to LAN port
- Once connected, the Home Screen displays:
- Assigned LAN IP address
- Wi-Fi status
If LAN IP shows “N/A”, the device is not connected or failed DHCP assignment.
6. Accessing the Web Interface
![]()
- From a computer on the same network, enter the Connexio’s LAN IP in a browser
- The landing page provides:
- Windows & macOS sharing software
- User manual downloads
- Click Settings
- Username: admin
- Password: admin
From here, administrators can:
- Rename the device (SSID)
- Configure network settings
- Change security levels
- Perform firmware updates
- Factory reset the unit
7. Wireless Screen Sharing
![]()
Windows / macOS
- Download and install Connexio software
- Launch the application
- Select the Connexio device ID
- Enter the on-screen password
- Click Ready to Share
Sharing begins instantly.
To stop sharing, click Stop Sharing.
iOS (iPhone / iPad)
- Connect to the same network (or Connexio hotspot)
- Open Control Center
- Tap Screen Mirroring
- Select the Connexio device ID
Android
- Download WirelessMedia2 from Google Play
- Connect via:
- Connexio Hotspot, or
- Same LAN network
- Select the Connexio device and share
8. Audio & Video Peripherals
Supported USB Devices
- USB cameras
- USB speakerphones (mic + speaker combined)
- Touch displays
- USB mouse
Important Limitations
- Separate microphones and speakers are not supported
- Speakerphones must include both mic and speaker
- Webcam-only devices will provide video only
Audio Output
![]()
- Audio is transmitted with video
- Output simultaneously via:
- HDMI
- 3.5mm line out
If audio is missing:
- Ensure LED is solid GREEN or CYAN
- Confirm Connexio is selected as the audio output device
- Check volume levels
9. USB Touch & Whiteboard Functions
- Connect touch interface USB cable to the presenting laptop
- Supported features:
- Whiteboard
- Annotations
- Mouse/touch control during presentations
10. Pairing Optional USB-C Dongles
- Insert dongle into front USB-A or USB-C
- Wait for pairing message:
- “Succeeded to pair!”
- Remove dongle and connect to computer
After changing SSID, all dongles must be re-paired
11. Security Levels
![]()
Security levels (1–3) define:
- Who can control shared content
- Firmware upgrade permissions
- Annotation and whiteboard access
Levels are view-only on the Home Screen and configurable via the web interface.
12. Best Practices
- Keep firmware updated via LAN
- Place Connexio close to the display
- Avoid RF interference near antennas
- Use speakerphones instead of separate mic/speaker setups
- Connect to LAN for multi-user environments
8.00 a.m. - 5.00 p.m. (PST)
10.00 a.m. - 3.00 p.m. (PST)
(by appointment only)


