


BG-Switch-Control App Startup Guide
Connect your matrix switcher to the same network as your iPad or iPhone.
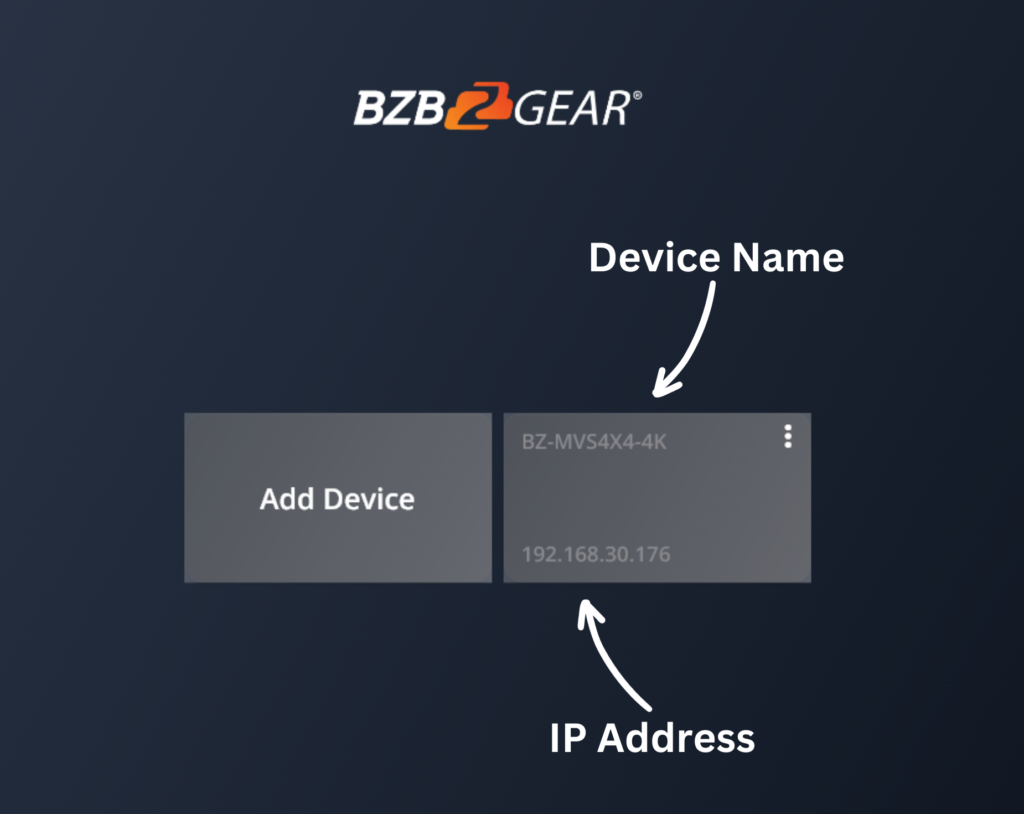
Once you’re connected, you can begin controlling your unit.
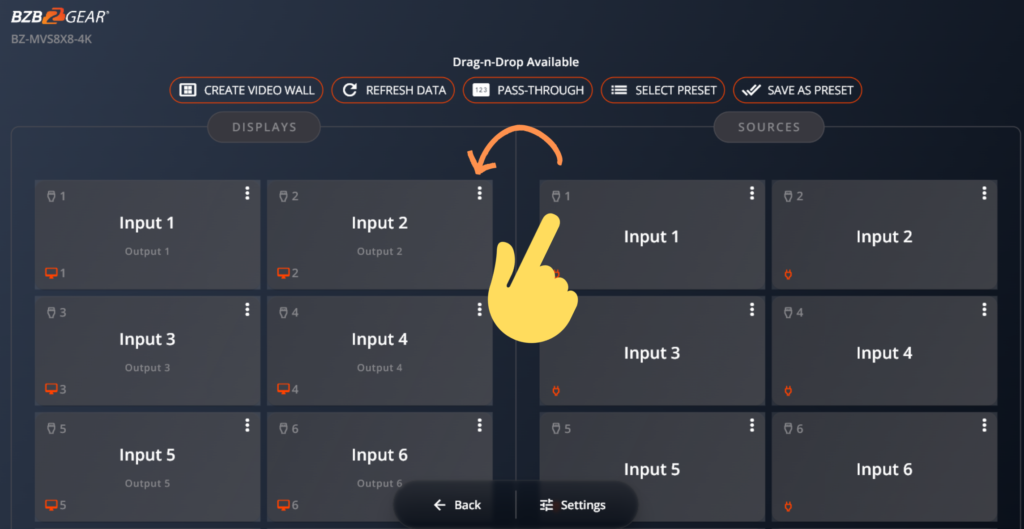
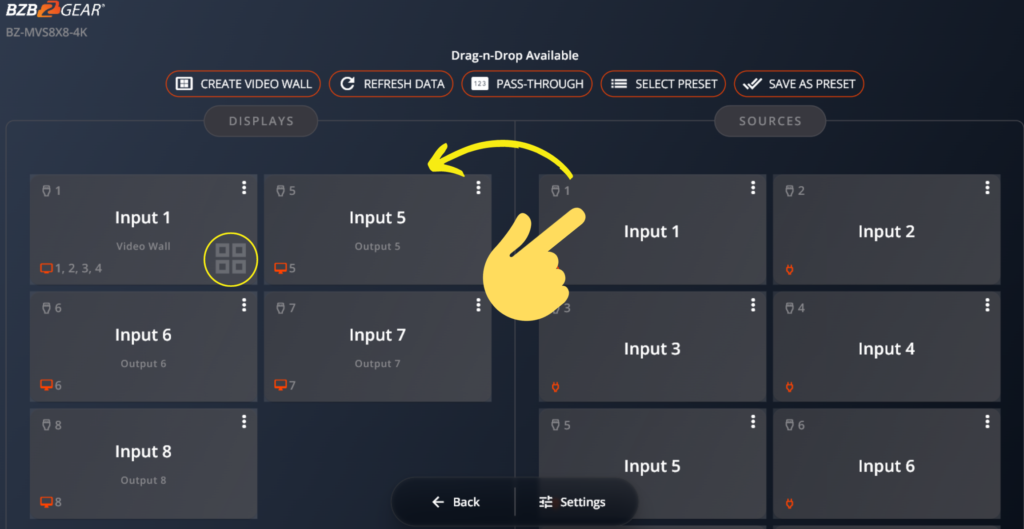
This is the initial screen upon logging into your device. On the left, you can observe your outputs and the assigned inputs. These outputs are automatically configured based on your unit's input and output setup.
To matrix or alter the inputs on the outputs, press and hold the desired input (source) on the right side, then drag it to the left side and drop it onto the output where you want to display the source. This process applies to all your inputs (sources) and outputs (displays).
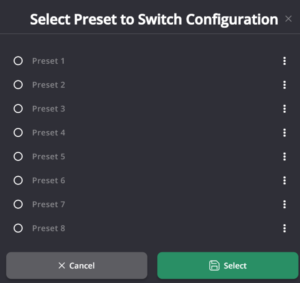
If you've configured a setup that you are satisfied with and wish to recall it later, navigate to the upper right corner and choose "SAVE AS PRESET." You'll be prompted to select a preset number and name, providing an organized way to manage multiple presets.
Create a Video Wall
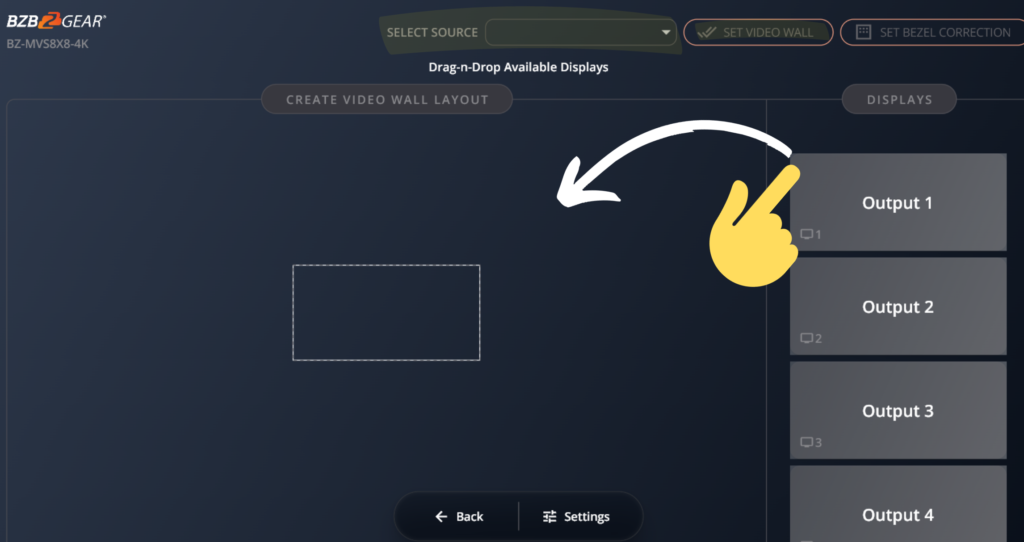
To initiate the creation of a video wall, choose the "CREATE VIDEO WALL" option. On the left side, you will find all available outputs (TVs). To build a video wall, drag and drop your outputs to the middle of the left screen. When establishing a video wall, ensure that your configuration is logical. For instance, if you are setting up a 2X2 video wall in a 3X3 arrangement, utilize the correct four outputs instead of selecting random ones.
Once your configuration is in place, navigate to the top left tab labeled "SELECT SOURCE" and choose the source you want to stretch across those displays. After completing this, remember to click "SET VIDEO WALL" before leaving this screen.
Changing the Input On Your Video Wall
After configuring your video wall, it will be visible on the initial screen. To modify this video wall's input, drag and drop your preferred source from the right side. From this screen, you can adjust the input for your other displays below the video wall. It's worth noting that using the same input for multiple outputs, including the video wall, is acceptable.
If you wish to preserve this configuration, click "SAVE AS PRESET," and choose the preset number and name as you did before.
What is the “REFRESH DATA” Button For?
When you choose the "Refresh Data" button, you are essentially prompting the application to update itself. This is advantageous in ensuring that the application stays current with the modifications you make. Additionally, refreshing can be helpful if you encounter any lag or latency issues.
What is the “PASS-THROUGH” Button?
By choosing "Pass-Through," you instruct the application to reconfigure your inputs and outputs to match the setup on your unit, maintaining a point-to-point, 1-to-1, 2-to-2, etc., configuration.
8.00 a.m. - 5.00 p.m. (PST)
10.00 a.m. - 3.00 p.m. (PST)
(by appointment only)


