


BG-IPGEAR-ULTRA Multiview Setup Guide
This guide explains how to create a multiview layout on top of an existing video wall, then how to create separate multiview layouts for individual screens.
Be sure to reading this article on how to create a videowall first before adding a multiview preset: https://bzbgear.com/knowledge-base/bg-ipgear-ultra-video-wall-setup-guide/
Step 1: Open the existing video wall layout
Start from the video wall layout you already created, such as 2x2 Video Wall 1.
You will create a new preset within the same video wall layout so you can switch between different views later.
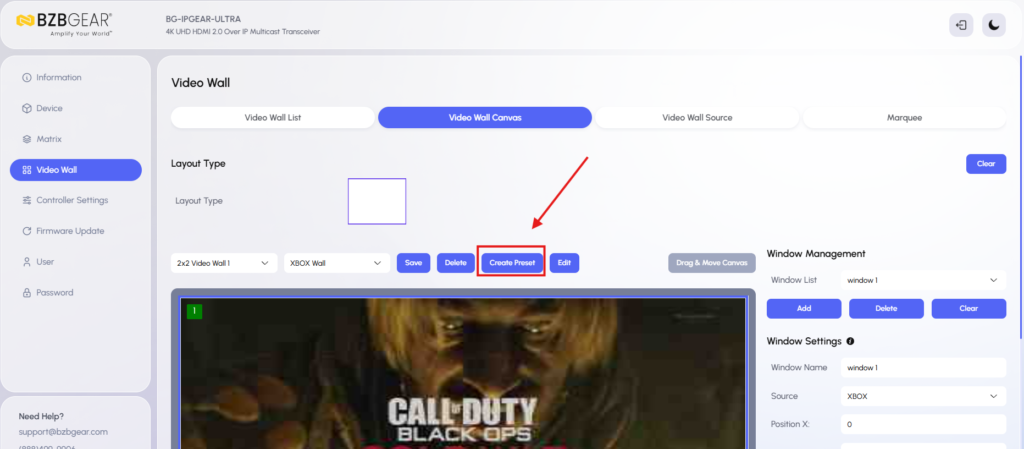
Step 2: Create a new preset
- Go to the preset area.
- Select Create New Preset.
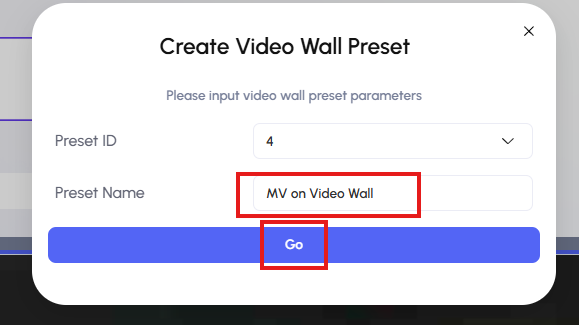
- Name the preset.
Example name:
MV on Video Wall
- Click Go.
This creates a new preset under the same video wall layout.
Step 3: Select a multiview layout type
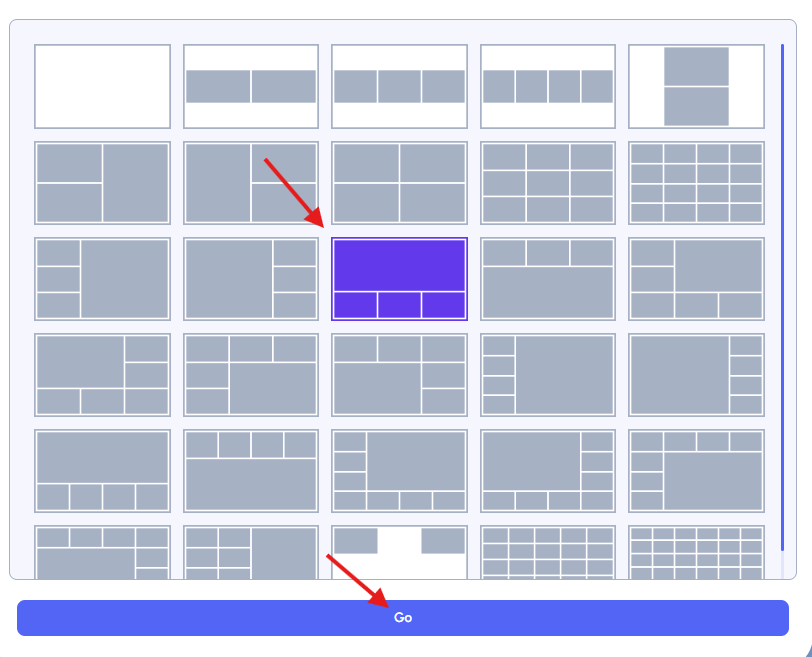
- Choose a layout type from the available preconfigured layouts.
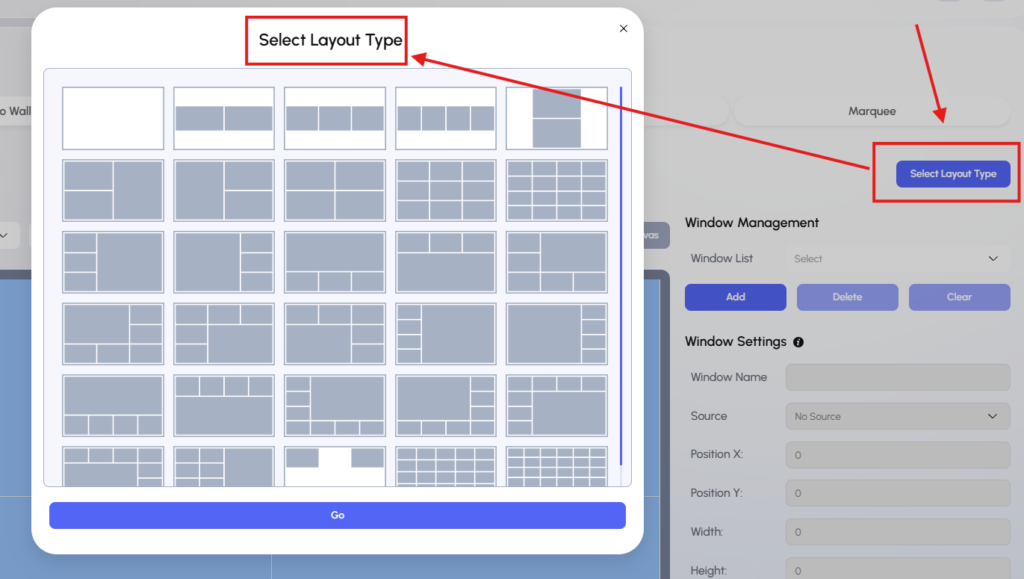
2. For example, if you have four sources, select a 4 by 1 custom layout:
-
- One large image
- Three smaller images along the bottom
- Click Go.
The multiview layout will appear on the video wall canvas.
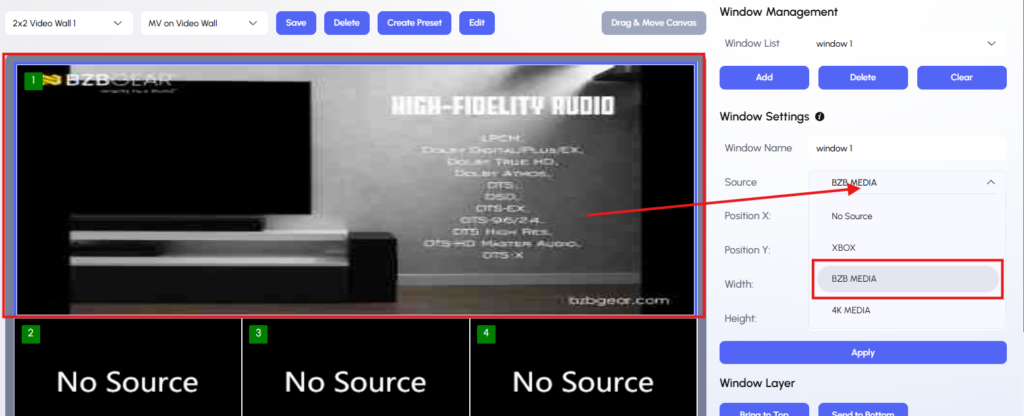
Step 4: Assign sources to the multiview windows
You can assign sources in either of these ways:
Option A: Click each image area
- Click a section of the multiview layout.
- Select the source you want to display there from the Source dropdown menu.
Option B: Drag and drop sources
- Open the Video Wall Source panel.
- Drag each source into the desired section of the layout.
- Repeat until all sections have sources assigned.
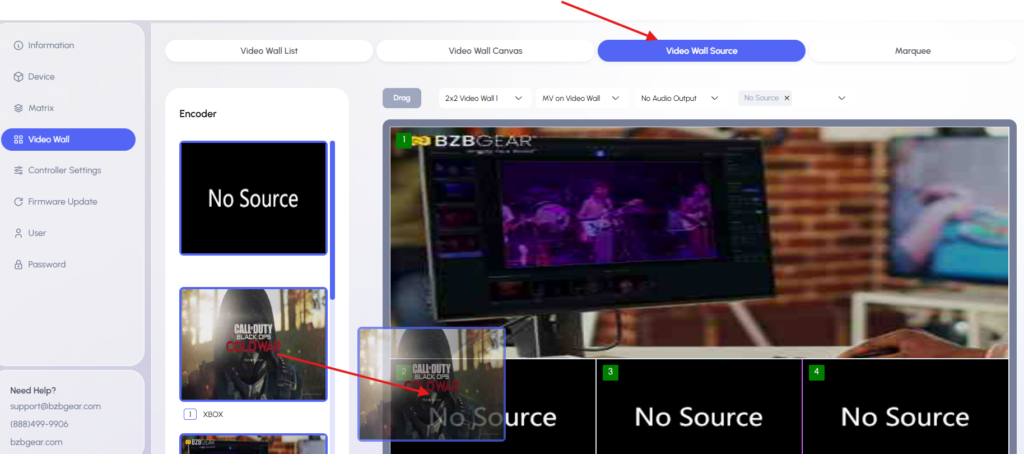
This allows you to quickly fill the large image area and the smaller image areas.
Step 5: Apply the preset
- Return to the canvas page.
- Click Save.
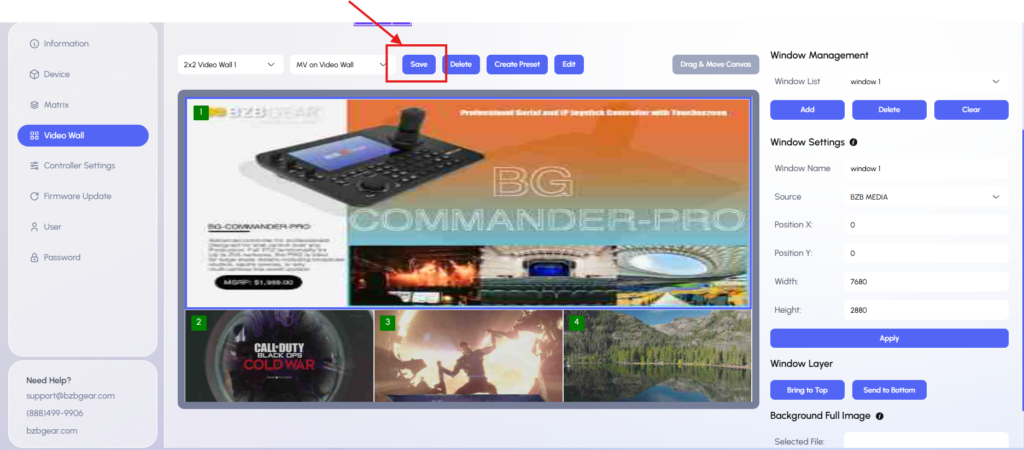
This saves the multiview layout as a preset.
Your custom multview is now displayed across your 2x2 videowall
Step 6: Switch between video wall presets
You can now switch between layouts using the preset dropdown.
For example:
- Select Preset 1 (BZB Wall) to return to the original 2x2 video wall.
- Select MV on Video Wall to recall the multiview layout.
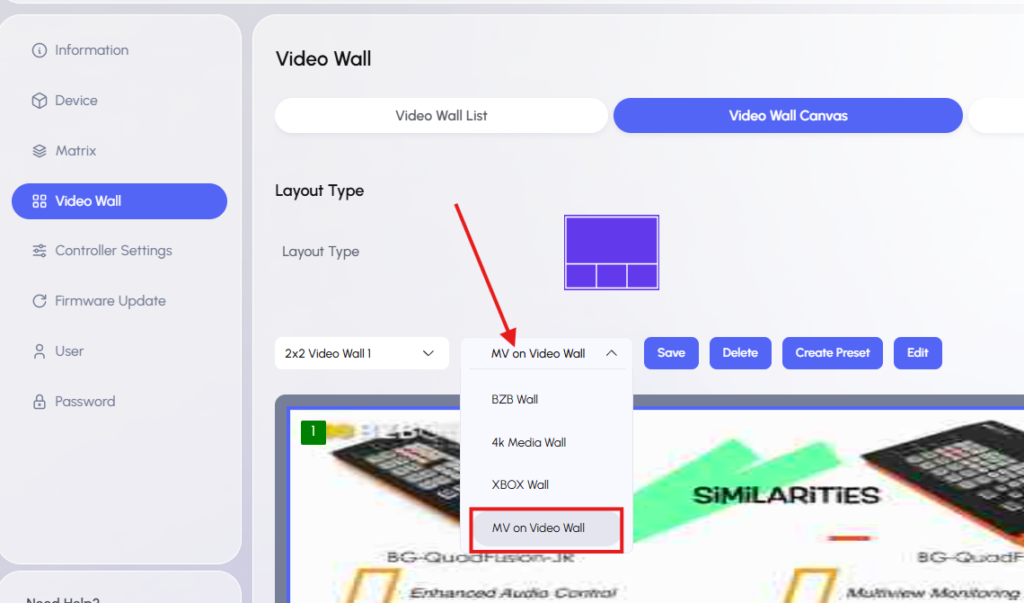
The video wall will recall the selected preset.
Part 2: Create Multiview on Individual Outputs
Use this method when each TV or screen needs its own multiview layout.
For example:
- Decoder 1 may show a 2x2 quad view.
- Decoder 2 may show a different split-screen layout.
- Other decoders may show a single full-source feed.
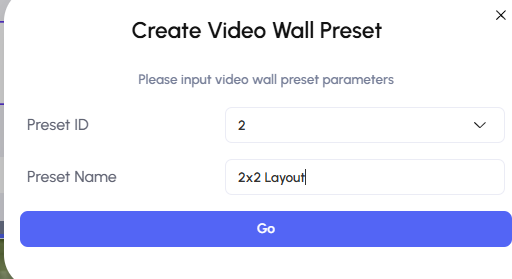
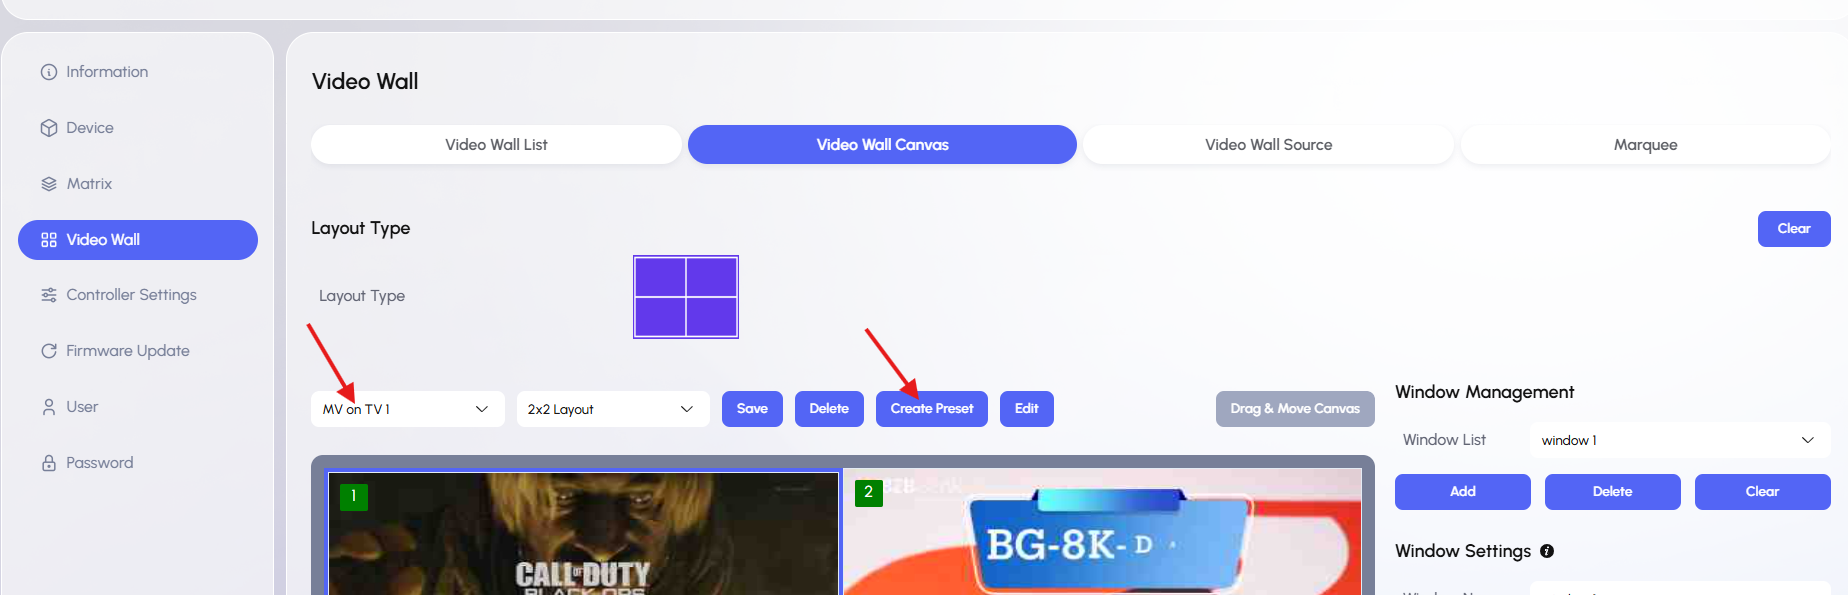
Step 1: Create a new video wall layout for one decoder TV
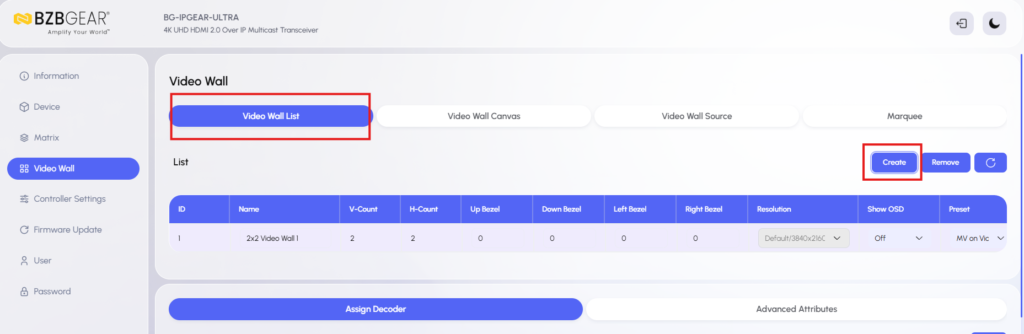
- Go to Video Wall List.
- Click Create.
- Enter a video wall name.
Example:
MV on TV 1
- Set the layout size to 1 x 1.
- Click Go.
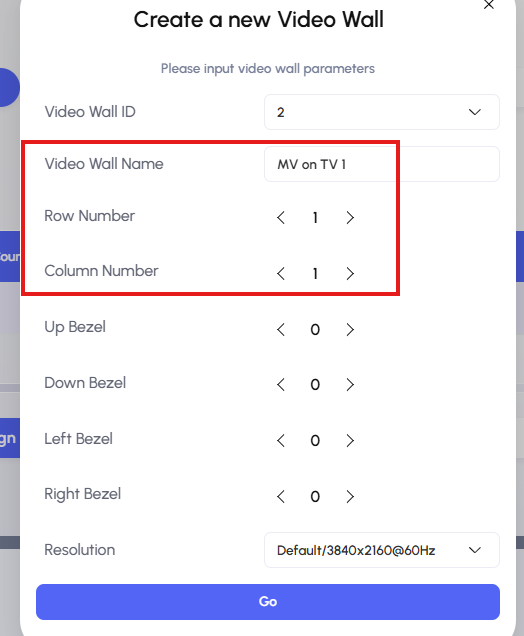
Because this is for one individual TV, the layout should be one screen only.
Step 2: Assign the decoder for TV 1
- Click the (1,1) box.
- Select the correct decoder for TV 1 from the decoder dropdown list (For our setup, it is Decoder 9).
- Click Apply.
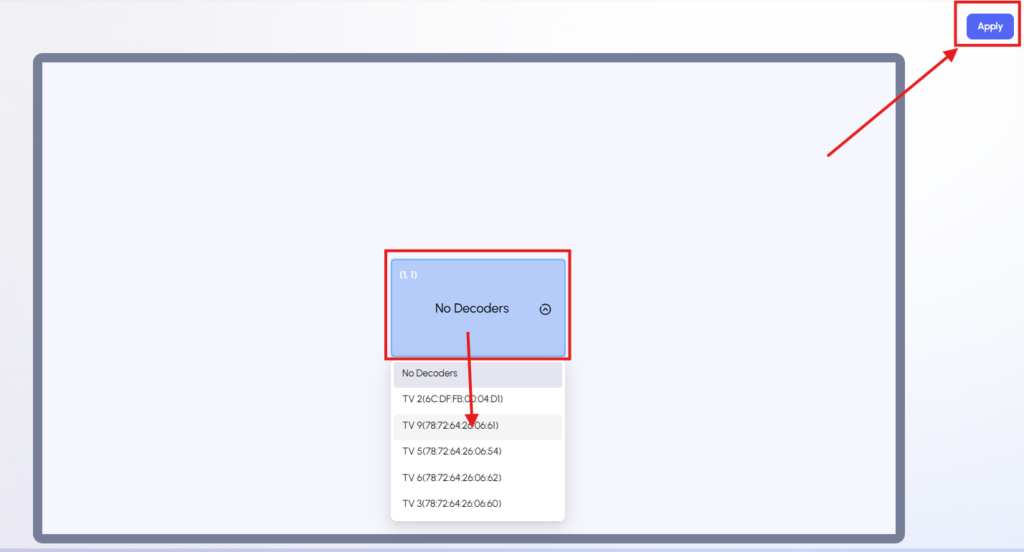
The TV decoder is now assigned to this new 1x1 layout.
Step 3: Choose a multiview layout for TV 1
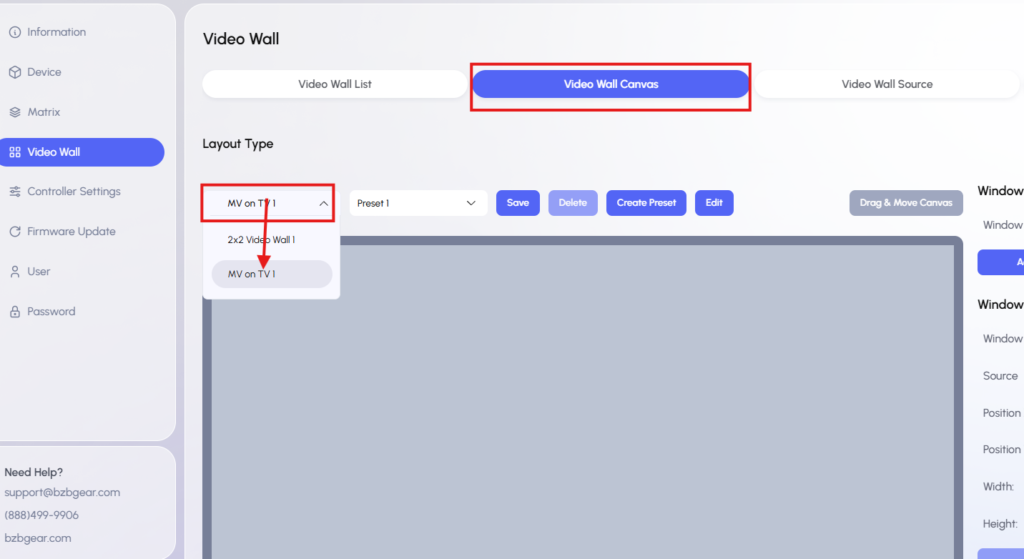
- Select the Video Wall Canvas tab.
- Select Decoder (MV on TV 1) from the video wall list dropdown.
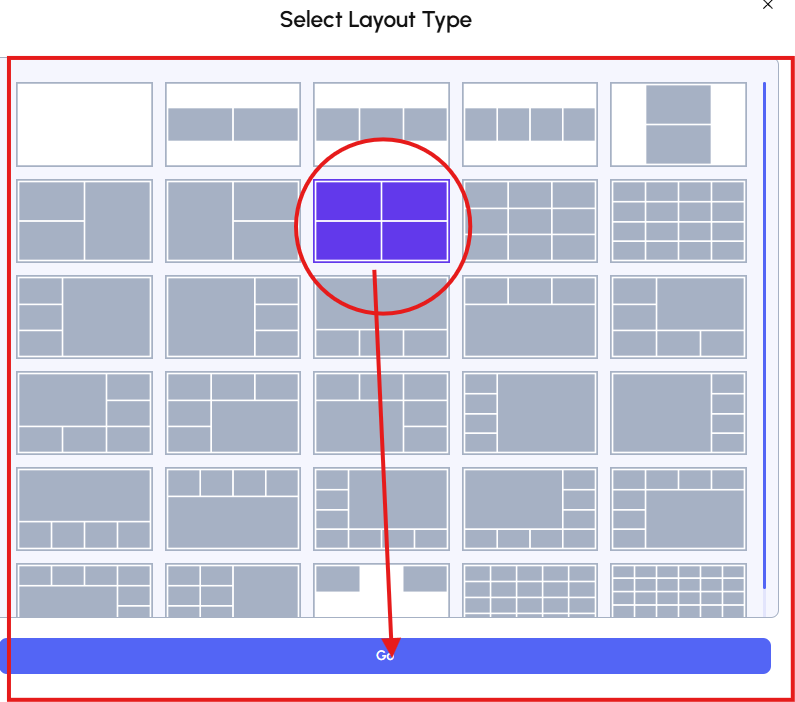
3. Select Create Preset and enter a preset name.
4. For example, choose a standard 2 x 2 layout for four images.
5. Click Go.
6. Select Layout Type.
7. Select the Quadview layout.
The TV may appear blue temporarily if no sources have been assigned yet.
Step 4: Add sources to multiview layout
- Open Video Wall Source.
- Drag and drop sources into each section of the 2x2 layout.
- Confirm that the sources appear correctly.
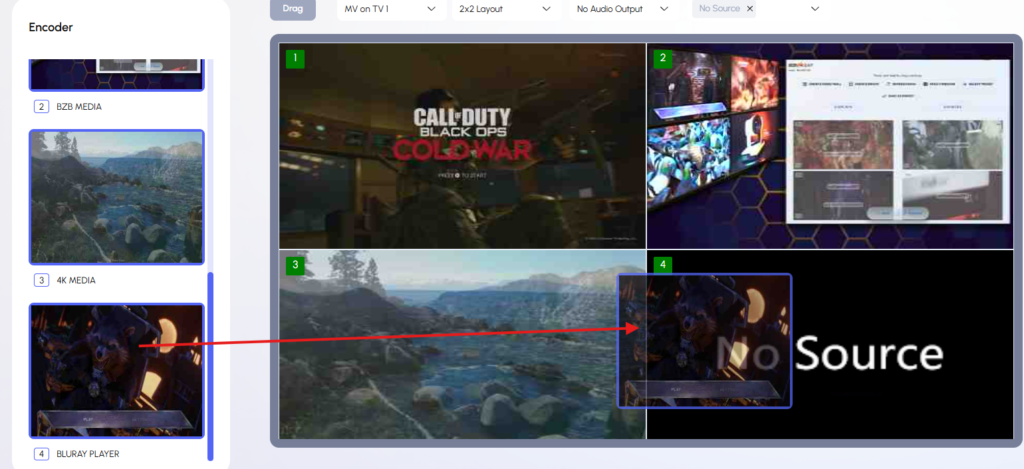
Once the sources are placed, TV 1 will display the multiview layout.
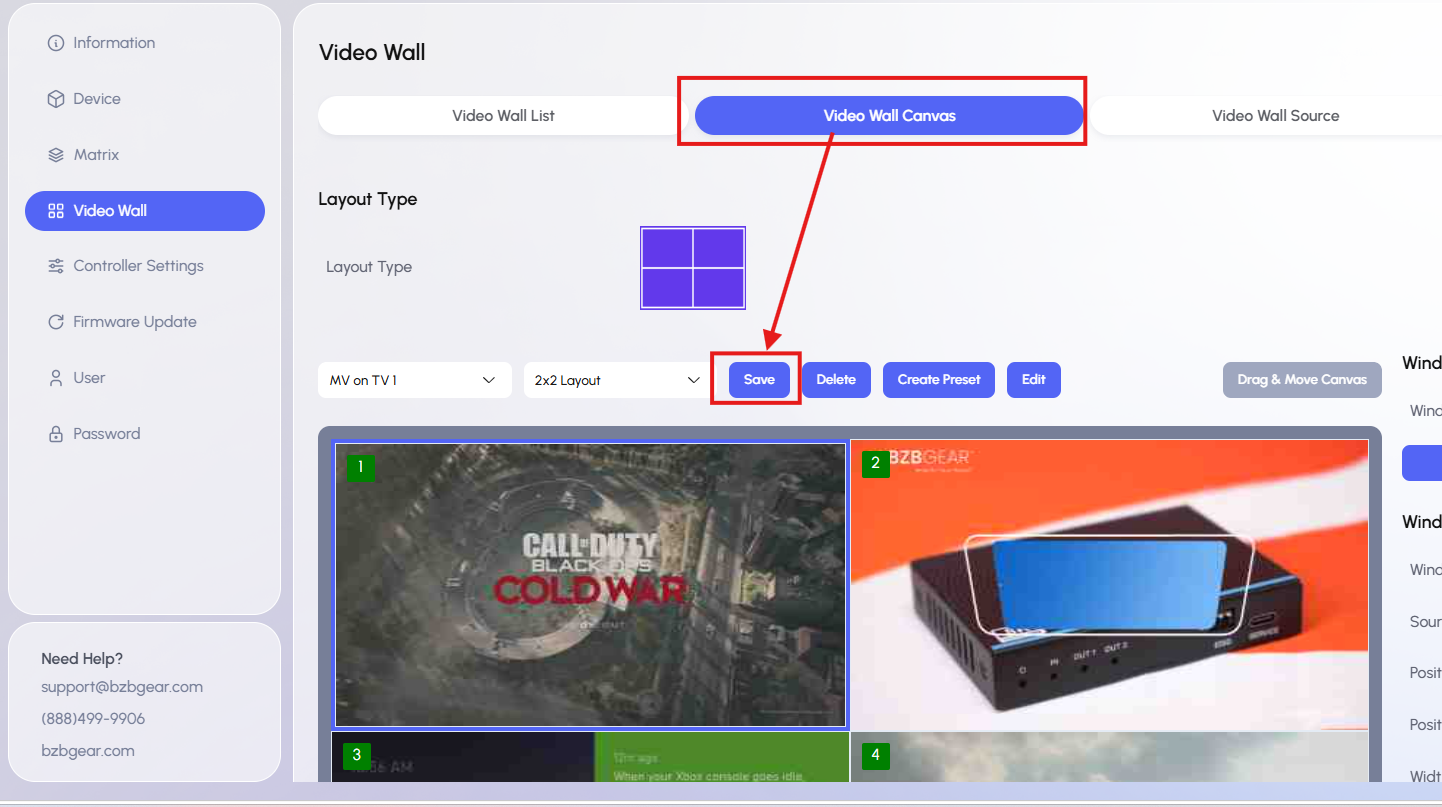
Step 5: Save the multiview layout
- Go back to Video Wall Canvas.
- Click Save.
If you want to create different multiview layouts on the same decoder, repeat the process by clicking Create Preset while the same decoder is selected from the Video Wall List dropdown.
8.00 a.m. - 5.00 p.m. (PST)
10.00 a.m. - 3.00 p.m. (PST)
(by appointment only)


