


How to Live Stream to YouTube from Your VPTZ IP Camera in 7 Easy Steps
In this article we will review the steps on live streaming to YouTube directly from your BZBGEAR VPTZ Camera. It is assumed that your camera is connected to your LAN and has an IP address that is compatible with your router's settings. If this has not been done refer to our knowledge base articles on addressing your camera here or here.
Please note that if this is your first time live streaming on YouTube, it takes 24 hours to activate the live stream.
Let’s get streaming!
Step 1:
Login to your YouTube account and click on the camera icon  at the top right of the interface and select “Go Live”. This will navigate you to YouTube Studio.
Step 2:
Select the “Manage” tab on the left side of the page and then select “Schedule Stream” on the right side and select “Create New”.
Here you will fill in the stream details (title, description, time of stream, etc.). When finished, select “Create Stream” and this will take you to the stream settings page.
at the top right of the interface and select “Go Live”. This will navigate you to YouTube Studio.
Step 2:
Select the “Manage” tab on the left side of the page and then select “Schedule Stream” on the right side and select “Create New”.
Here you will fill in the stream details (title, description, time of stream, etc.). When finished, select “Create Stream” and this will take you to the stream settings page.
 Step 3:
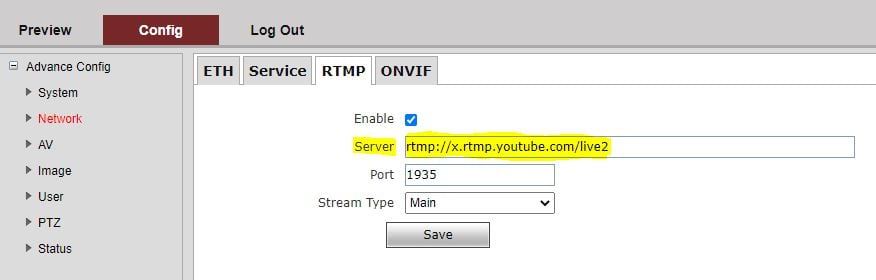
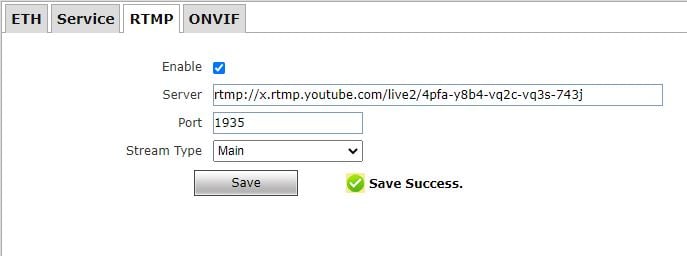
Open a second tab in your web browser and login to your camera’s web interface. Select “Config” at the top left, select “Network”, and select the “RTMP” tab.
Check the “Enable” box.
Step 4:
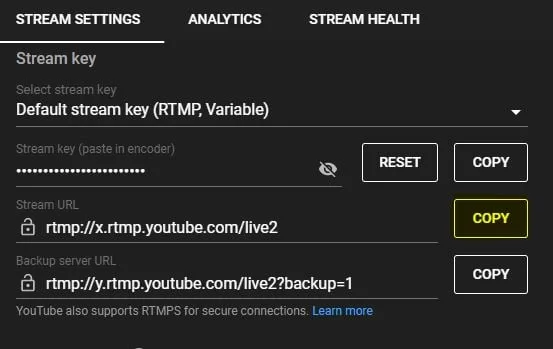
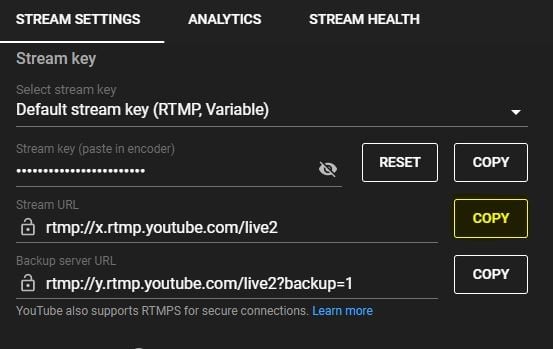
In the “Server” box enter the “Stream URL” and “Stream Key” information provided by YouTube. Return to your open YouTube streaming settings page and select “Copy” next to the “Stream URL” address provided:
Step 3:
Open a second tab in your web browser and login to your camera’s web interface. Select “Config” at the top left, select “Network”, and select the “RTMP” tab.
Check the “Enable” box.
Step 4:
In the “Server” box enter the “Stream URL” and “Stream Key” information provided by YouTube. Return to your open YouTube streaming settings page and select “Copy” next to the “Stream URL” address provided:
 Return to the “RTMP” tab on your camera’s web interface and paste the Stream URL copied from YouTube:
 Step 5:
Return to your YouTube streaming settings page and select “Copy” next to the “Stream Key” address provided:
Step 5:
Return to your YouTube streaming settings page and select “Copy” next to the “Stream Key” address provided:
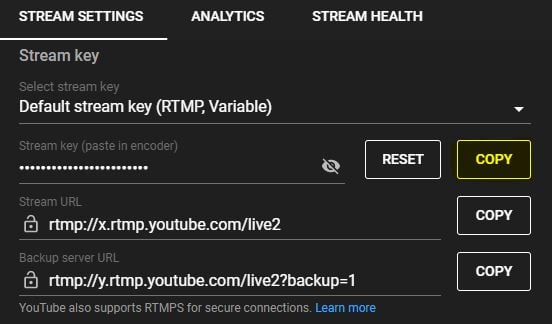 .
Return to the RTMP tab and paste the Stream Key copied from YouTube at the end of the Stream URL you previously pasted. (Be sure to add a forward slash (/) between the stream URL and stream key):
.
Return to the RTMP tab and paste the Stream Key copied from YouTube at the end of the Stream URL you previously pasted. (Be sure to add a forward slash (/) between the stream URL and stream key):
 Step 6:
Keep “Host Port” at 1935
Keep “Stream Type” set as “Main”
Hit Save. Look for “Save Success”:
Step 6:
Keep “Host Port” at 1935
Keep “Stream Type” set as “Main”
Hit Save. Look for “Save Success”:
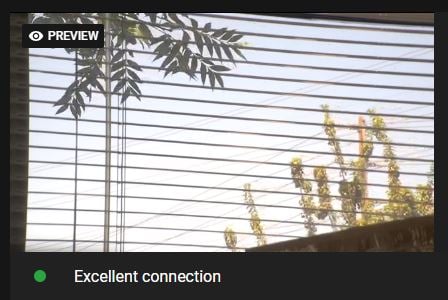
 Step 7:
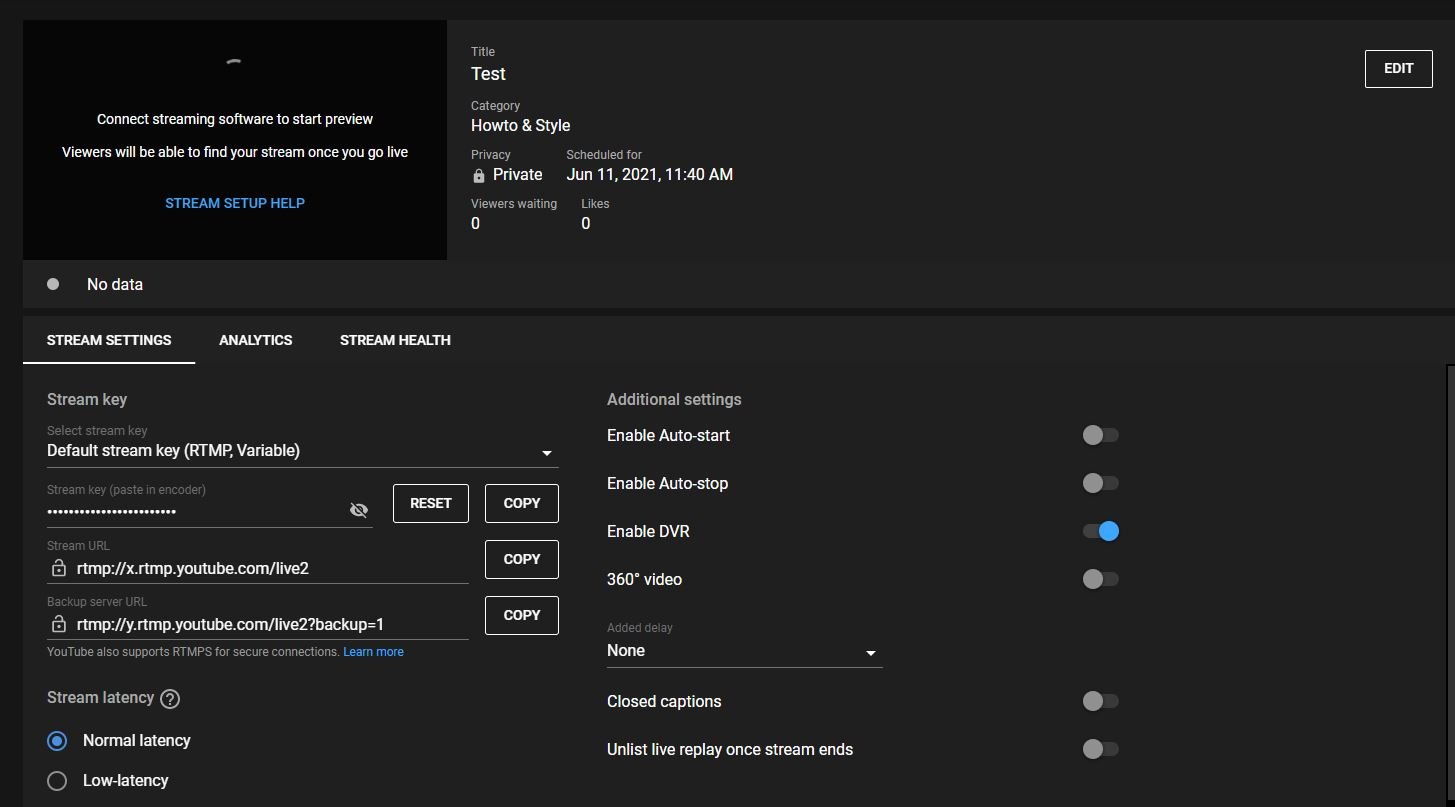
Return to YouTube and you will now see a preview of your video feed at the top of your stream setting page. There may be a delay, so please be patient!
Step 7:
Return to YouTube and you will now see a preview of your video feed at the top of your stream setting page. There may be a delay, so please be patient!
 When ready, hit “Go Live” on the top right of your YouTube. You are live!
The next time you want to live stream, return to the “Manage” tab on your YouTube Studio page and select “Schedule Stream”. This time select “Reuse Settings” and then “Create”. This will return you straight to the camera preview.
When ready, hit “Go Live” on the top right of your YouTube. You are live!
The next time you want to live stream, return to the “Manage” tab on your YouTube Studio page and select “Schedule Stream”. This time select “Reuse Settings” and then “Create”. This will return you straight to the camera preview.
Step 3:
Open a second tab in your web browser and login to your camera’s web interface. Select “Config” at the top left, select “Network”, and select the “RTMP” tab.
Check the “Enable” box.
Step 4:
In the “Server” box enter the “Stream URL” and “Stream Key” information provided by YouTube. Return to your open YouTube streaming settings page and select “Copy” next to the “Stream URL” address provided:
Return to the “RTMP” tab on your camera’s web interface and paste the Stream URL copied from YouTube:
Step 5:
Return to your YouTube streaming settings page and select “Copy” next to the “Stream Key” address provided:
.
Return to the RTMP tab and paste the Stream Key copied from YouTube at the end of the Stream URL you previously pasted. (Be sure to add a forward slash (/) between the stream URL and stream key):
Step 6:
Keep “Host Port” at 1935
Keep “Stream Type” set as “Main”
Hit Save. Look for “Save Success”:
Step 7:
Return to YouTube and you will now see a preview of your video feed at the top of your stream setting page. There may be a delay, so please be patient!
When ready, hit “Go Live” on the top right of your YouTube. You are live!
The next time you want to live stream, return to the “Manage” tab on your YouTube Studio page and select “Schedule Stream”. This time select “Reuse Settings” and then “Create”. This will return you straight to the camera preview.
Get insider
updates & offers
Learn more
Get insider updates and offers
Join our vibrant community of BZBGEAR insiders today and unlock a world of exclusive updates, irresistible offers, and invaluable education.
Sales Inquiries
Leave your phone number, and one of our specialists will reach out to you shortly.
Call Us
Technical support
Monday - Friday
8.00 a.m. - 5.00 p.m. (PST)
8.00 a.m. - 5.00 p.m. (PST)
Saturday - Sunday
10.00 a.m. - 3.00 p.m. (PST)
(by appointment only)
10.00 a.m. - 3.00 p.m. (PST)
(by appointment only)
Phone & Email Support


