


How to add your USB camera to OBS Studio
This article will review the steps needed to add a USB camera as a source in OBS Studio.


- The first step of this process is to connect your camera to your computer and verify that it's working. The easiest way to do this is to use the Camera app in Windows or the Photo Booth app on a Mac. If your computer has a built-in camera you may need to select your USB camera in settings. If you have an image proceed to OBS Studio.
- If you have no image please refer to our USB troubleshooting suggestions.
- Open OBS Studio
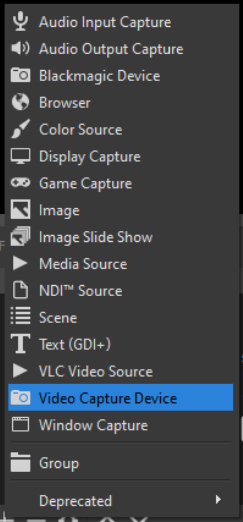
- In the 'Source' window of OBS Studio click the + and select Video Capture Device from the list that appears
- Name your source and click OK
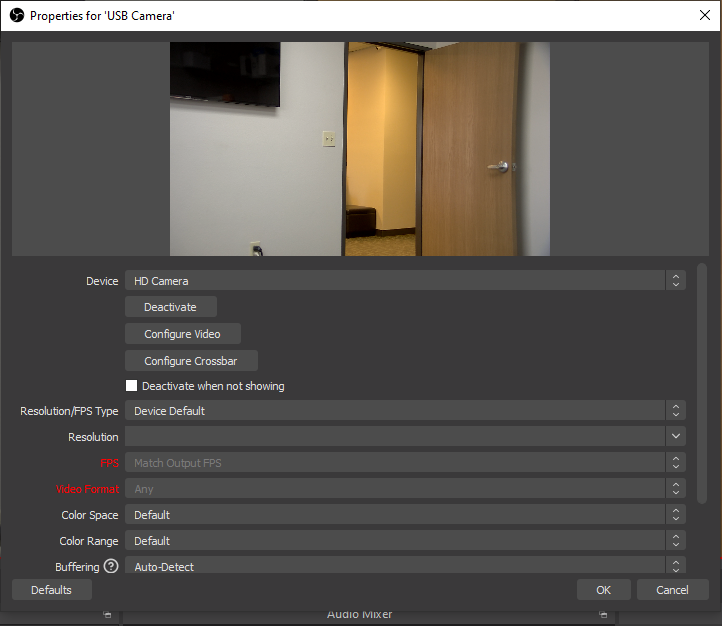
- In the Properties window that opens select your device from the pull-down menu. This will usually be something like 'USB Camera', 'USB Device', or 'HD Camera'.
- When you select your camera from the pull-down menu the camera feed will appear in the preview window. Click OK to close the window.
Get insider
updates & offers
Learn more
Get insider updates and offers
Join our vibrant community of BZBGEAR insiders today and unlock a world of exclusive updates, irresistible offers, and invaluable education.
Sales Inquiries
Leave your phone number, and one of our specialists will reach out to you shortly.
Call Us
Technical support
Monday - Friday
8.00 a.m. - 5.00 p.m. (PST)
8.00 a.m. - 5.00 p.m. (PST)
Saturday - Sunday
10.00 a.m. - 3.00 p.m. (PST)
(by appointment only)
10.00 a.m. - 3.00 p.m. (PST)
(by appointment only)
Phone & Email Support

